ONLINE FOOD DELIVERY APPLICATION
An online food ordering system is a web-based application that stimulates the foodies (customers) to put food orders through the internet by locating their favorite restaurant or nearest one.
It is known globally that, in today’s market, it is extremely difficult to start a new small-scale business and live through the competition from well-established and settled owners. In the fast-paced times of today, when everyone is squeezed for time, the majority of people are worried when it comes to placing a food order. The customers of today are not only attracted because placing an order online is very convenient but also because they have visibility into the items offered, price, and extremely simplified navigation for the order.
The online ordering system here greatly simplifies the ordering process for both the customer and the restaurant. The system presents an interactive and up-to-date menu with all available options in an easy-to-use manner. Customers can choose items to place an order which will land in the Cart.

STAKE HOLDERS
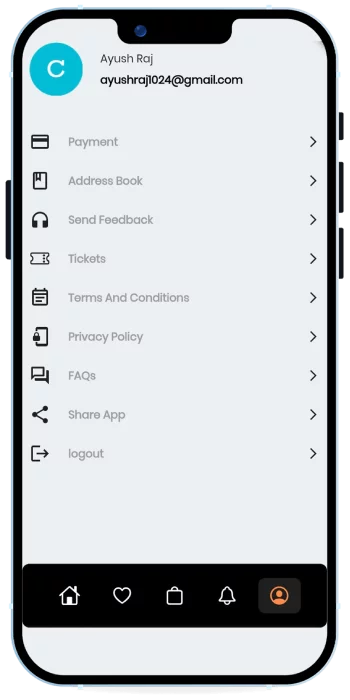
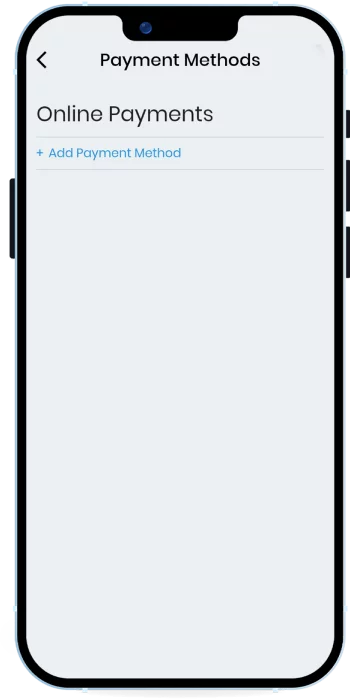
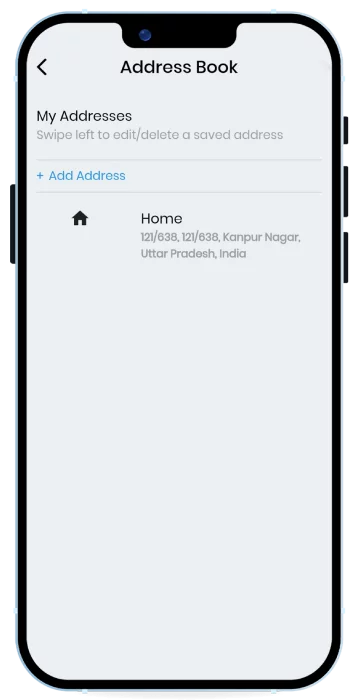
CUSTOMER MODULE
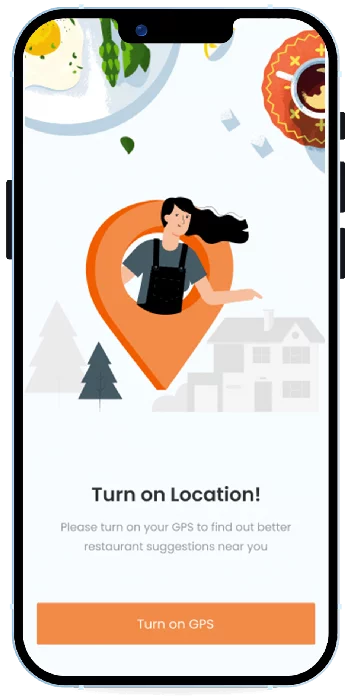
The first screen of the application will be the splash screen. It will be visible for 3-4 seconds. Splash screens typically serve to en- hance the look and feel of an application or website, hence they are often visually appealing. They may also have animations, graphics, and sound.
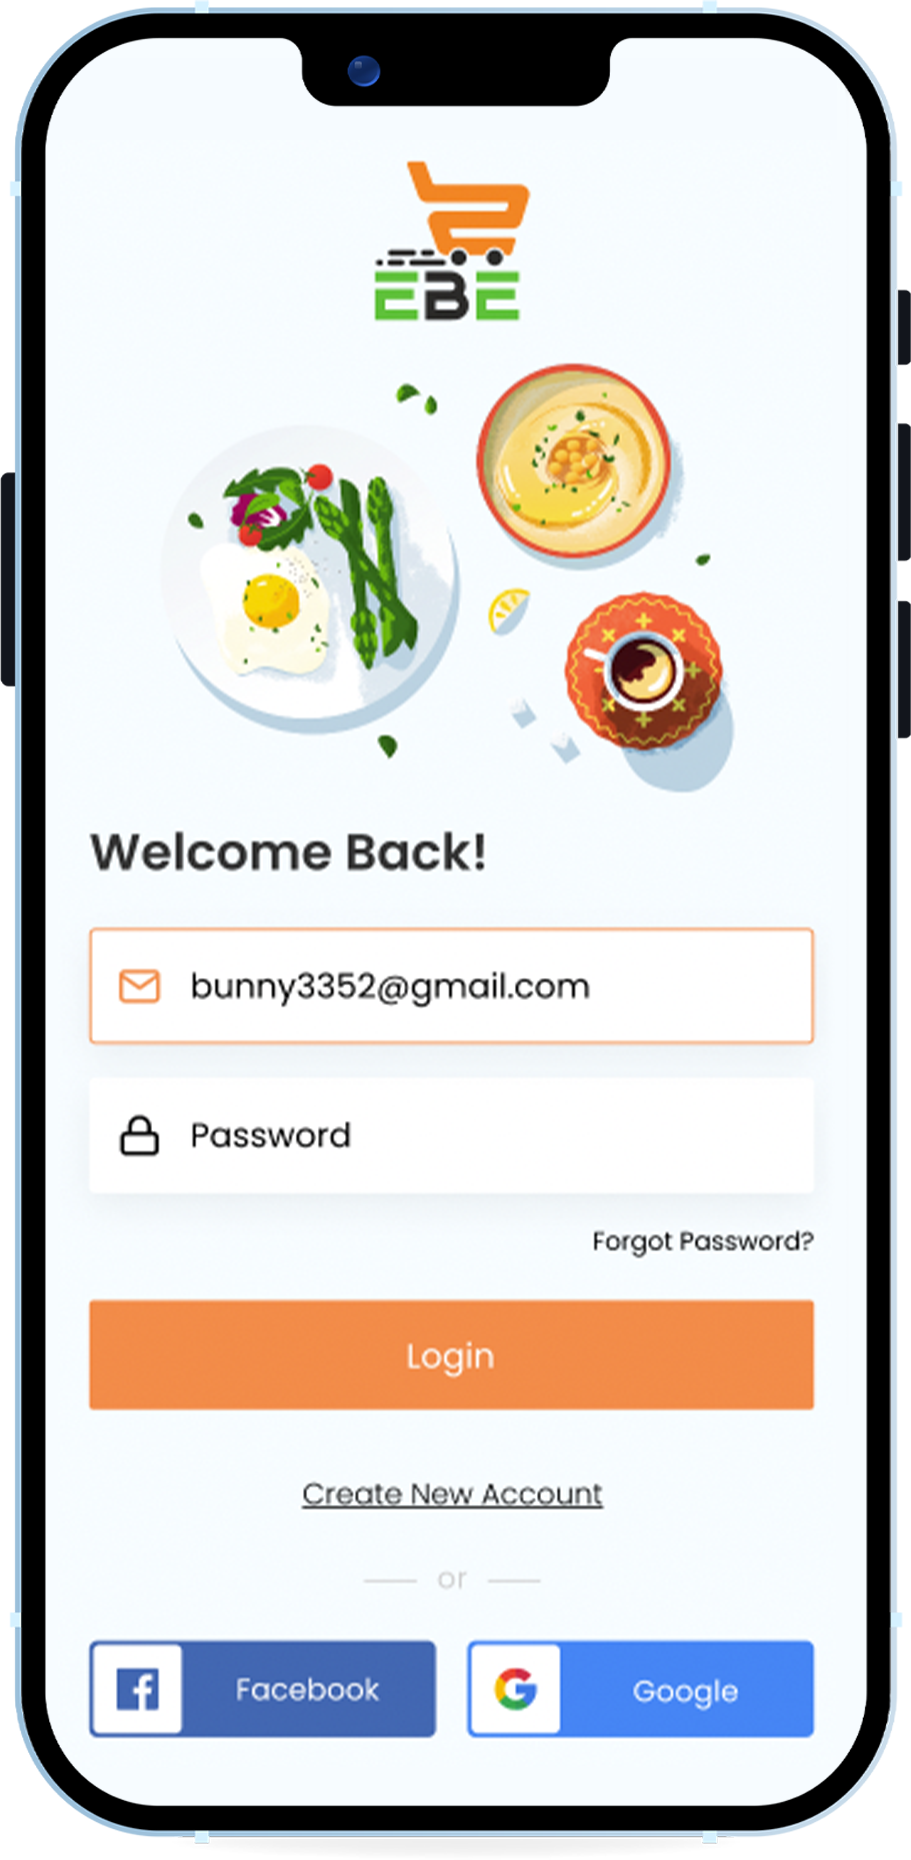
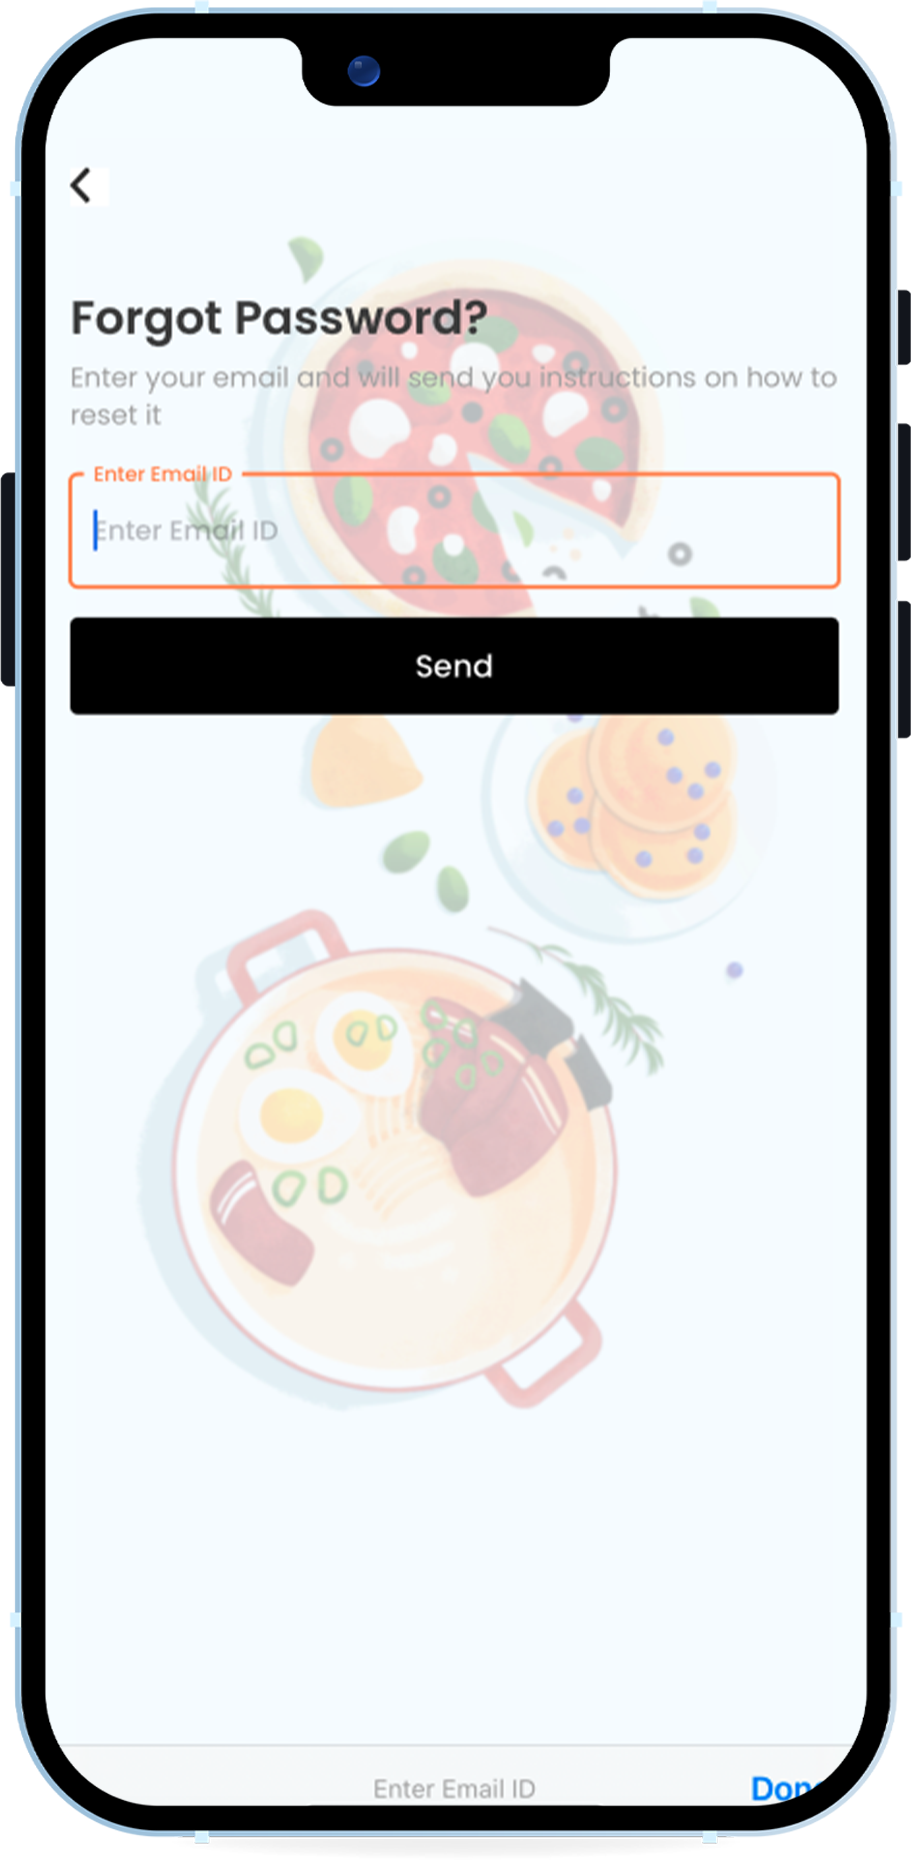
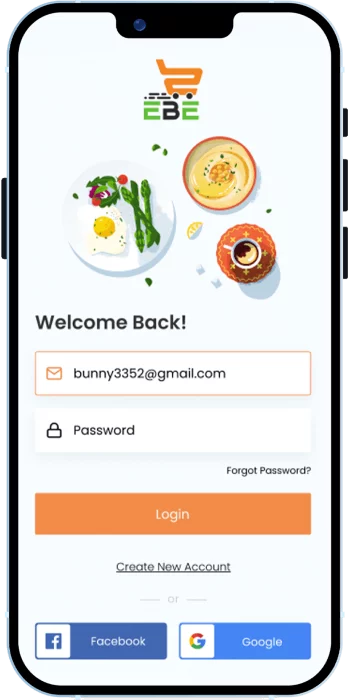
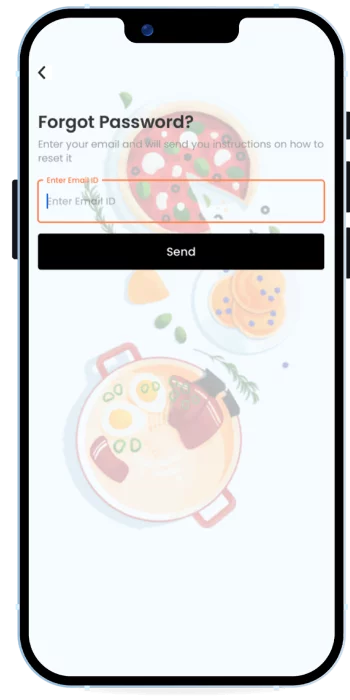
Then click on Login button.The user’s entered credential – Email address/Username, Pass-word is valid and correct or not. User will not get access to the re-stricted page until he/she entered a valid email and password. If the customer forgot their pass- word, in that case customer can reset their current password & set a new password.

The first screen of the application will be the splash screen. It will be visible for 3-4 seconds. Splash screens typically serve to en- hance the look and feel of an application or website, hence they are often visually appealing. They may also have animations, graphics, and sound.
Then click on Login button.The user’s entered credential – Email address/Username, Pass-word is valid and correct or not. User will not get access to the re-stricted page until he/she entered a valid email and password. If the customer forgot their pass- word, in that case customer can reset their current password & set a new password.
In verify OTP screen, the user will enter the OTP sent to his regis-tered mobile number for verification. Once enter the received OTP for verification, then the pop-up will generate that your pro-file is created successfully.
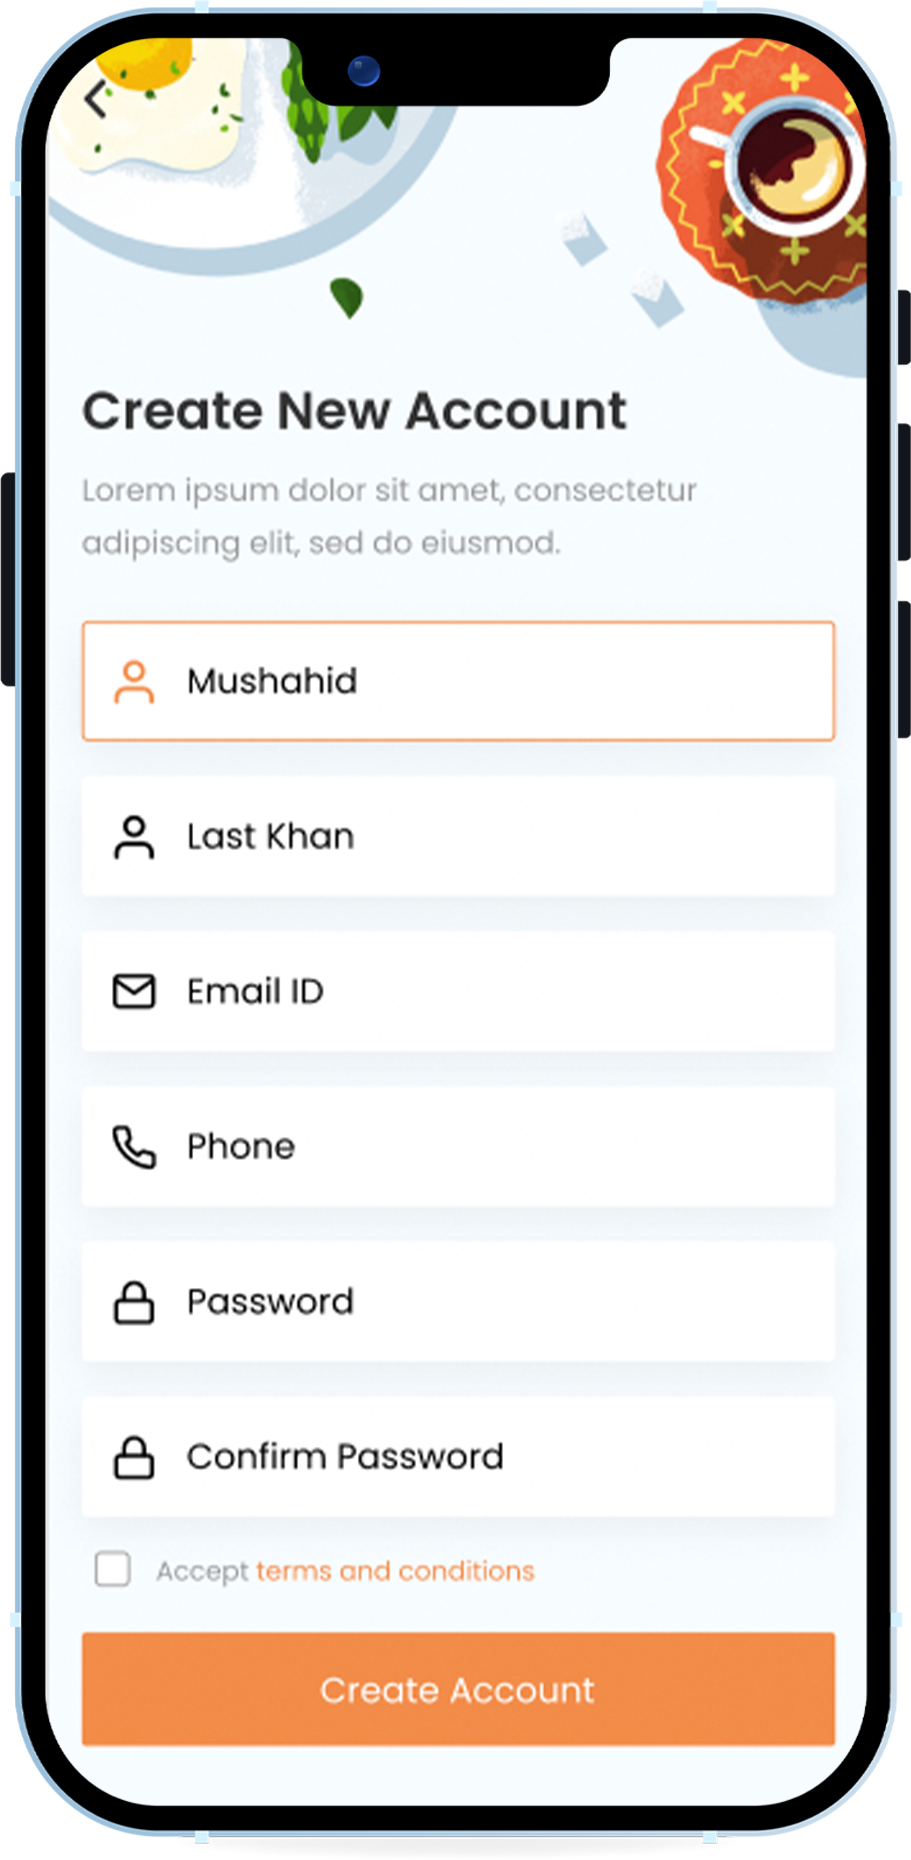
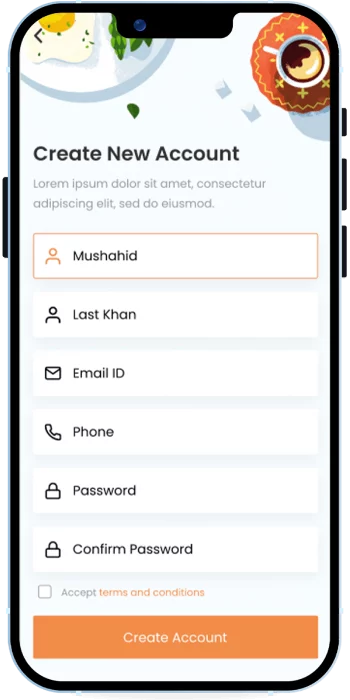
In registration screen, the new cus-tomer or user will enter his details like:
1. Name
2. Email address
3. Contact number with country code.
4. Password
5. Confirm password
6. Agree to terms and conditions (checkbox).
Then click on Create account button.
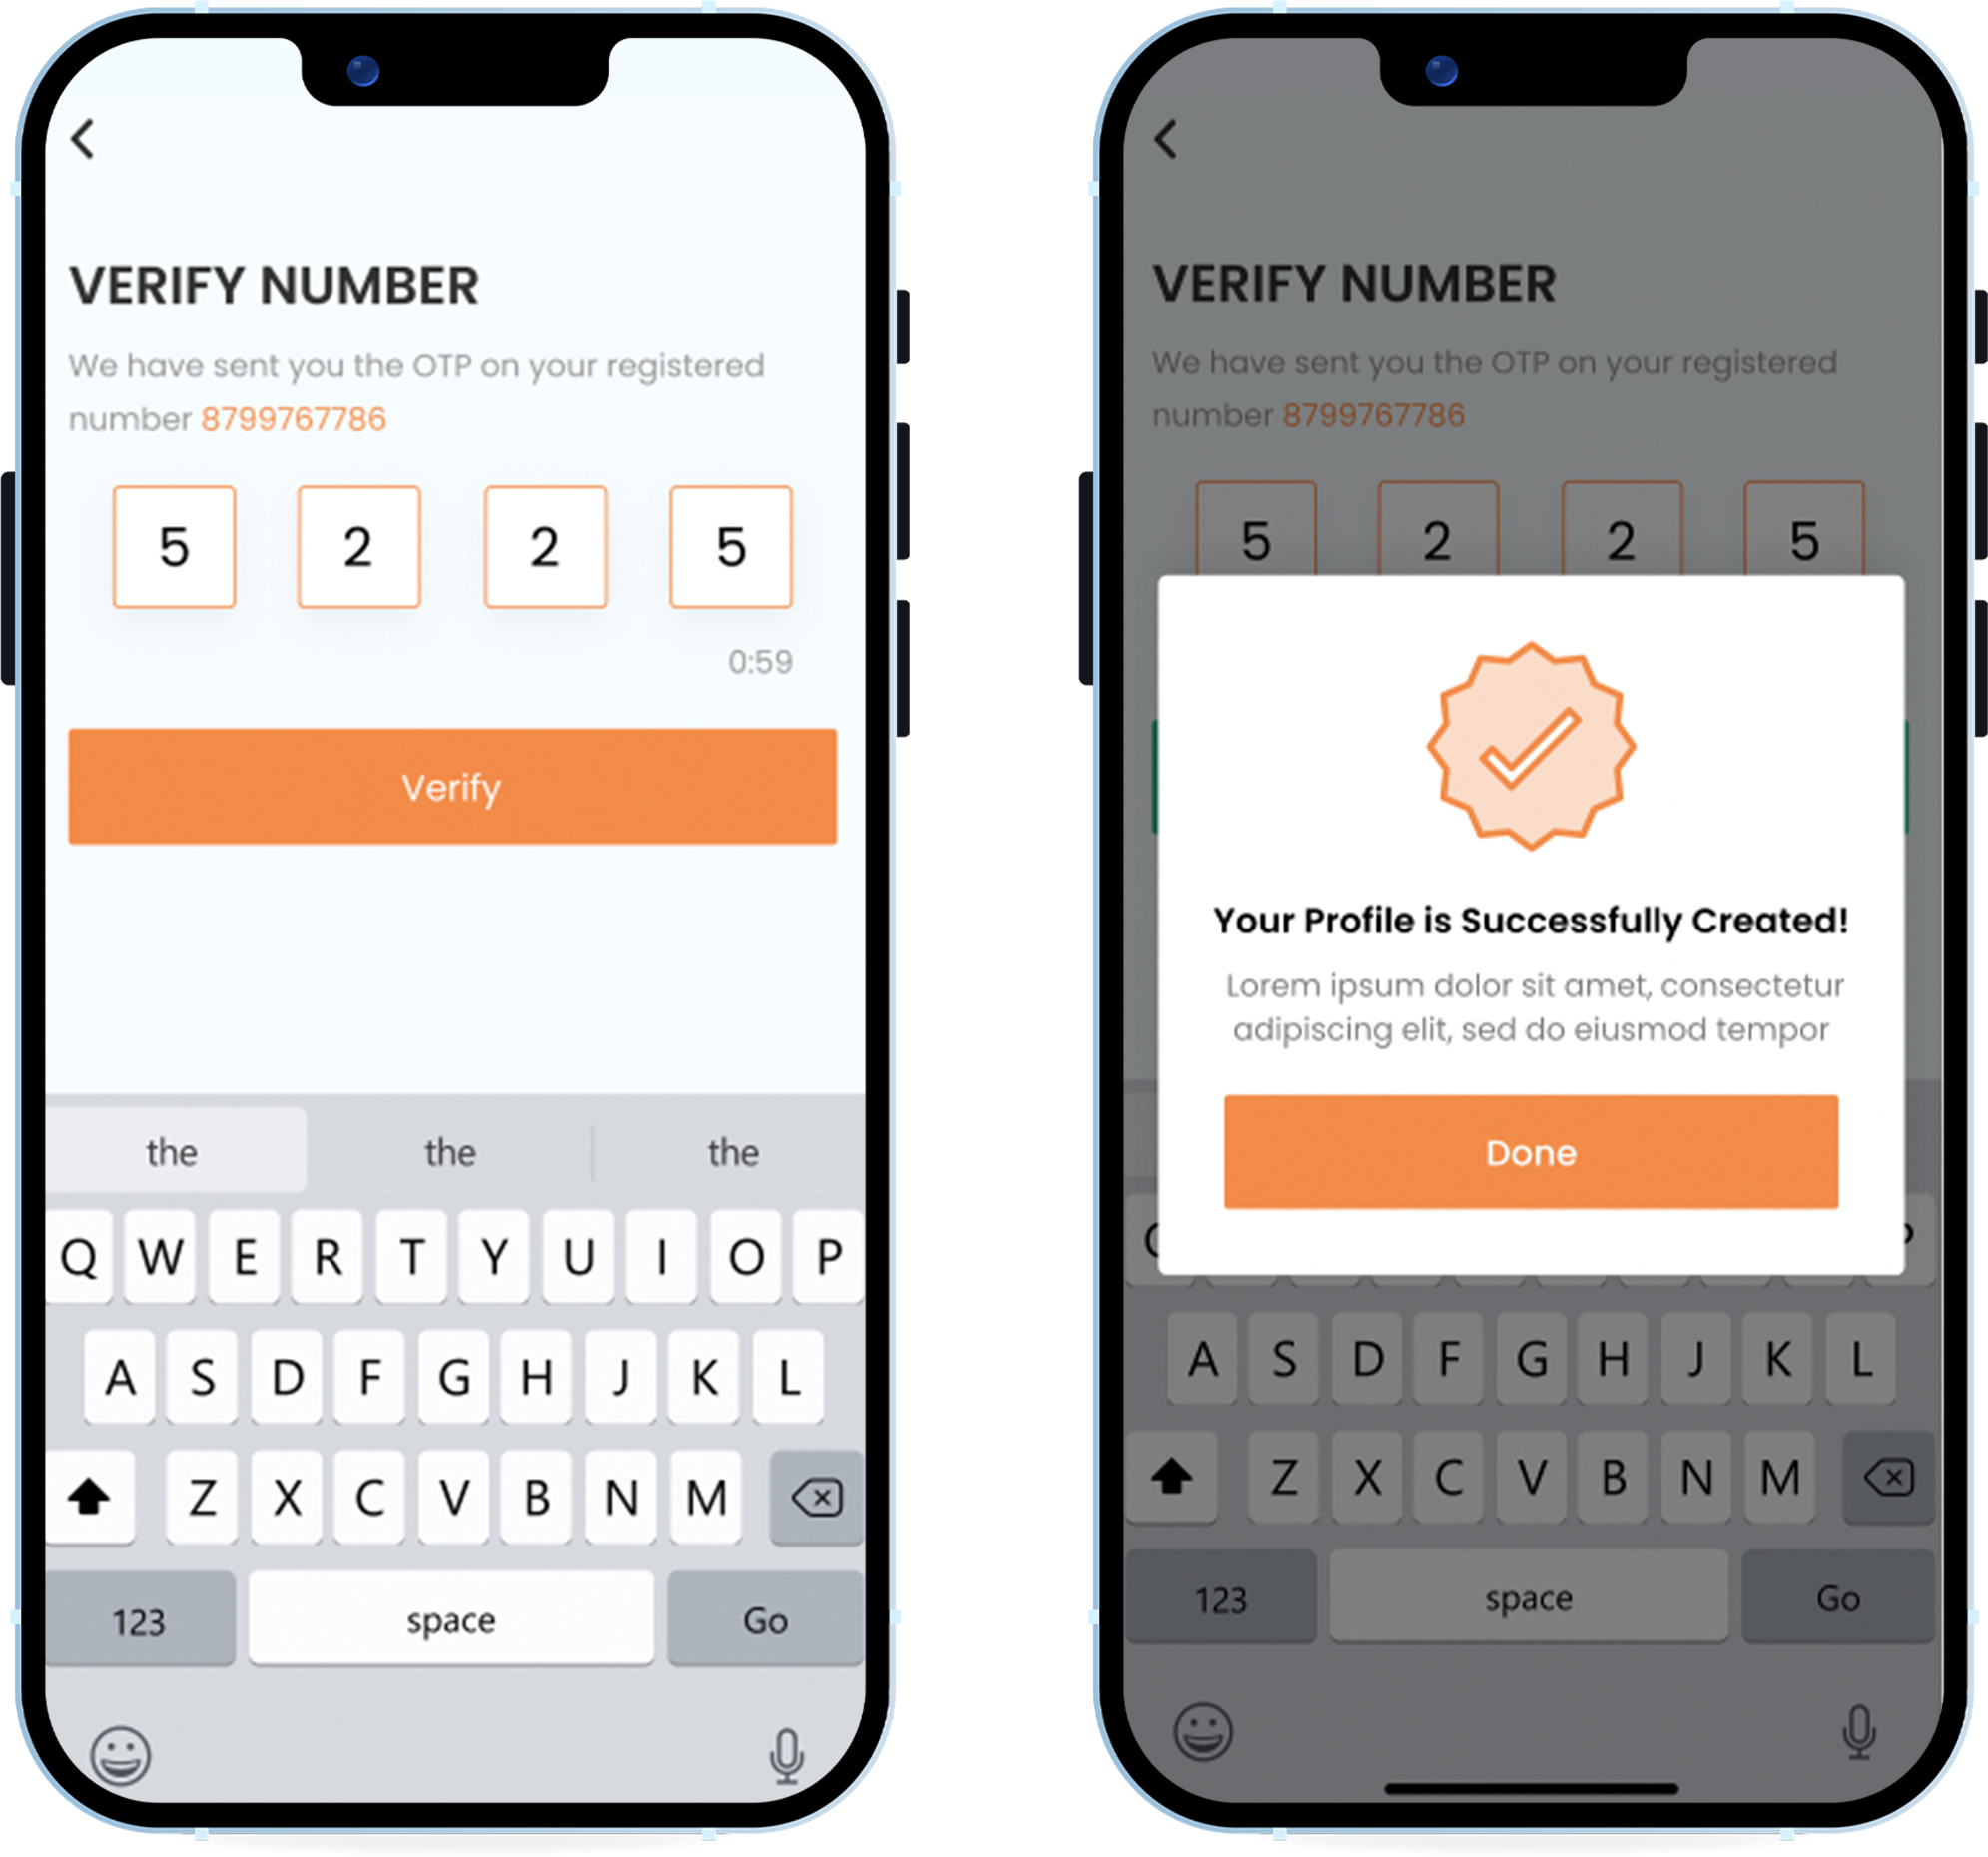
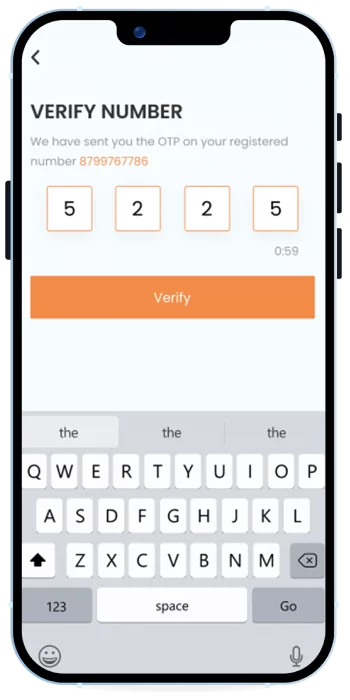
In verify OTP screen, the user will enter the OTP sent to his regis-tered mobile number for verification. Once enter the received OTP for verification, then the pop-up will generate that your pro-file is created successfully.
In registration screen, the new cus-tomer or user will enter his details like:
1. Name
2. Email address
3. Contact number with country code.
4. Password
5. Confirm password
6. Agree to terms and conditions (checkbox).
Then click on Create account button.
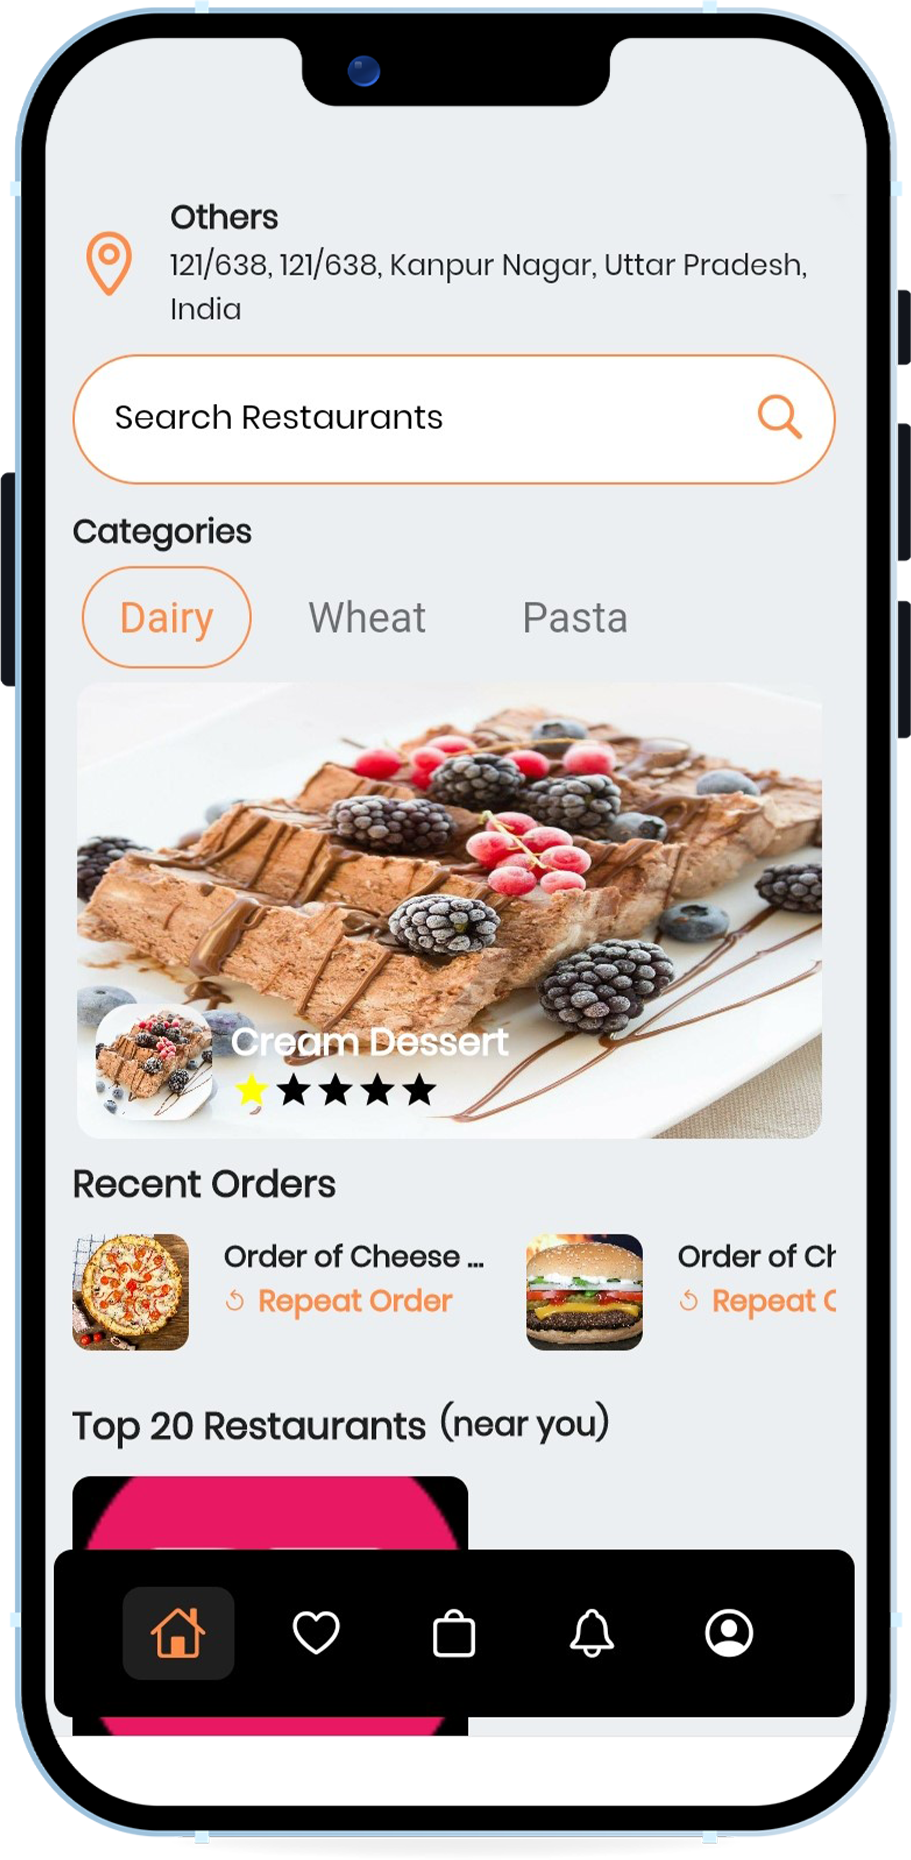

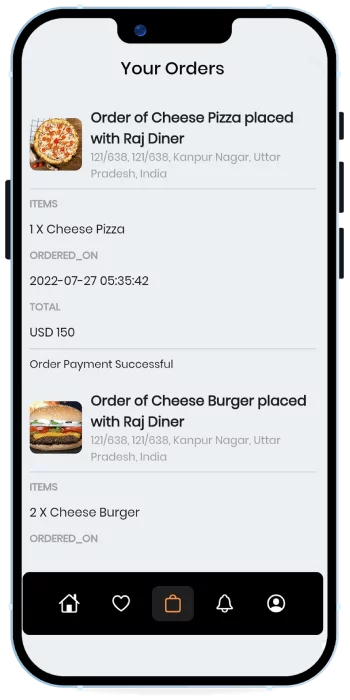
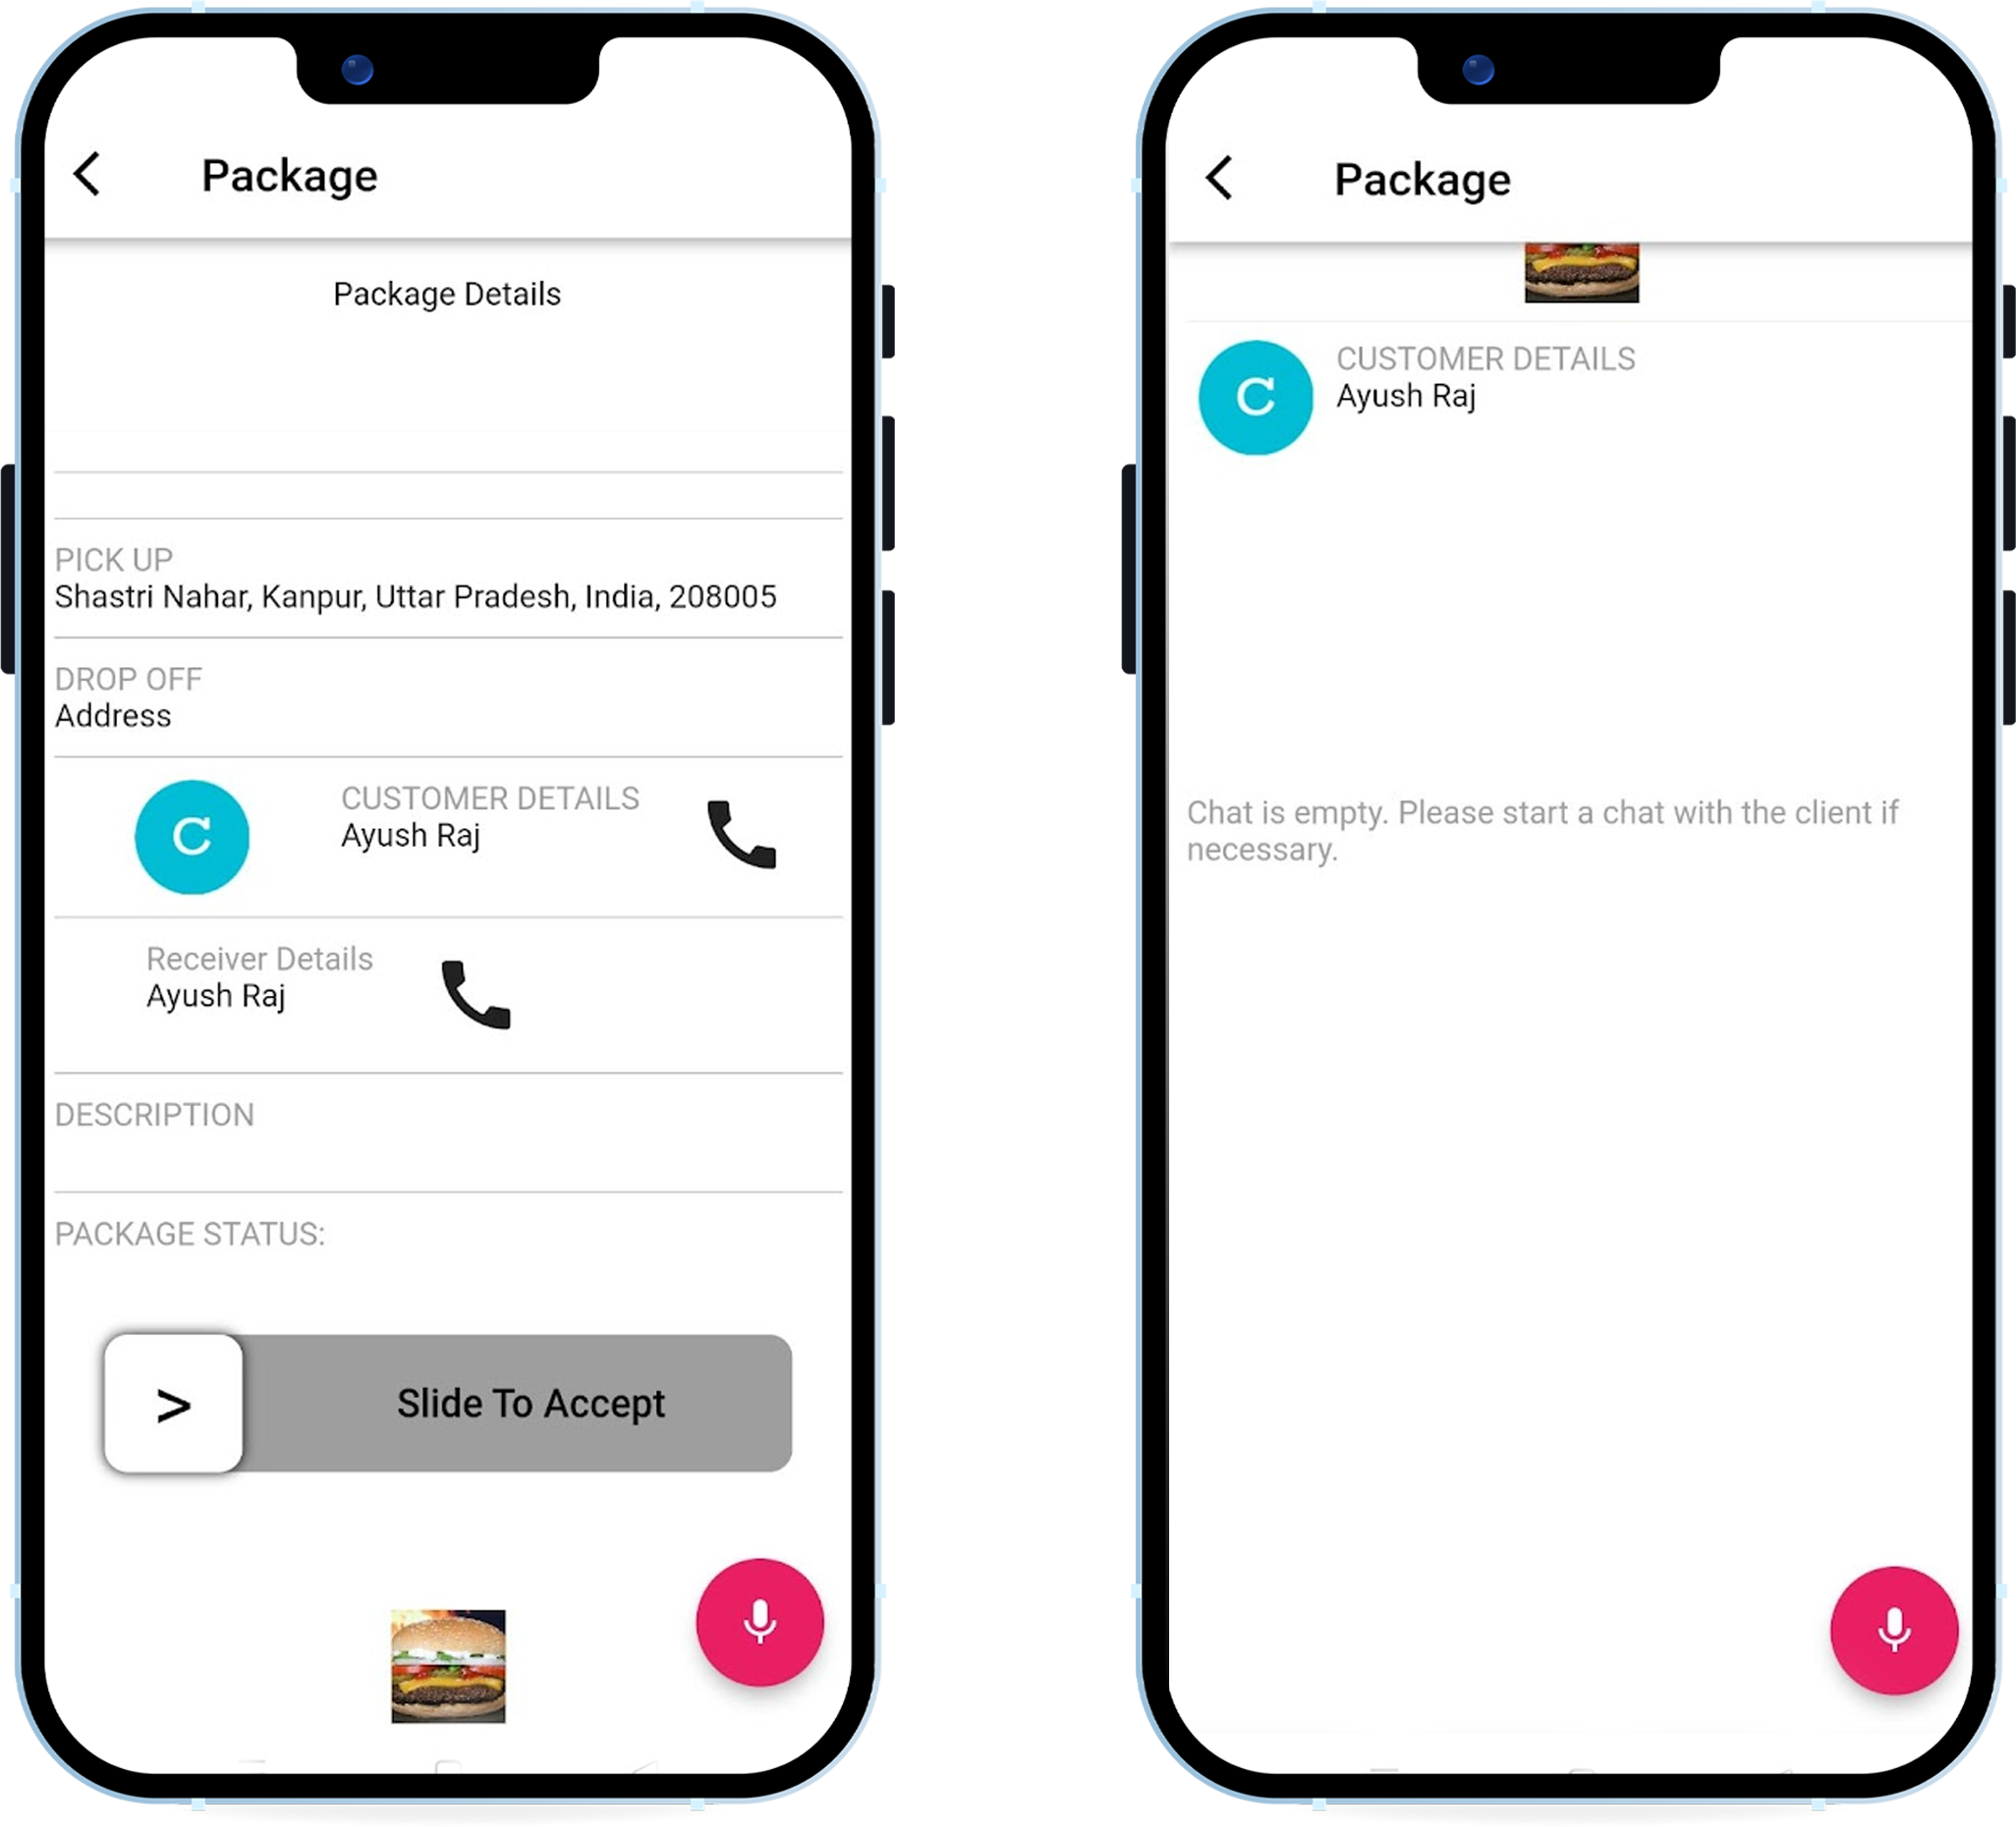
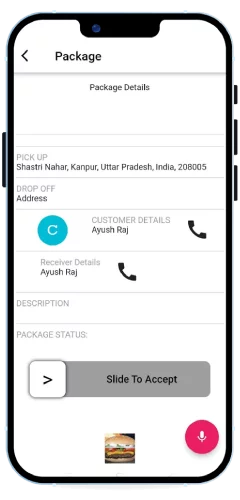
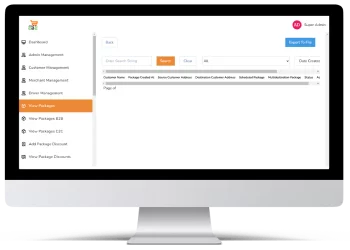
In the above screen, customers can search the restaurants on the basis of their location. Customers can view categories,
recent orders, top restaurants etc.
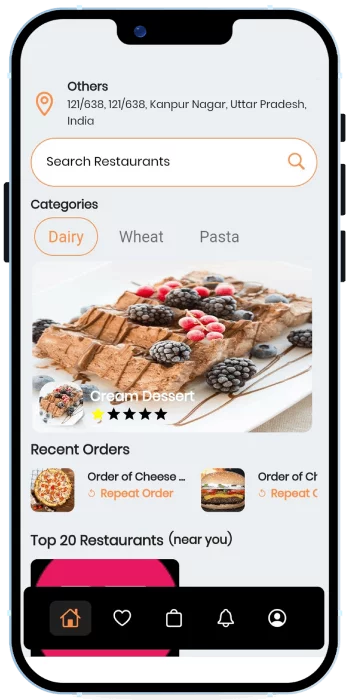

In the above screen, customers can search the restaurants on the basis of their location. Customers can view categories,
recent orders, top restaurants etc.
refers to a list of top-level app areas and collections, almost always displayed in the primary pane of a split view.
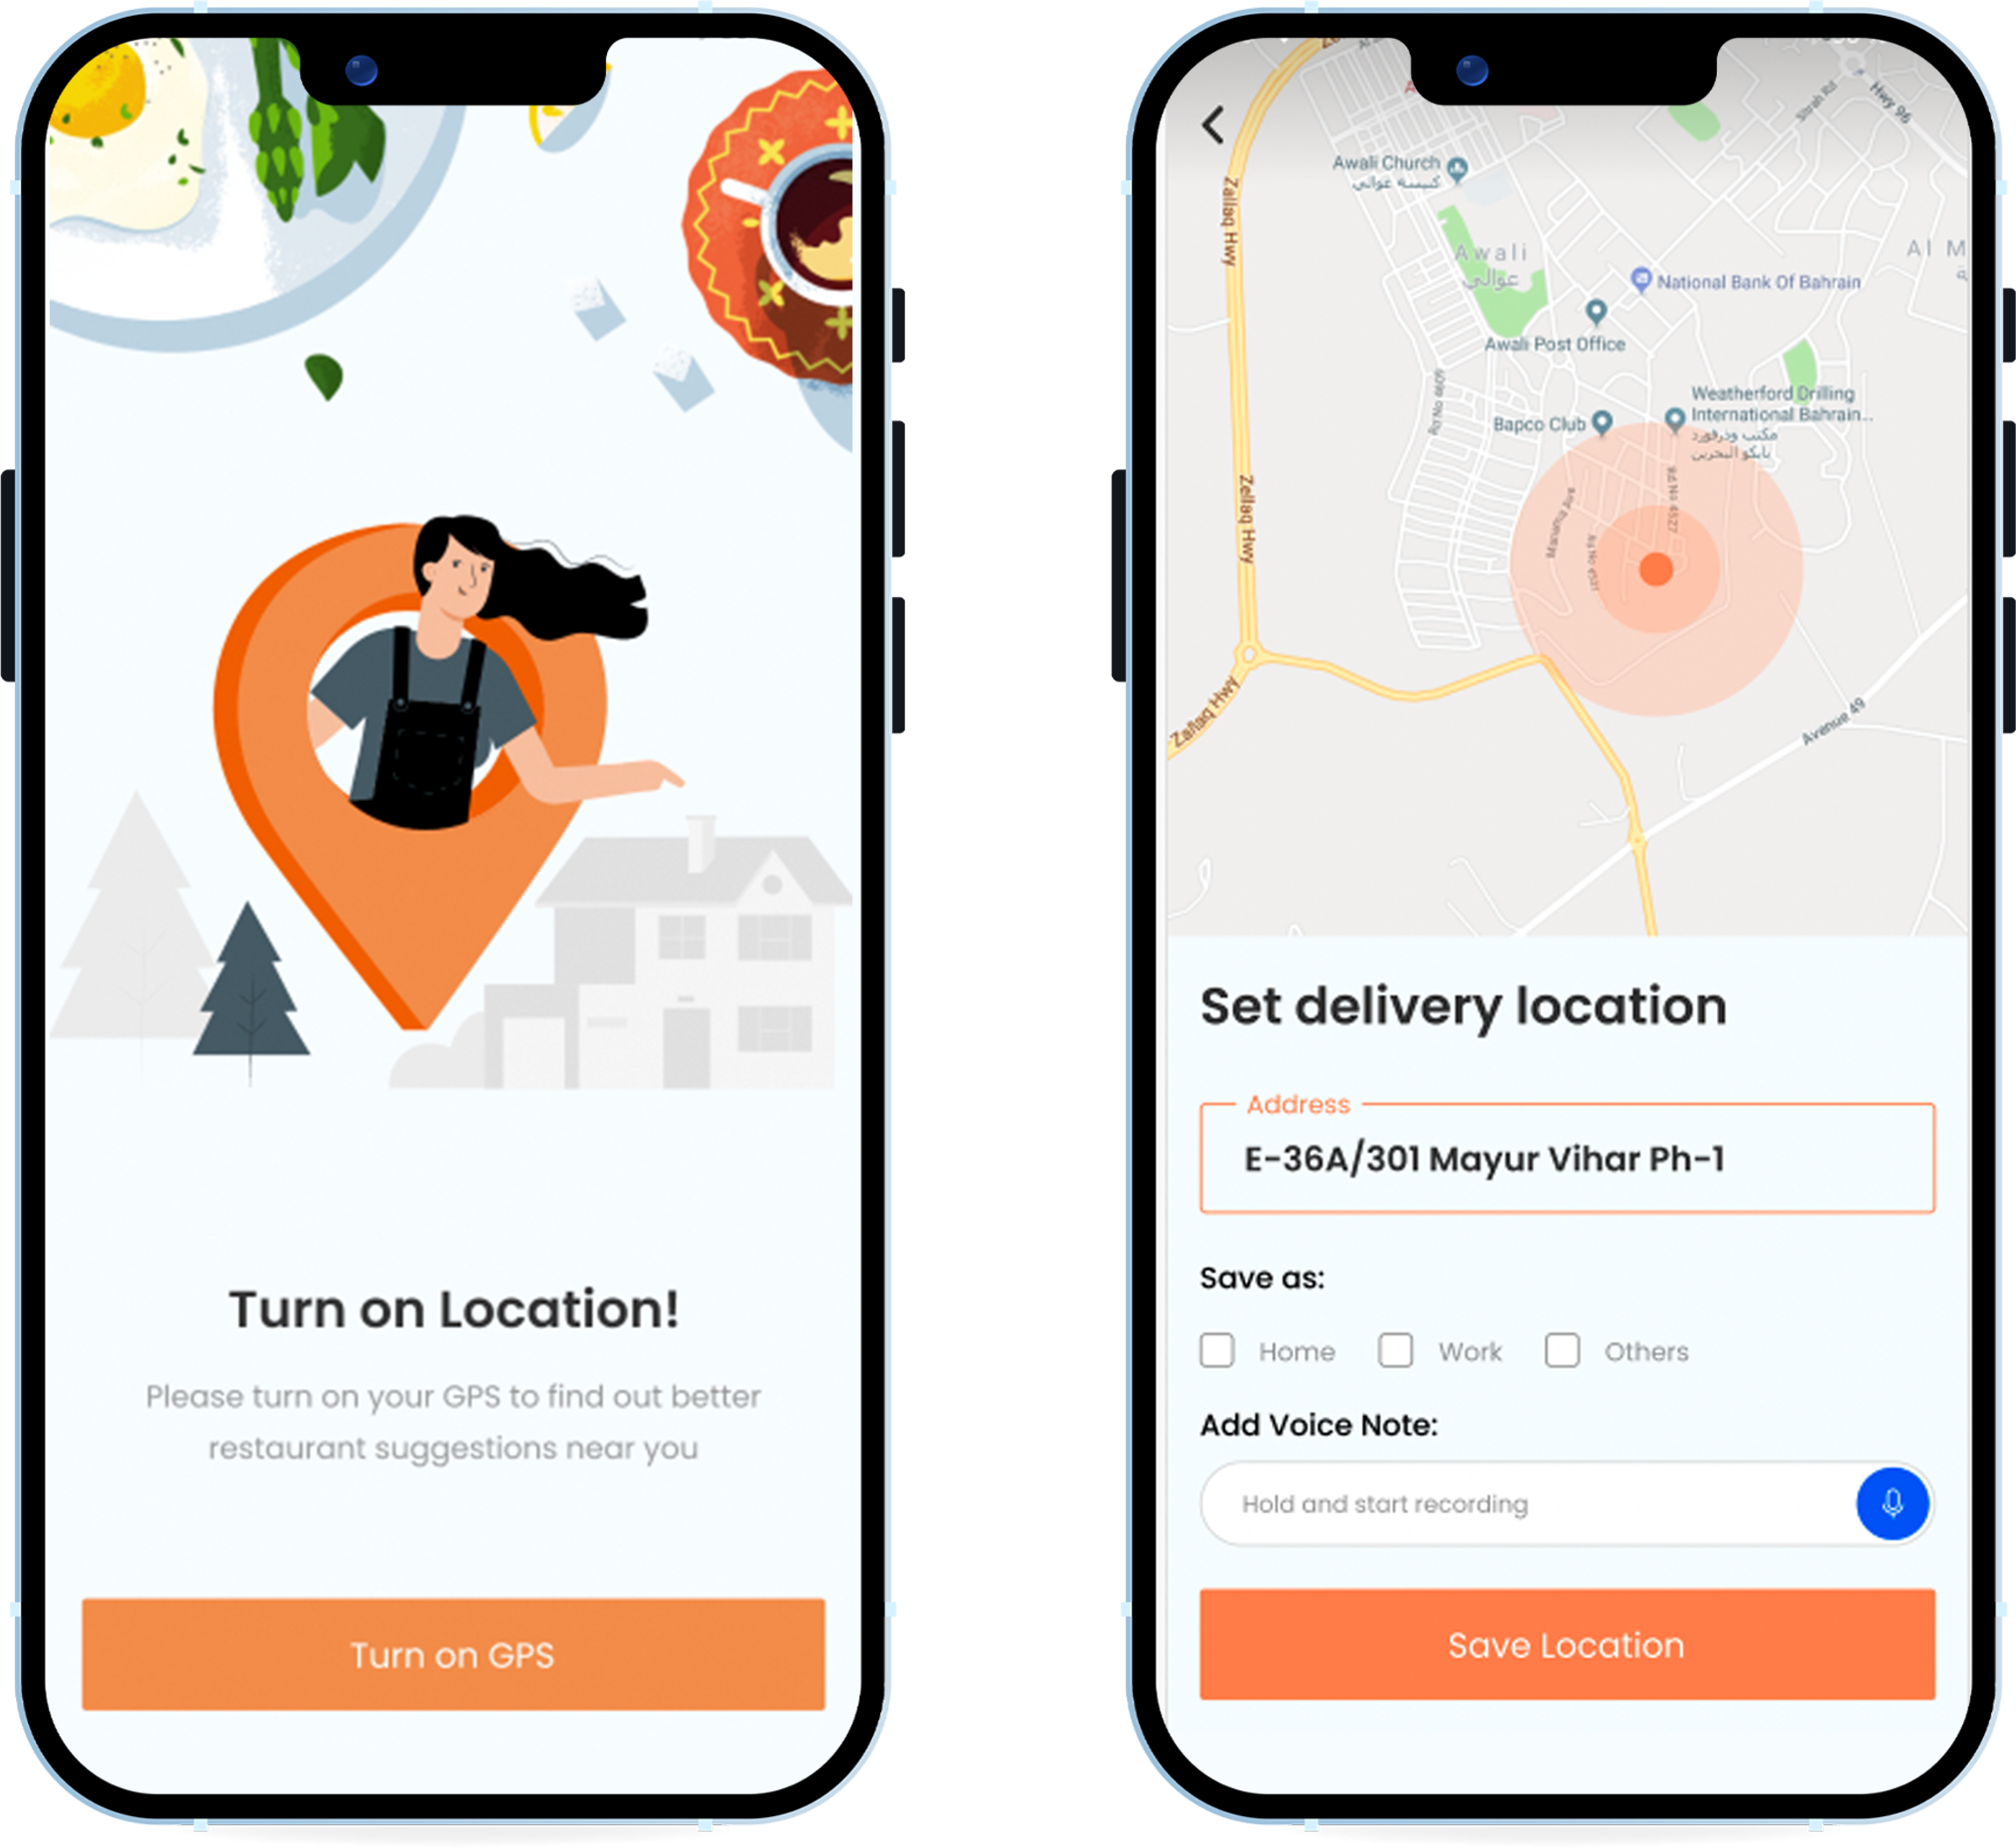
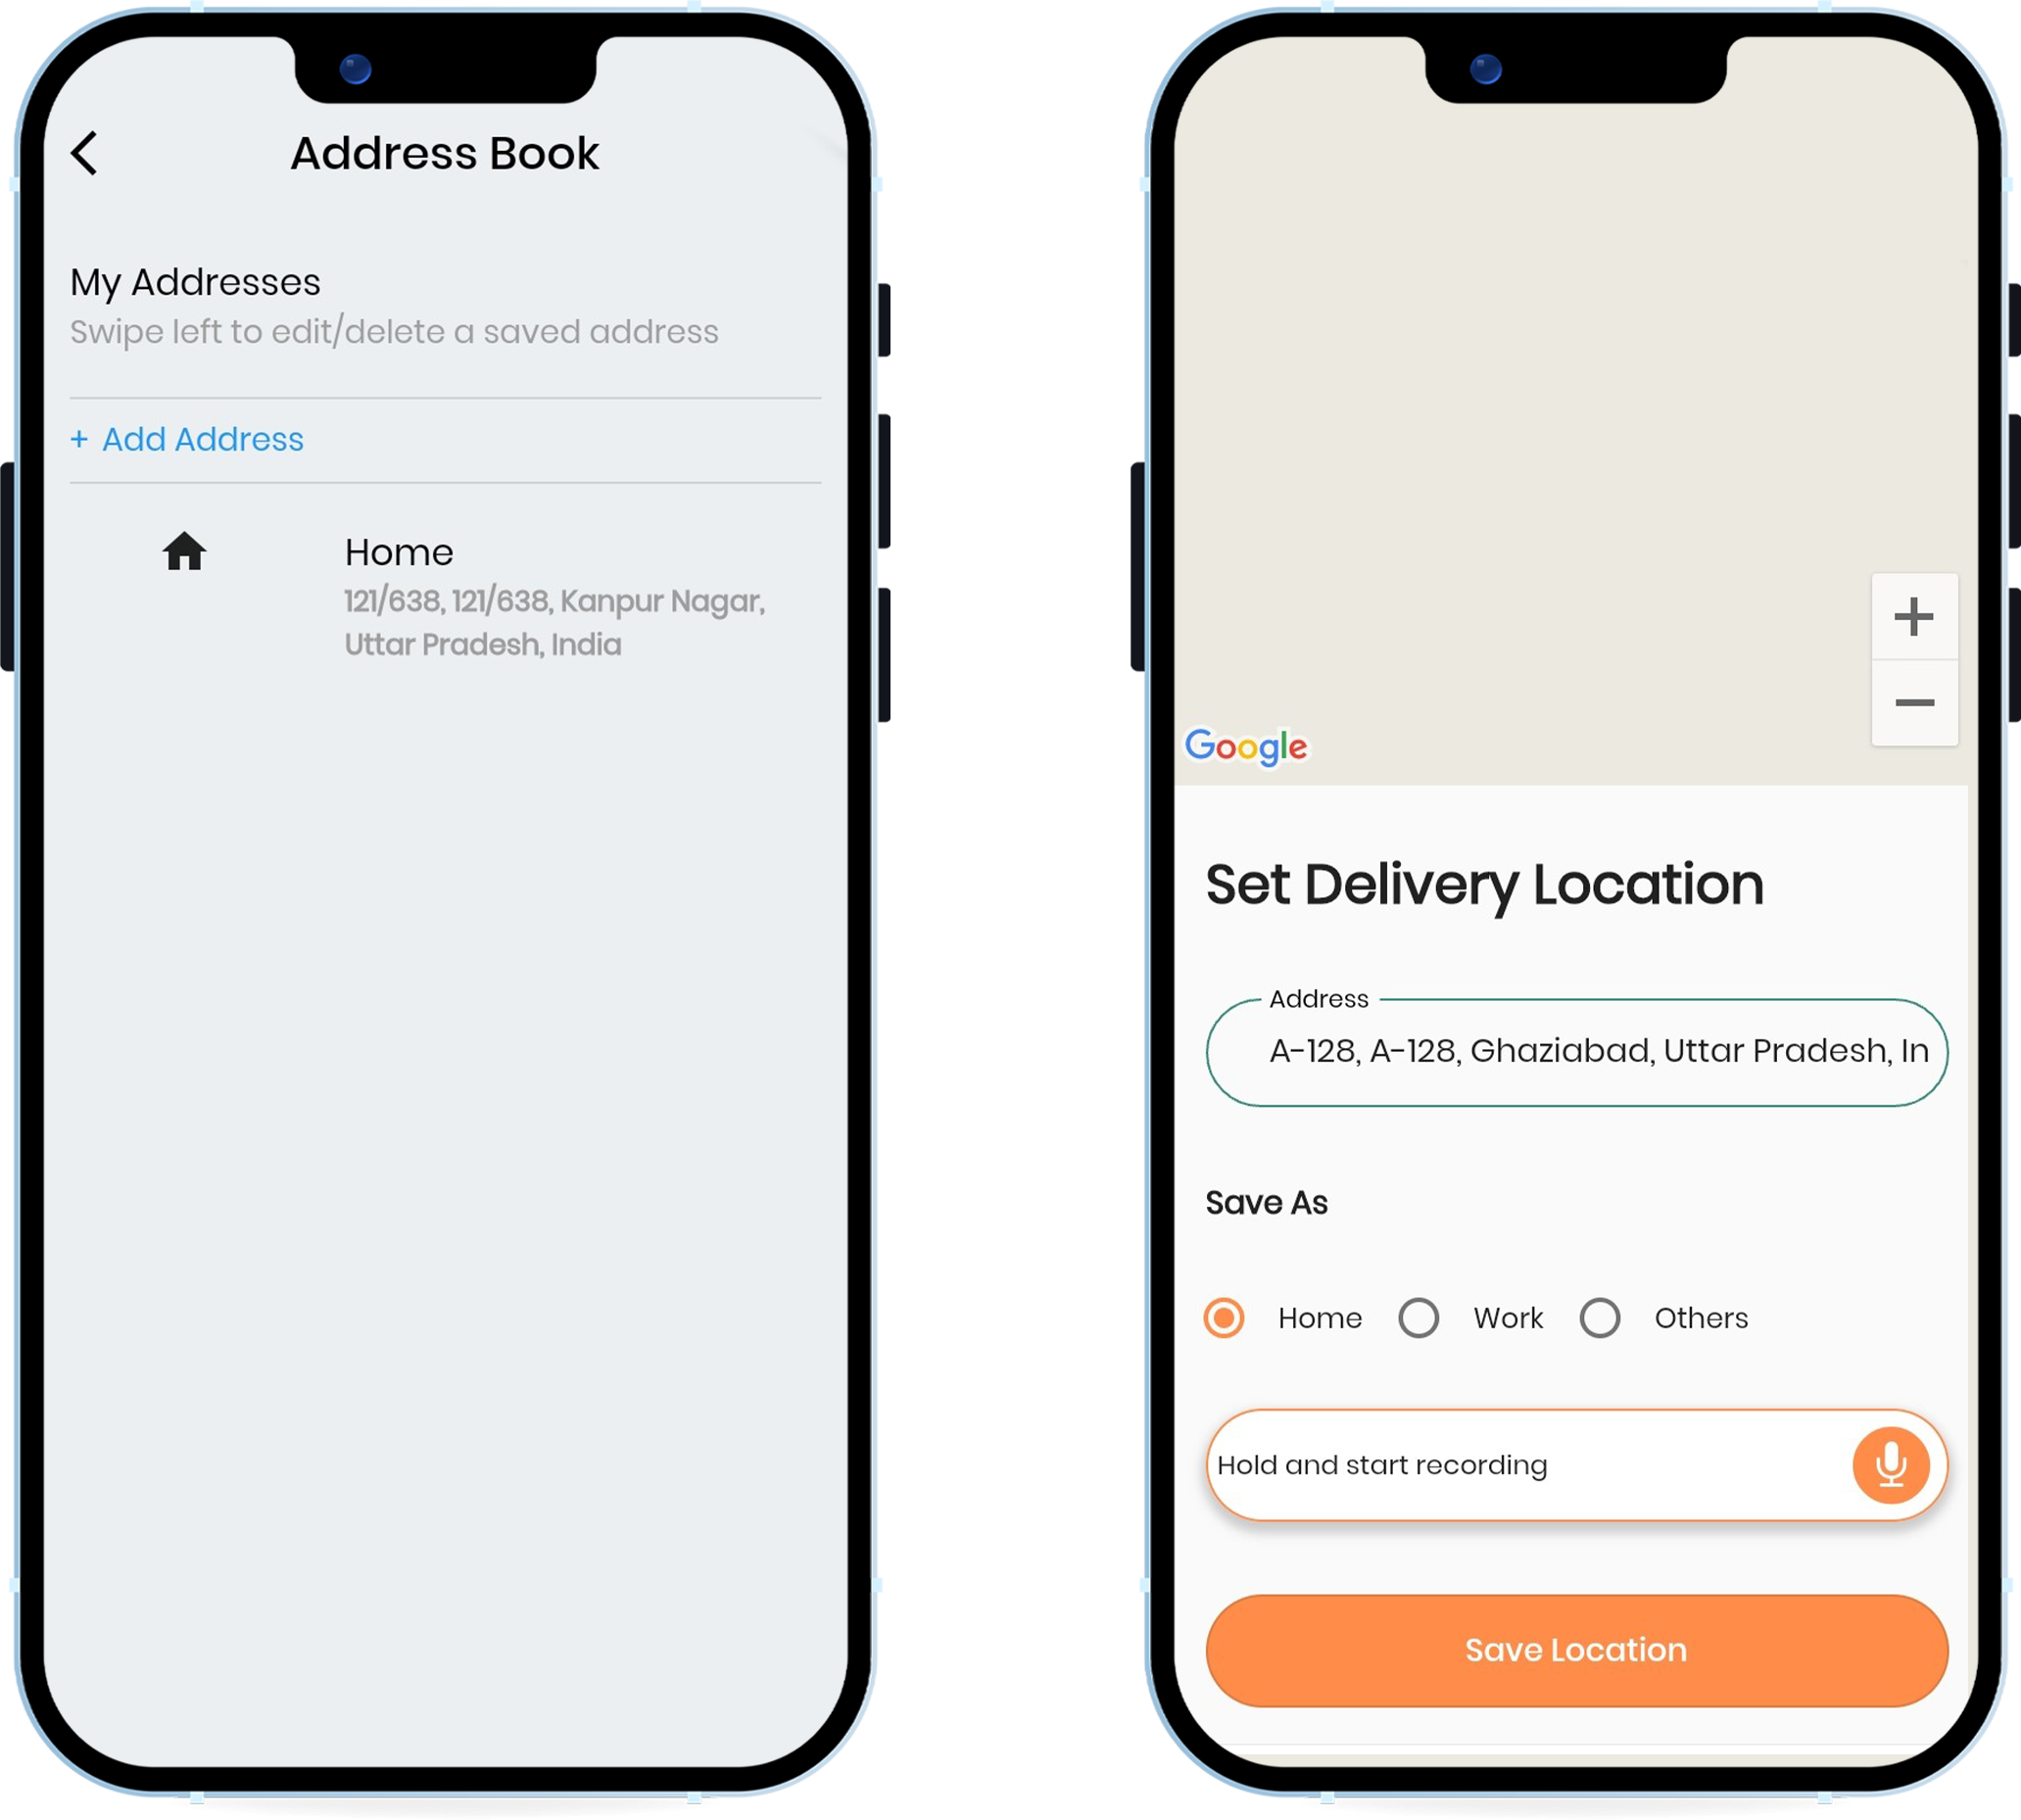
Here, he can enter his delivery location & save it as home, work or others. To set delivery location, even users can hold the audio icon & start recording & save their location.
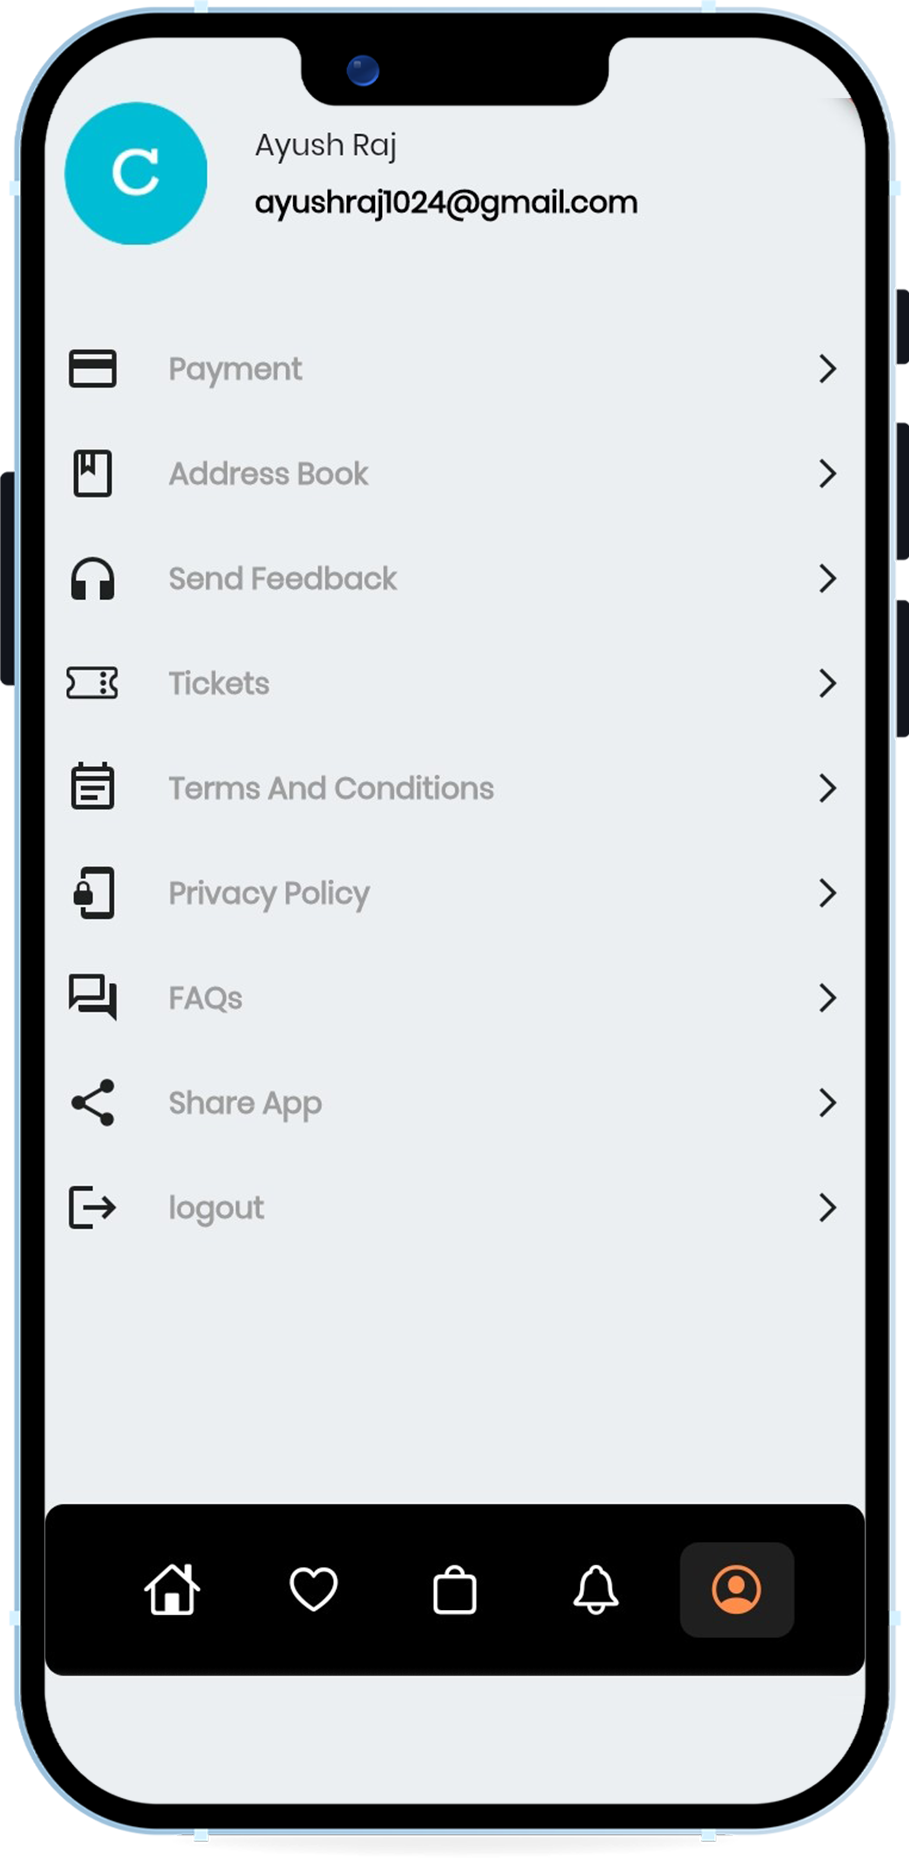
refers to a list of top-level app areas and collections, almost always displayed in the primary pane of a split view.
Here, he can enter his delivery location & save it as home, work or others. To set delivery location, even users can hold the audio icon & start recording & save their location.
refers to a list of top-level app areas and collections, almost always displayed in the primary pane of a split view.
Here, he can enter his delivery location & save it as home, work or others. To set delivery location, even users can hold the audio icon & start recording & save their location.
MERCHANT MODULE
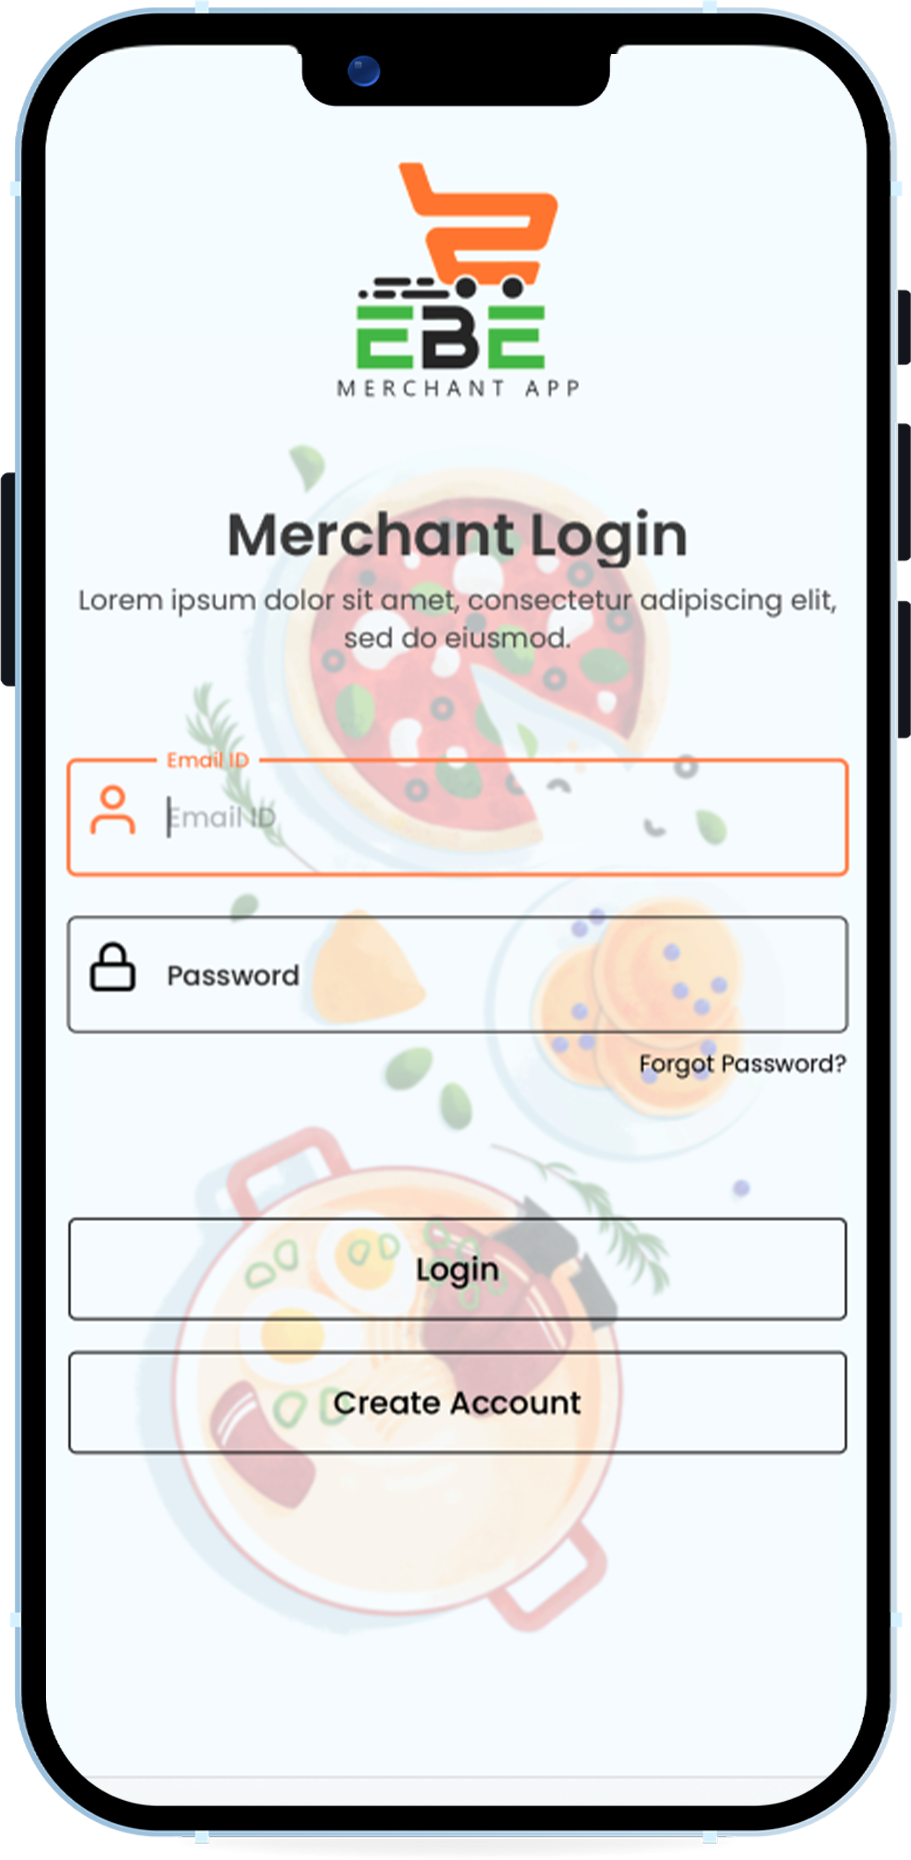
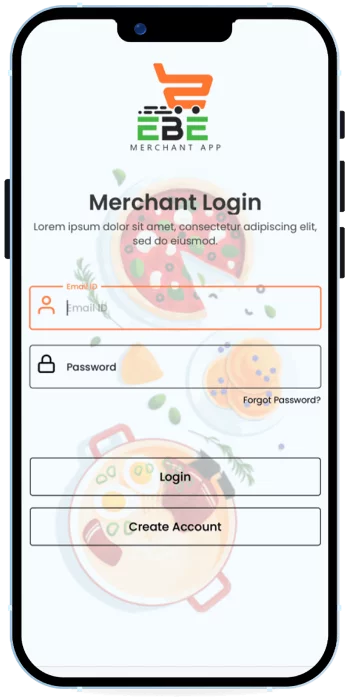
In login screen, merchant will enter the following information:
– Email ID
– Password
Then click on Login button.
The user’s entered credential -Email address/Username, Pass-word is valid and correct or not. User will not get access to the re-stricted page until he/she entered a valid email and password.
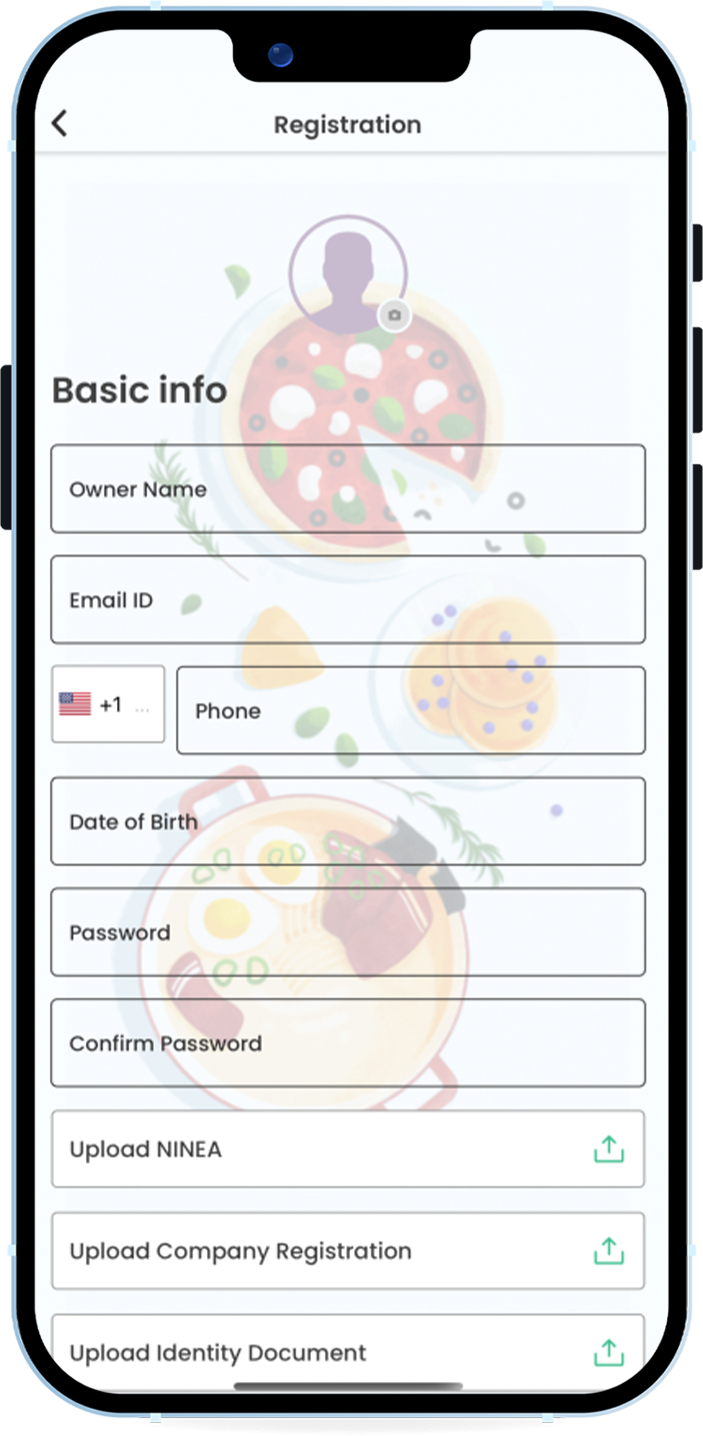
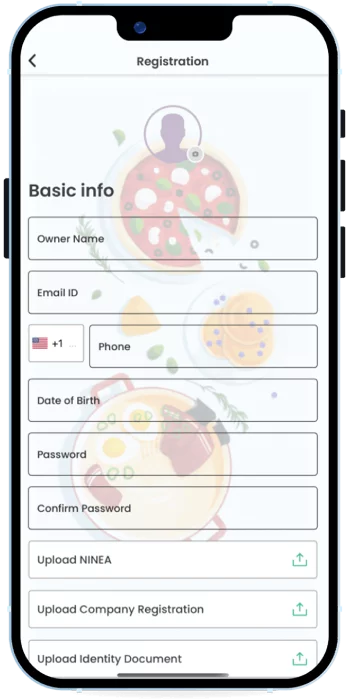
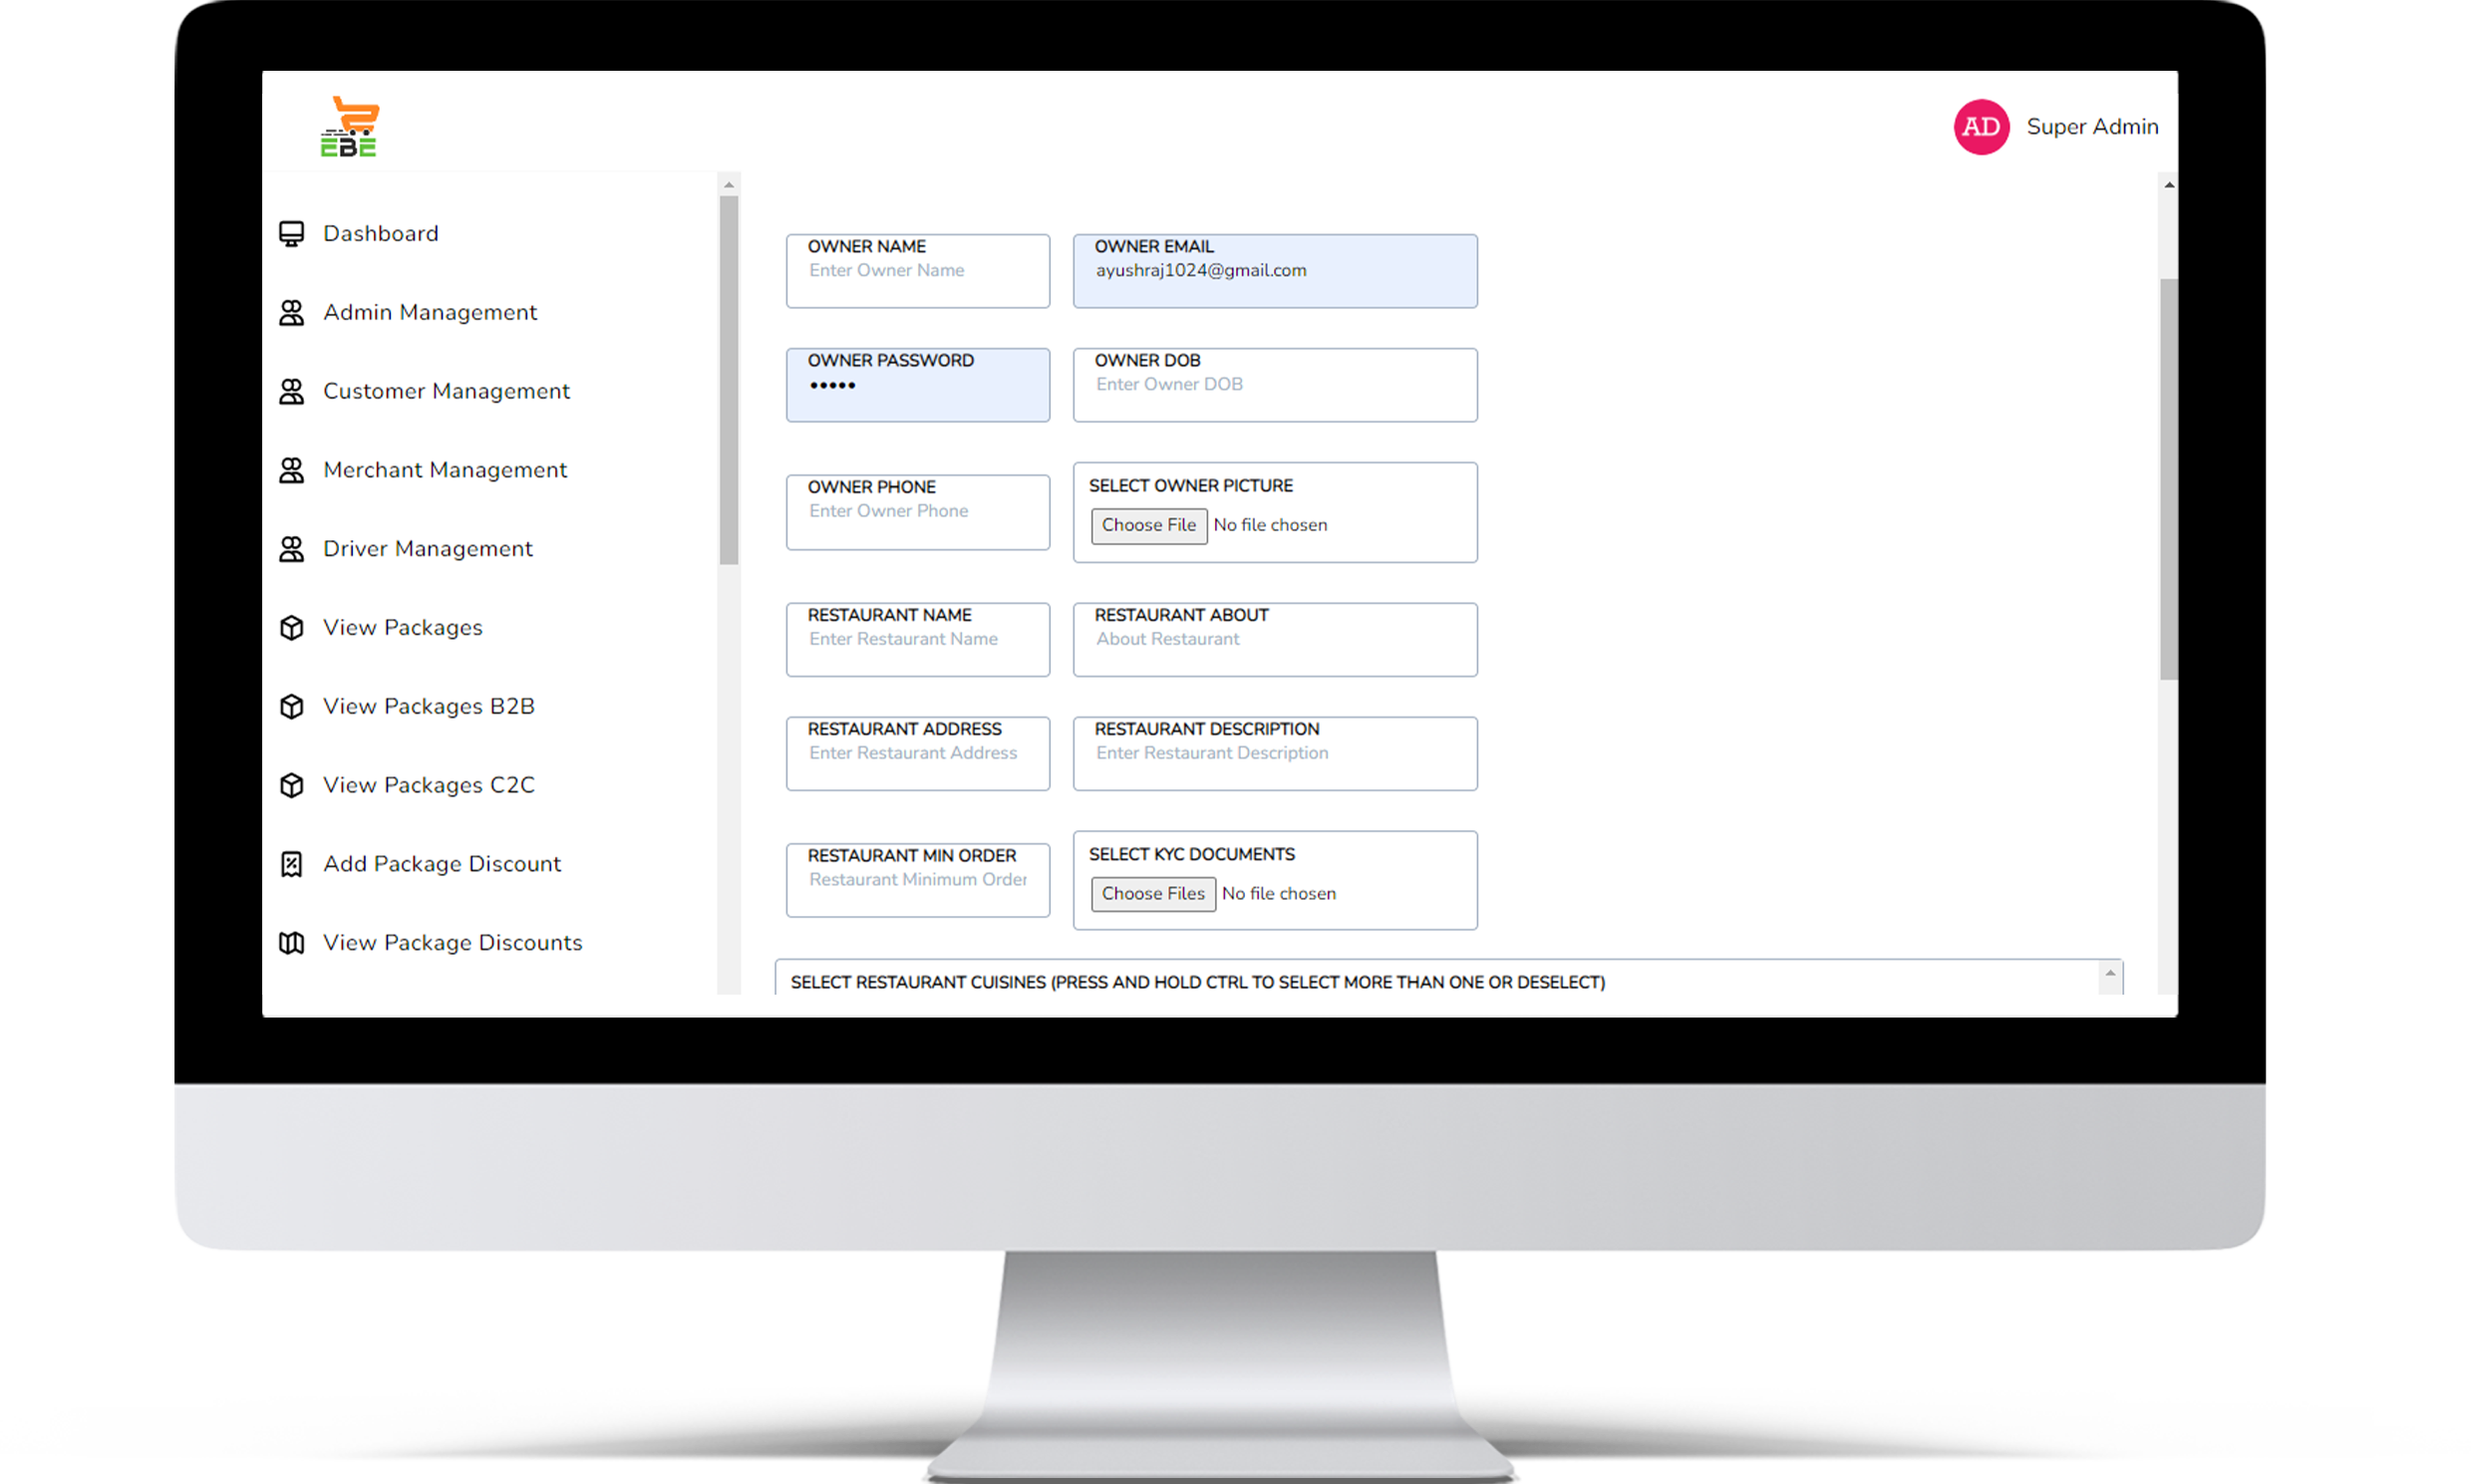
1. Basic info: This section will include the following details
a. Owner name b. Email ID c. Contact number with country code d. Date of birth e. Password f. Confirm pass word g. Upload
company or verification documents (if necessary)
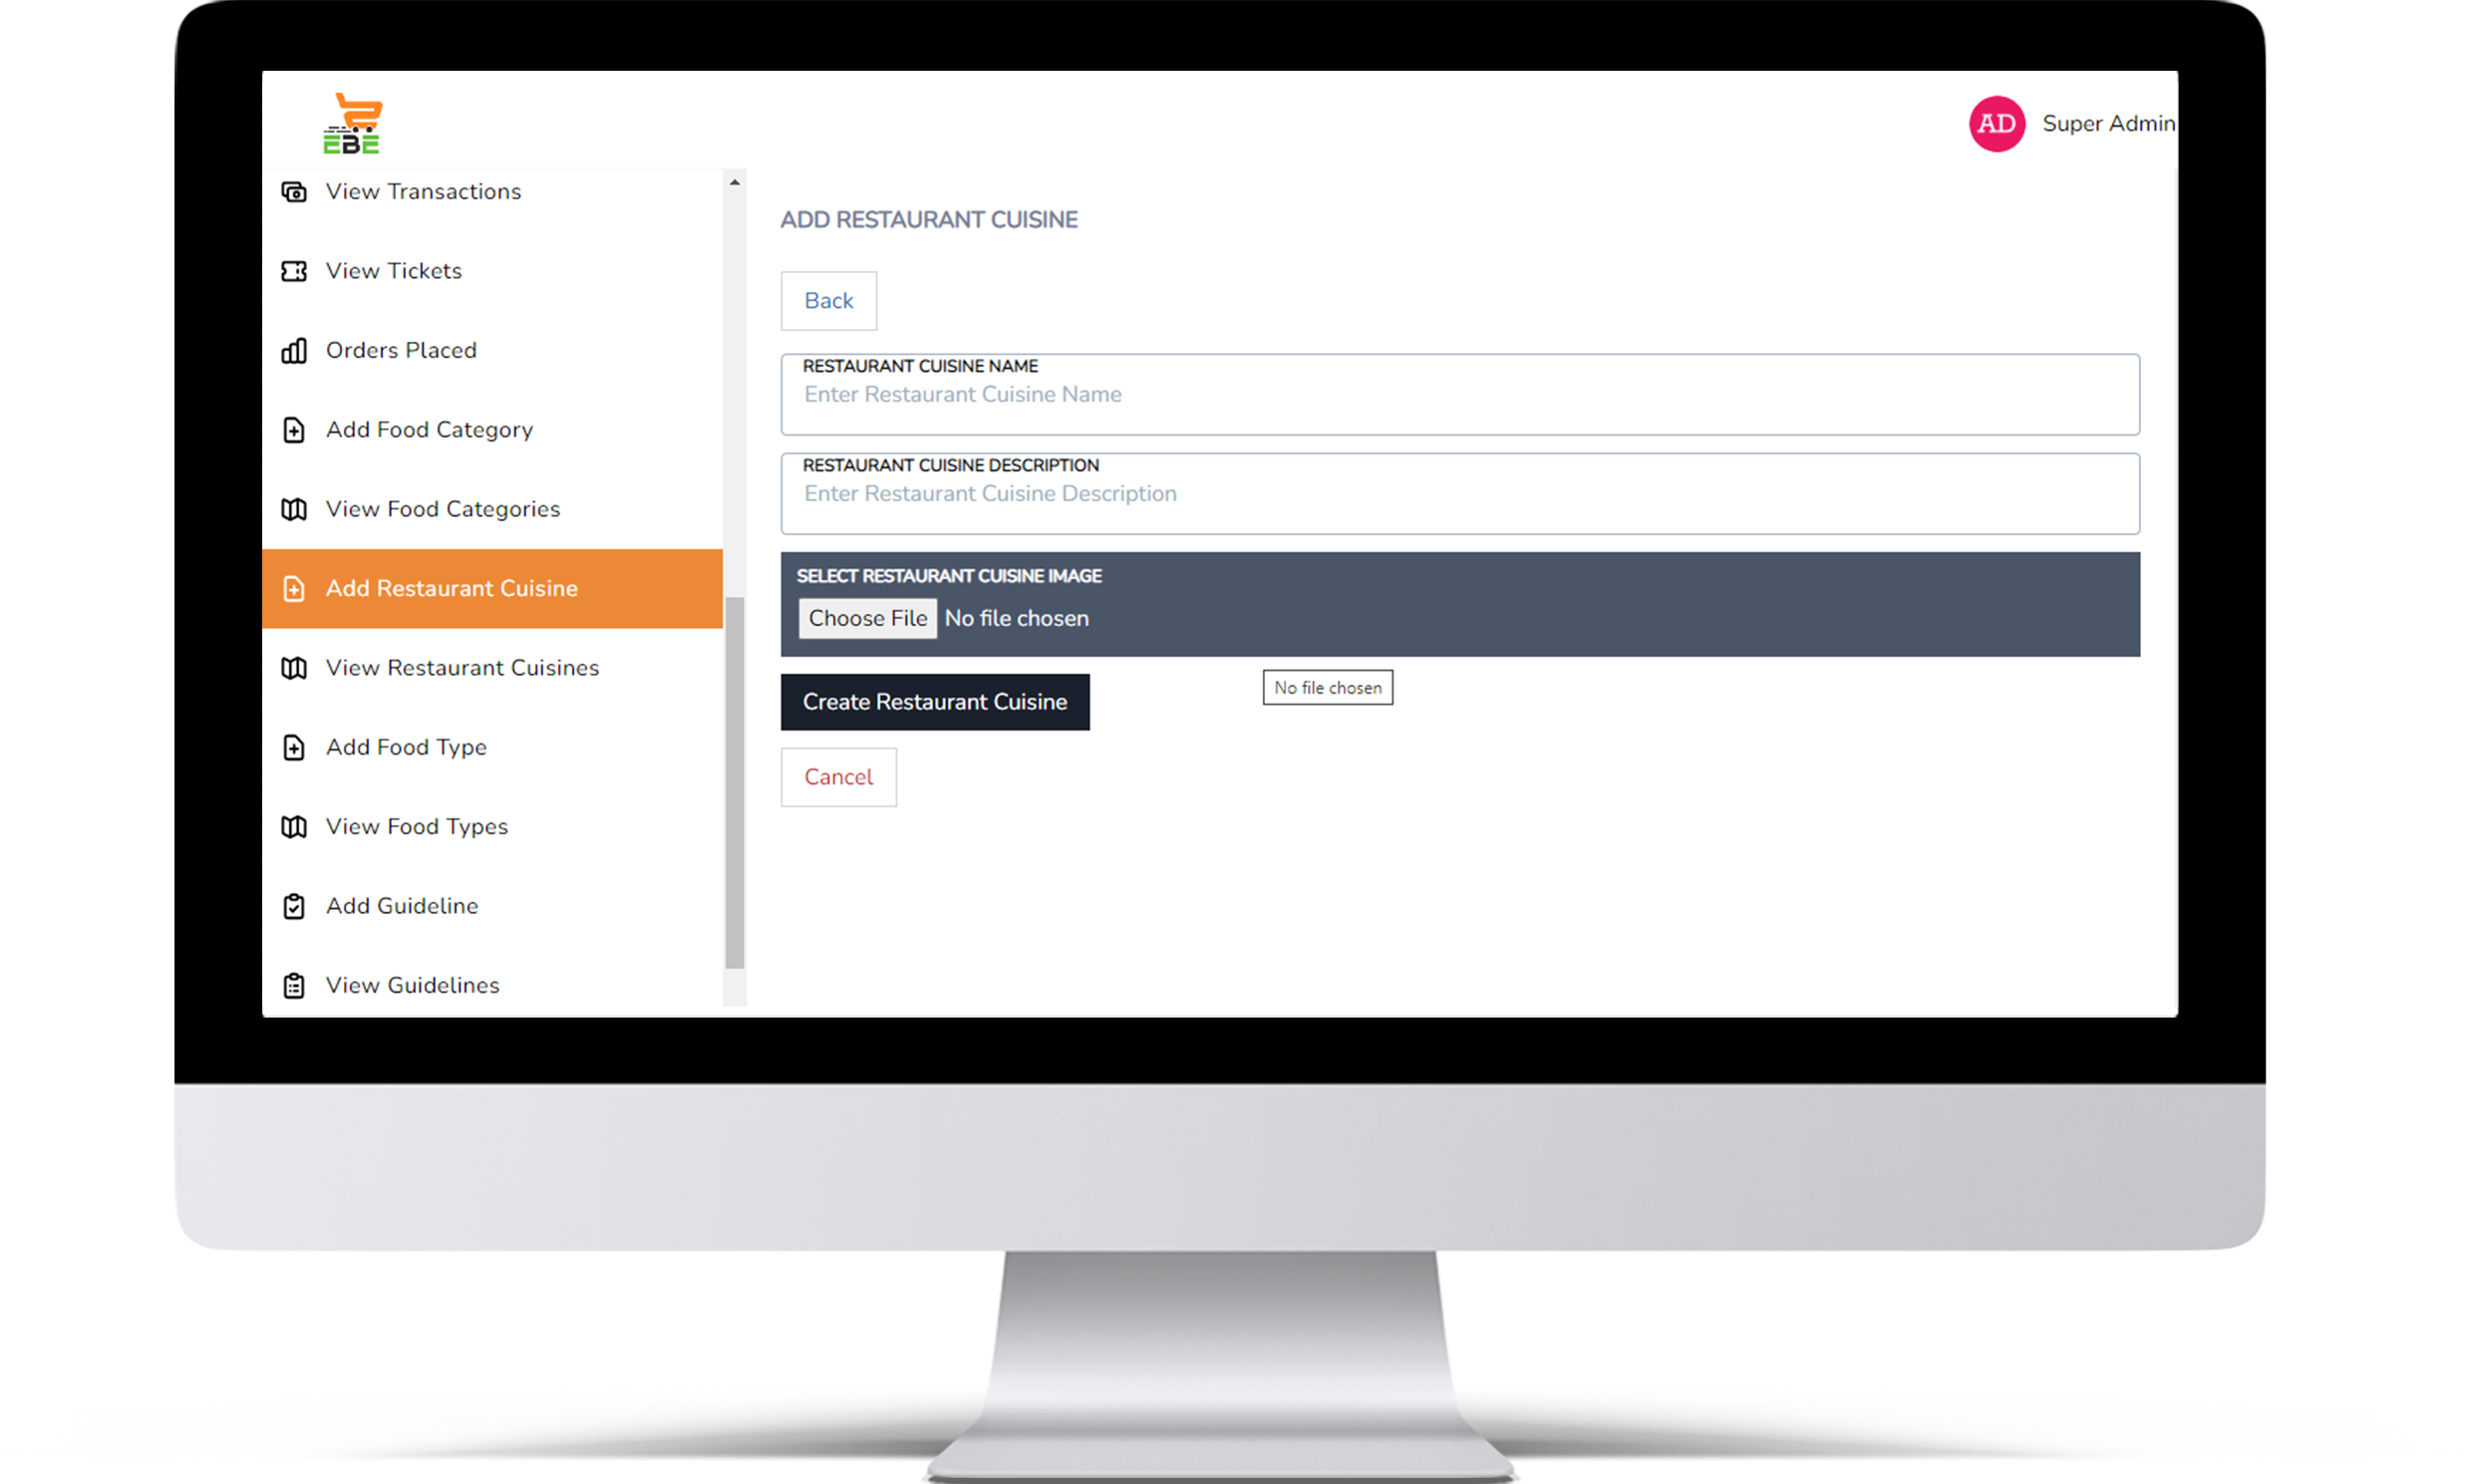
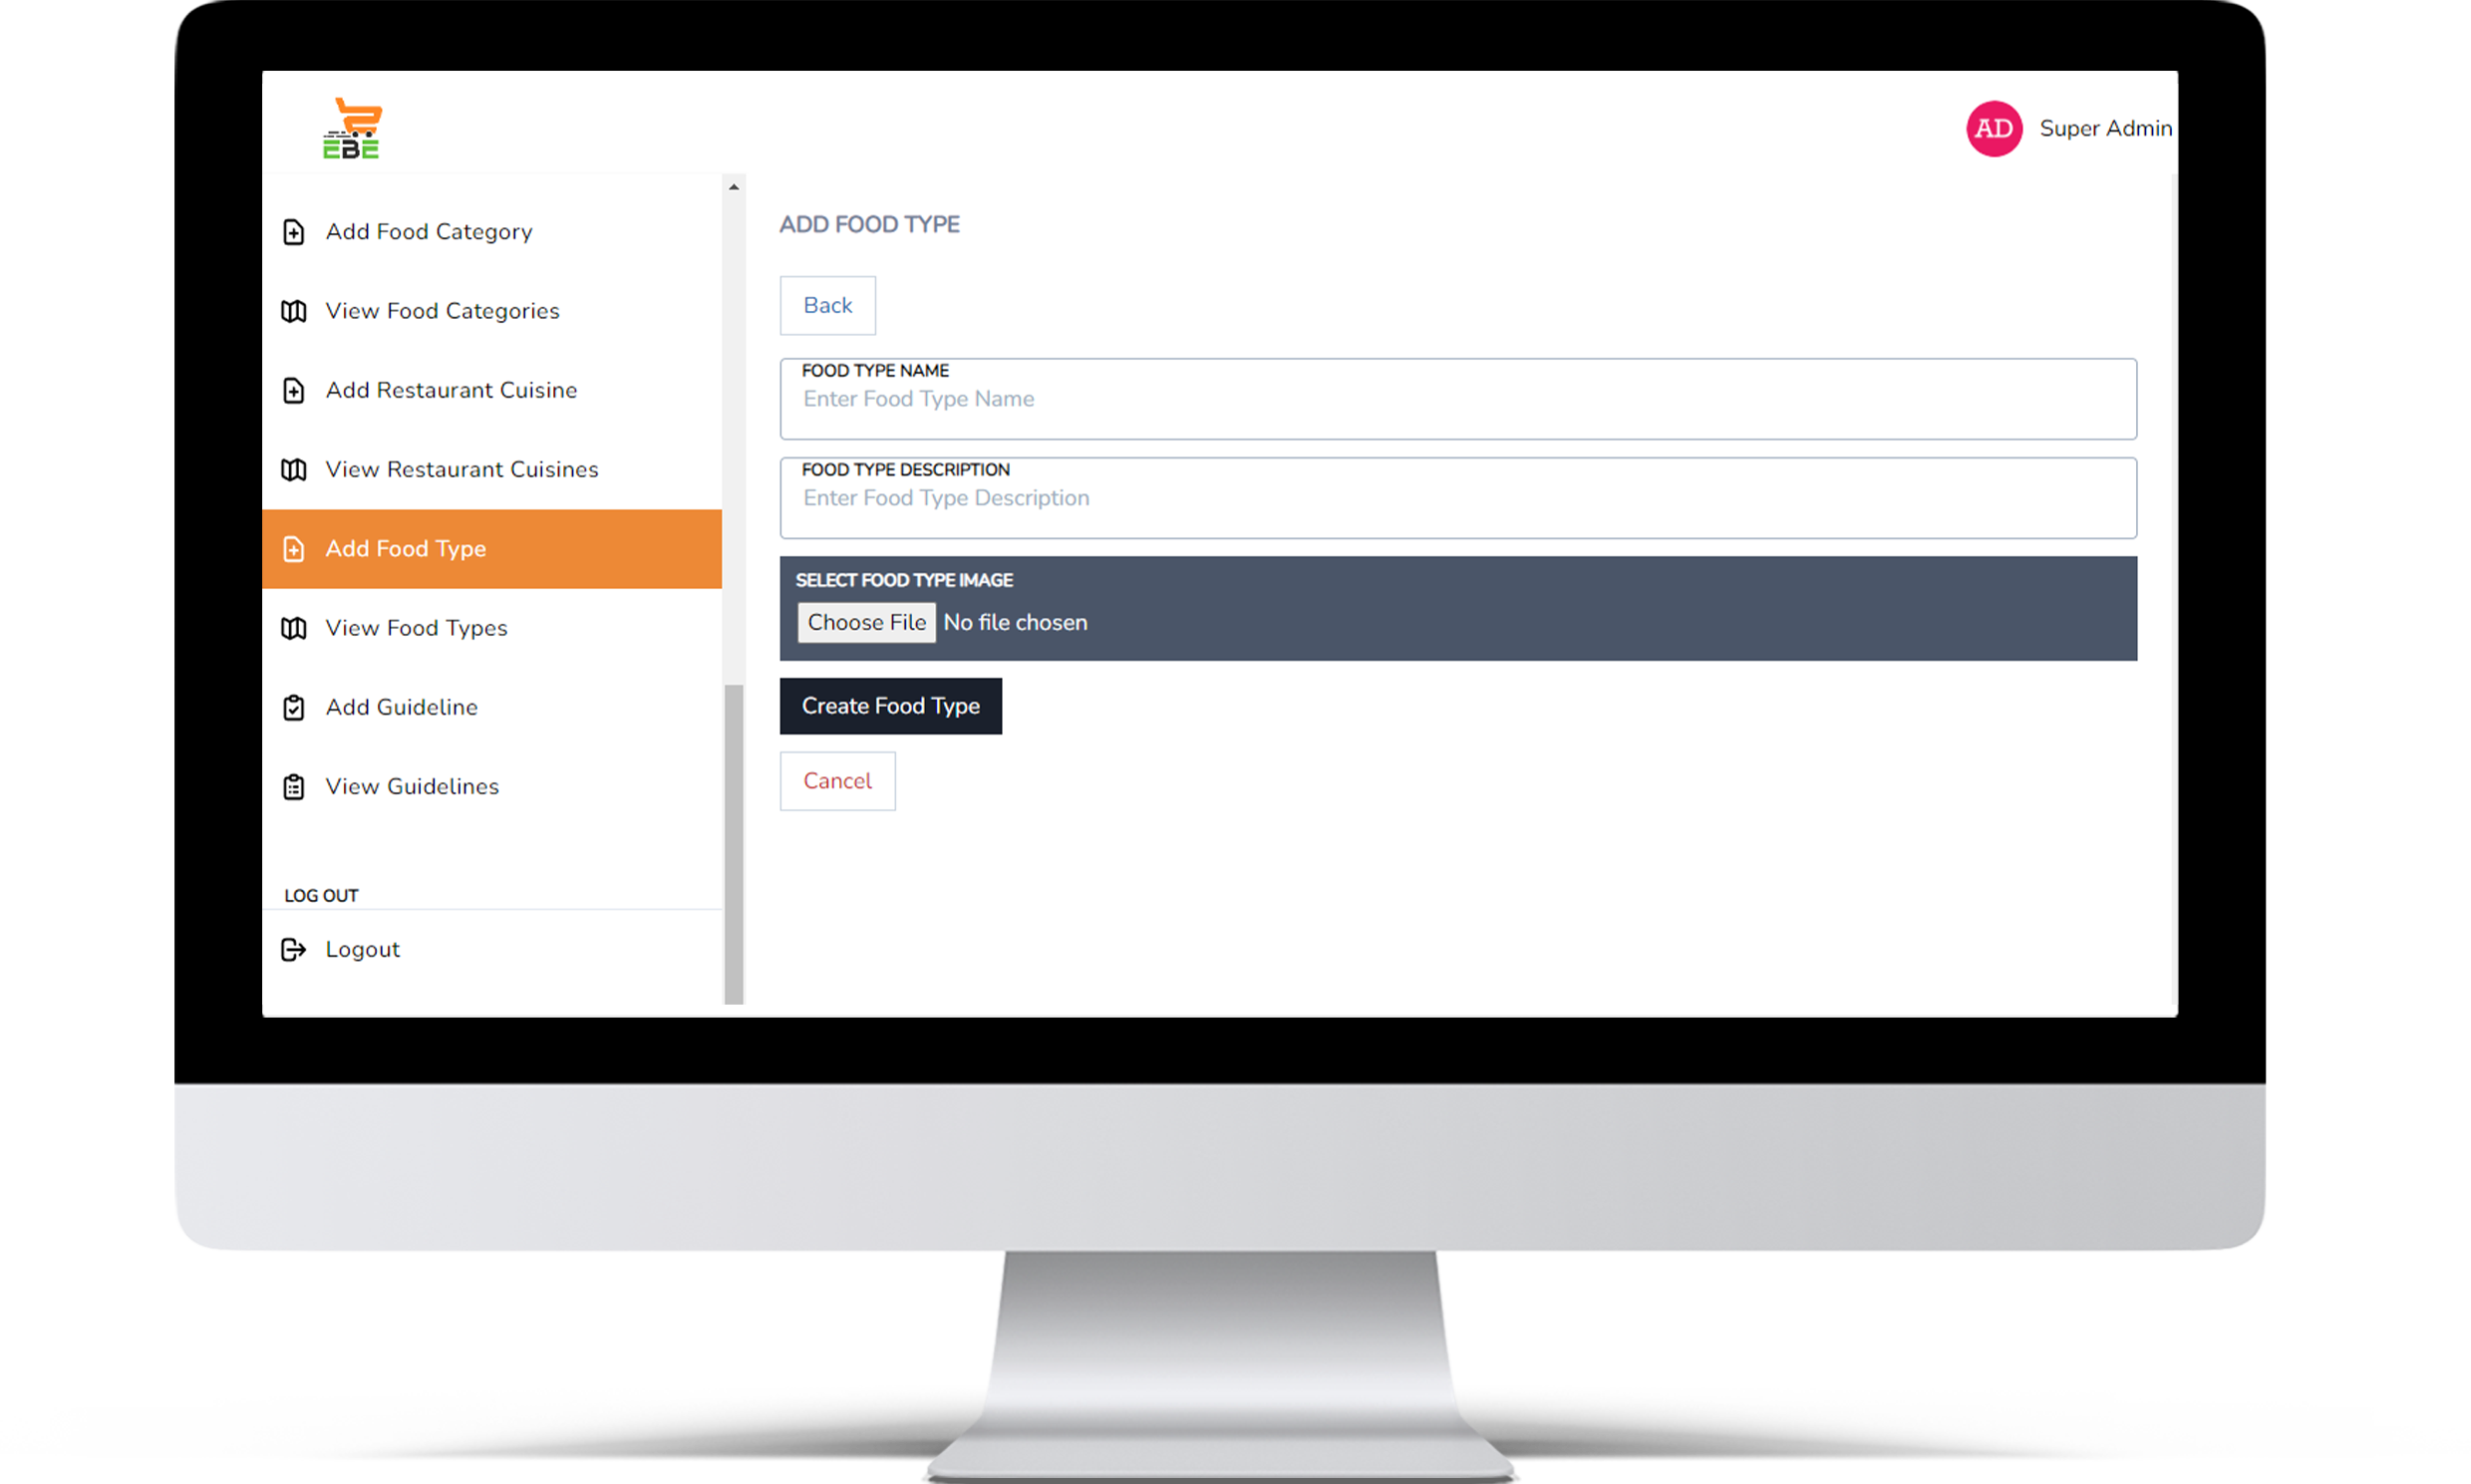
2. Restaurant info: This section will include the following detail
a. Restaurant name b. Restaurant location c. Select cuisines (drop-down) e. Select payment method d. Minimum order
3. Services date & time: In this section, the merchant will select his restaurant service days & opening & closing hours
MERCHANT MODULE
In login screen, merchant will enter the following information:
– Email ID
– Password
Then click on Login button.
The user’s entered credential -Email address/Username, Pass-word is valid and correct or not. User will not get access to the re-stricted page until he/she entered a valid email and password.
1. Basic info: This section will include the following details
a. Owner name b. Email ID c. Contact number with country code d. Date of birth e. Password f. Confirm pass word g. Upload
company or verification documents (if necessary)
2. Restaurant info: This section will include the following detail
a. Restaurant name b. Restaurant location c. Select cuisines (drop-down) e. Select payment method d. Minimum order
3. Services date & time: In this section, the merchant will select his restaurant service days & opening & closing hours
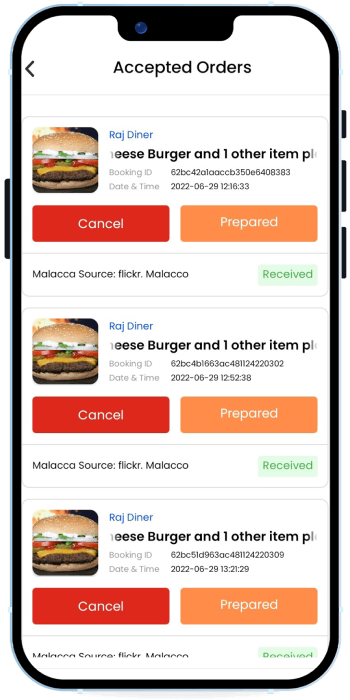
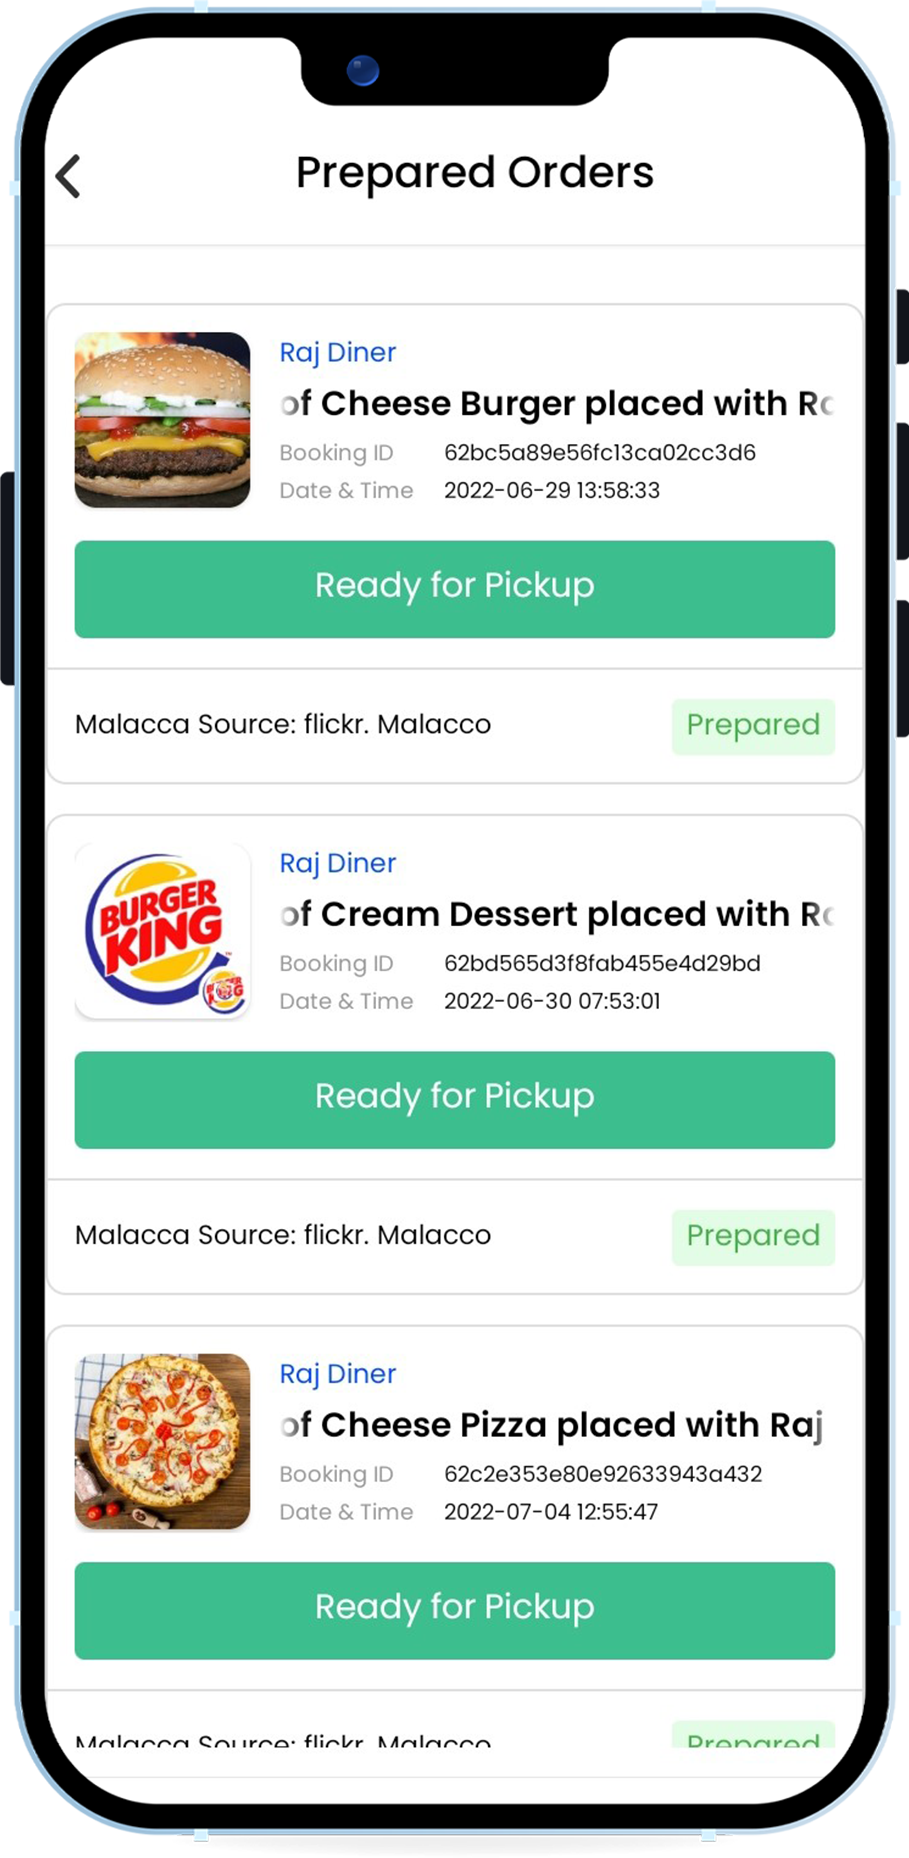
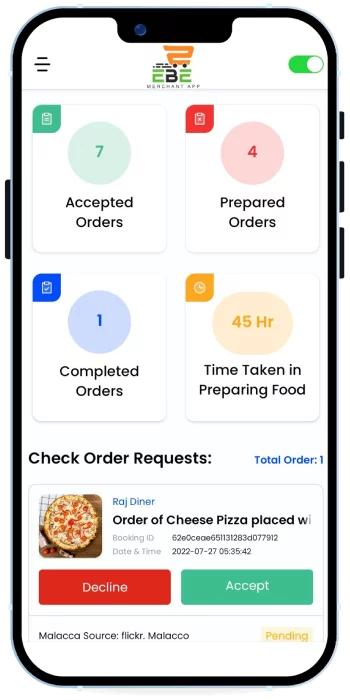
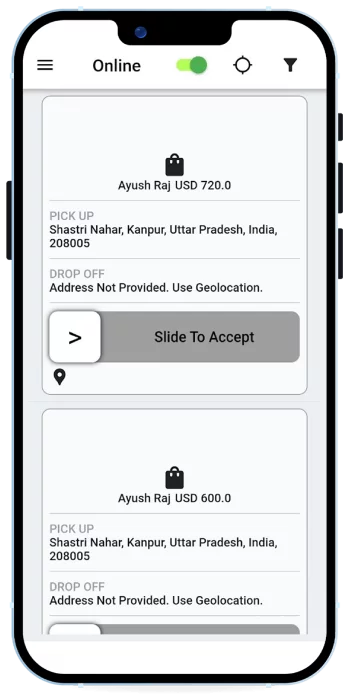
This is the main screen around which the entire app revolves. A toggle switch is a digital on/off switch. Toggle switches are best used for changing the state of system functionalities and preferences. Here, when we will on the toggle switch then we will consider online & all types of orders & data will display. When we will off the toggle button then we will consider offline & noth-ing will display on the screen.
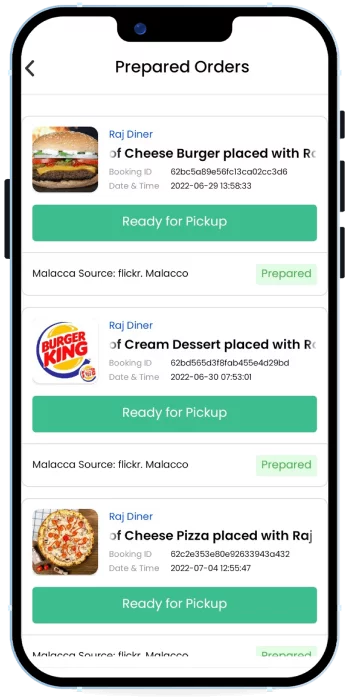
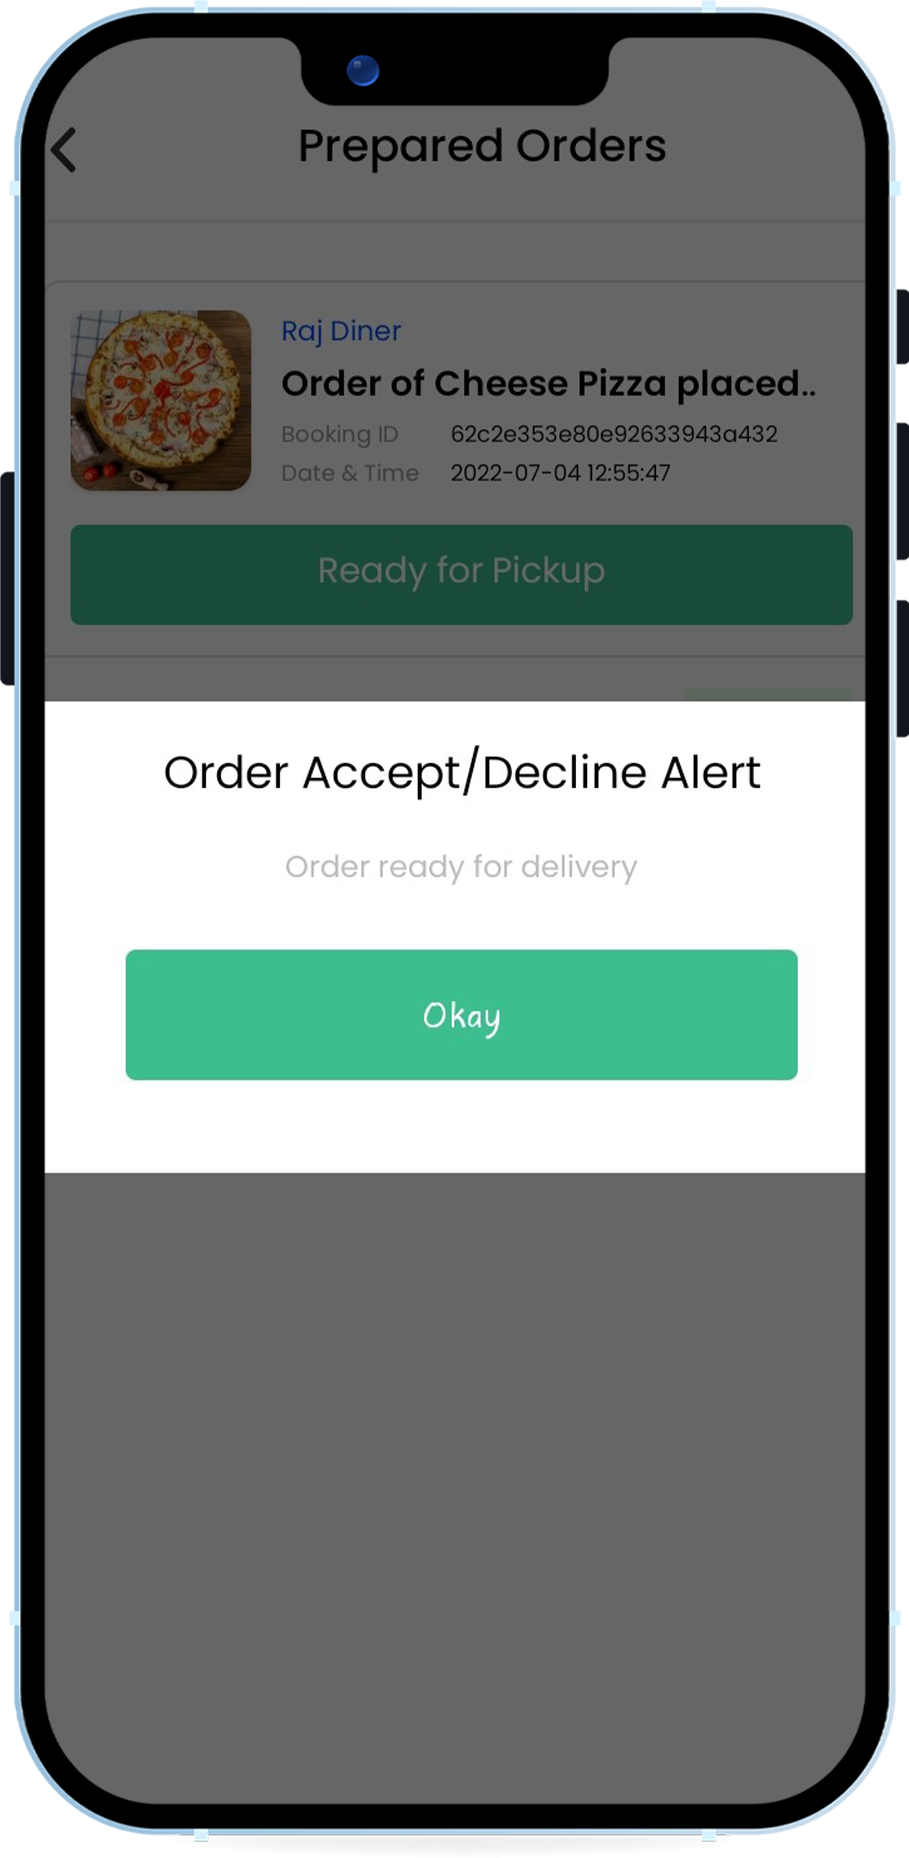
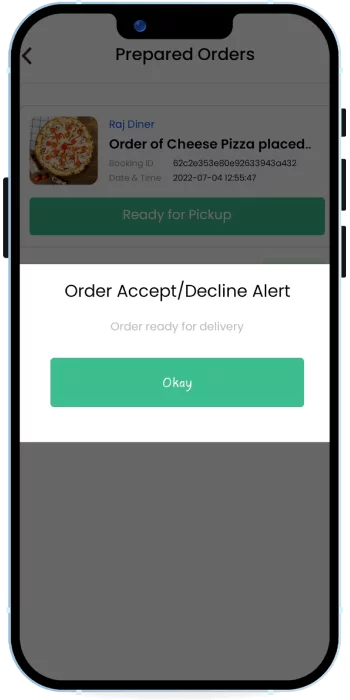
Prepared: when click on prepared button, a pop-up window will appear & will ask “are you sure you want to prepare this order”. Click on Yes or No. Once click on Yes button then the order will start to prepare.
Cancel: when click on Cancel button, a pop-up window will appear to cancel the order then click on Yes or No button accord-ingly.


This is the main screen around which the entire app revolves. A toggle switch is a digital on/off switch. Toggle switches are best used for changing the state of system functionalities and preferences. Here, when we will on the toggle switch then we will consider online & all types of orders & data will display. When we will off the toggle button then we will consider offline & noth-ing will display on the screen.
Prepared: when click on prepared button, a pop-up window will appear & will ask “are you sure you want to prepare this order”. Click on Yes or No. Once click on Yes button then the order will start to prepare.
Cancel: when click on Cancel button, a pop-up window will appear to cancel the order then click on Yes or No button accord-ingly.

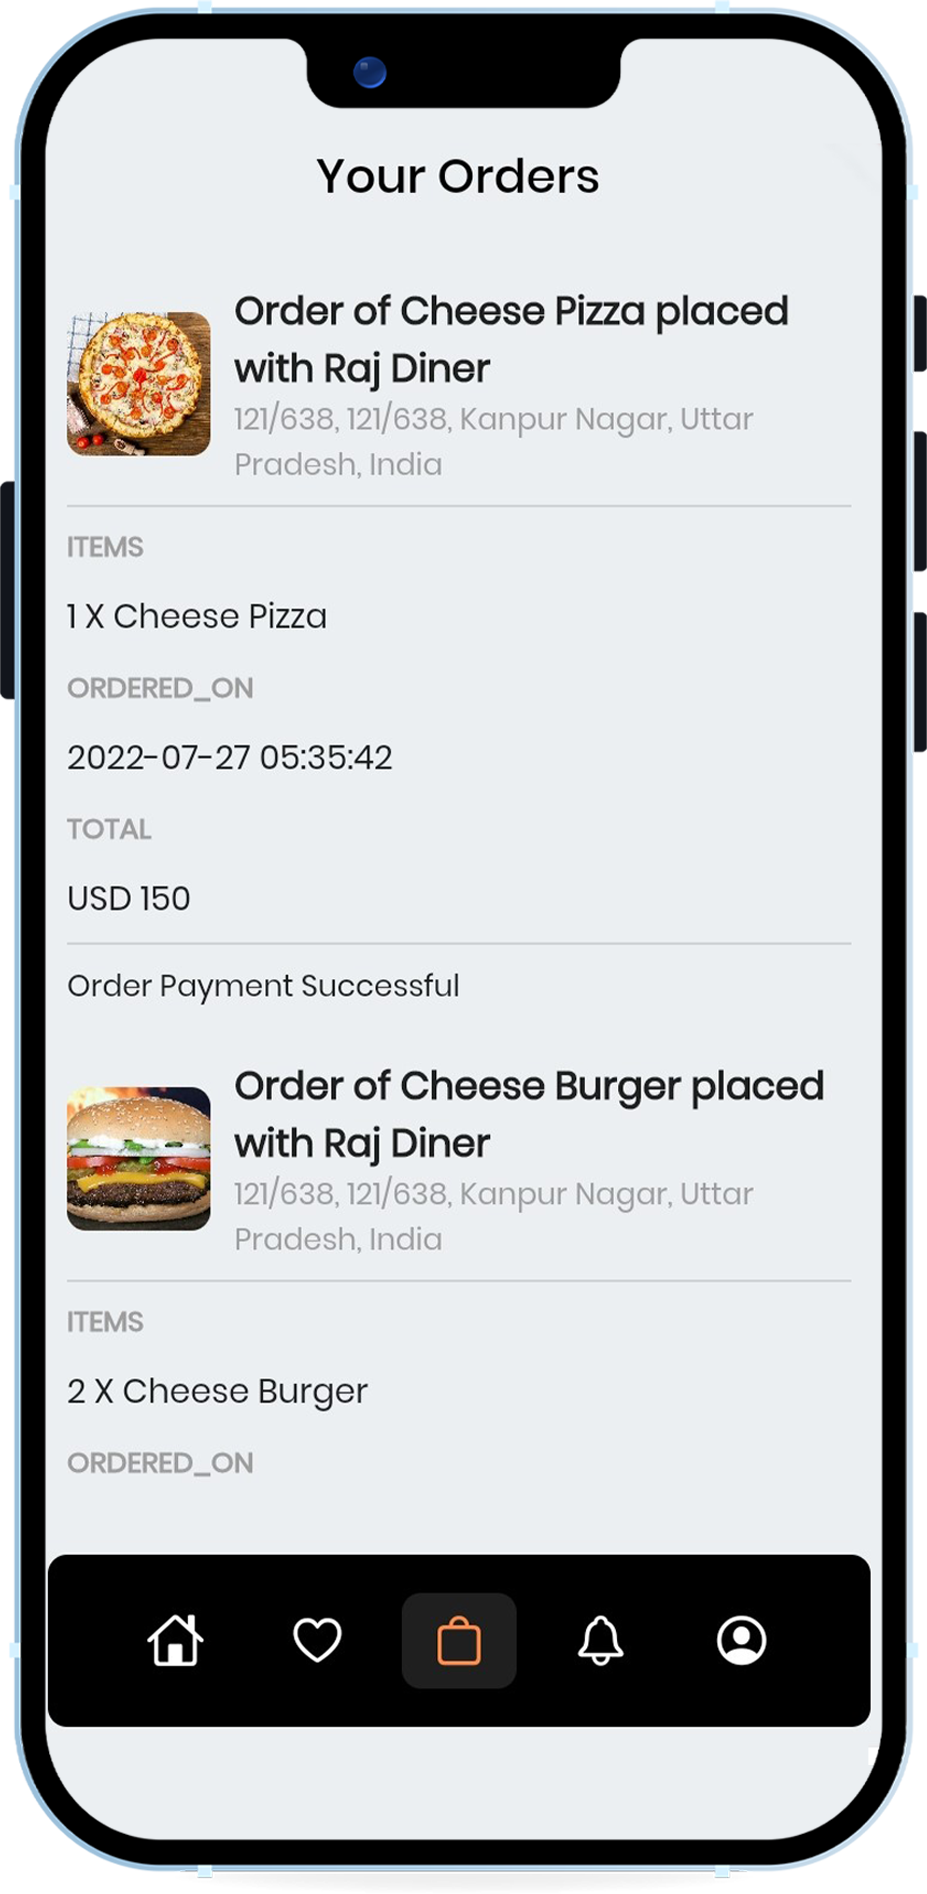
This screen will appear when clicking on completed order icon on the main screen. All the completed orders will display here.
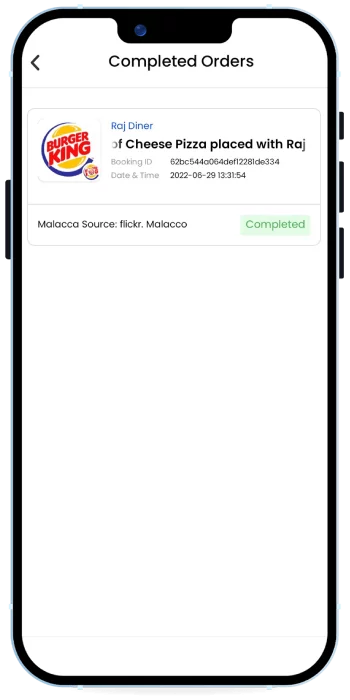
This screen will appear when clicking on completed order icon on the main screen. All the completed orders will display here.
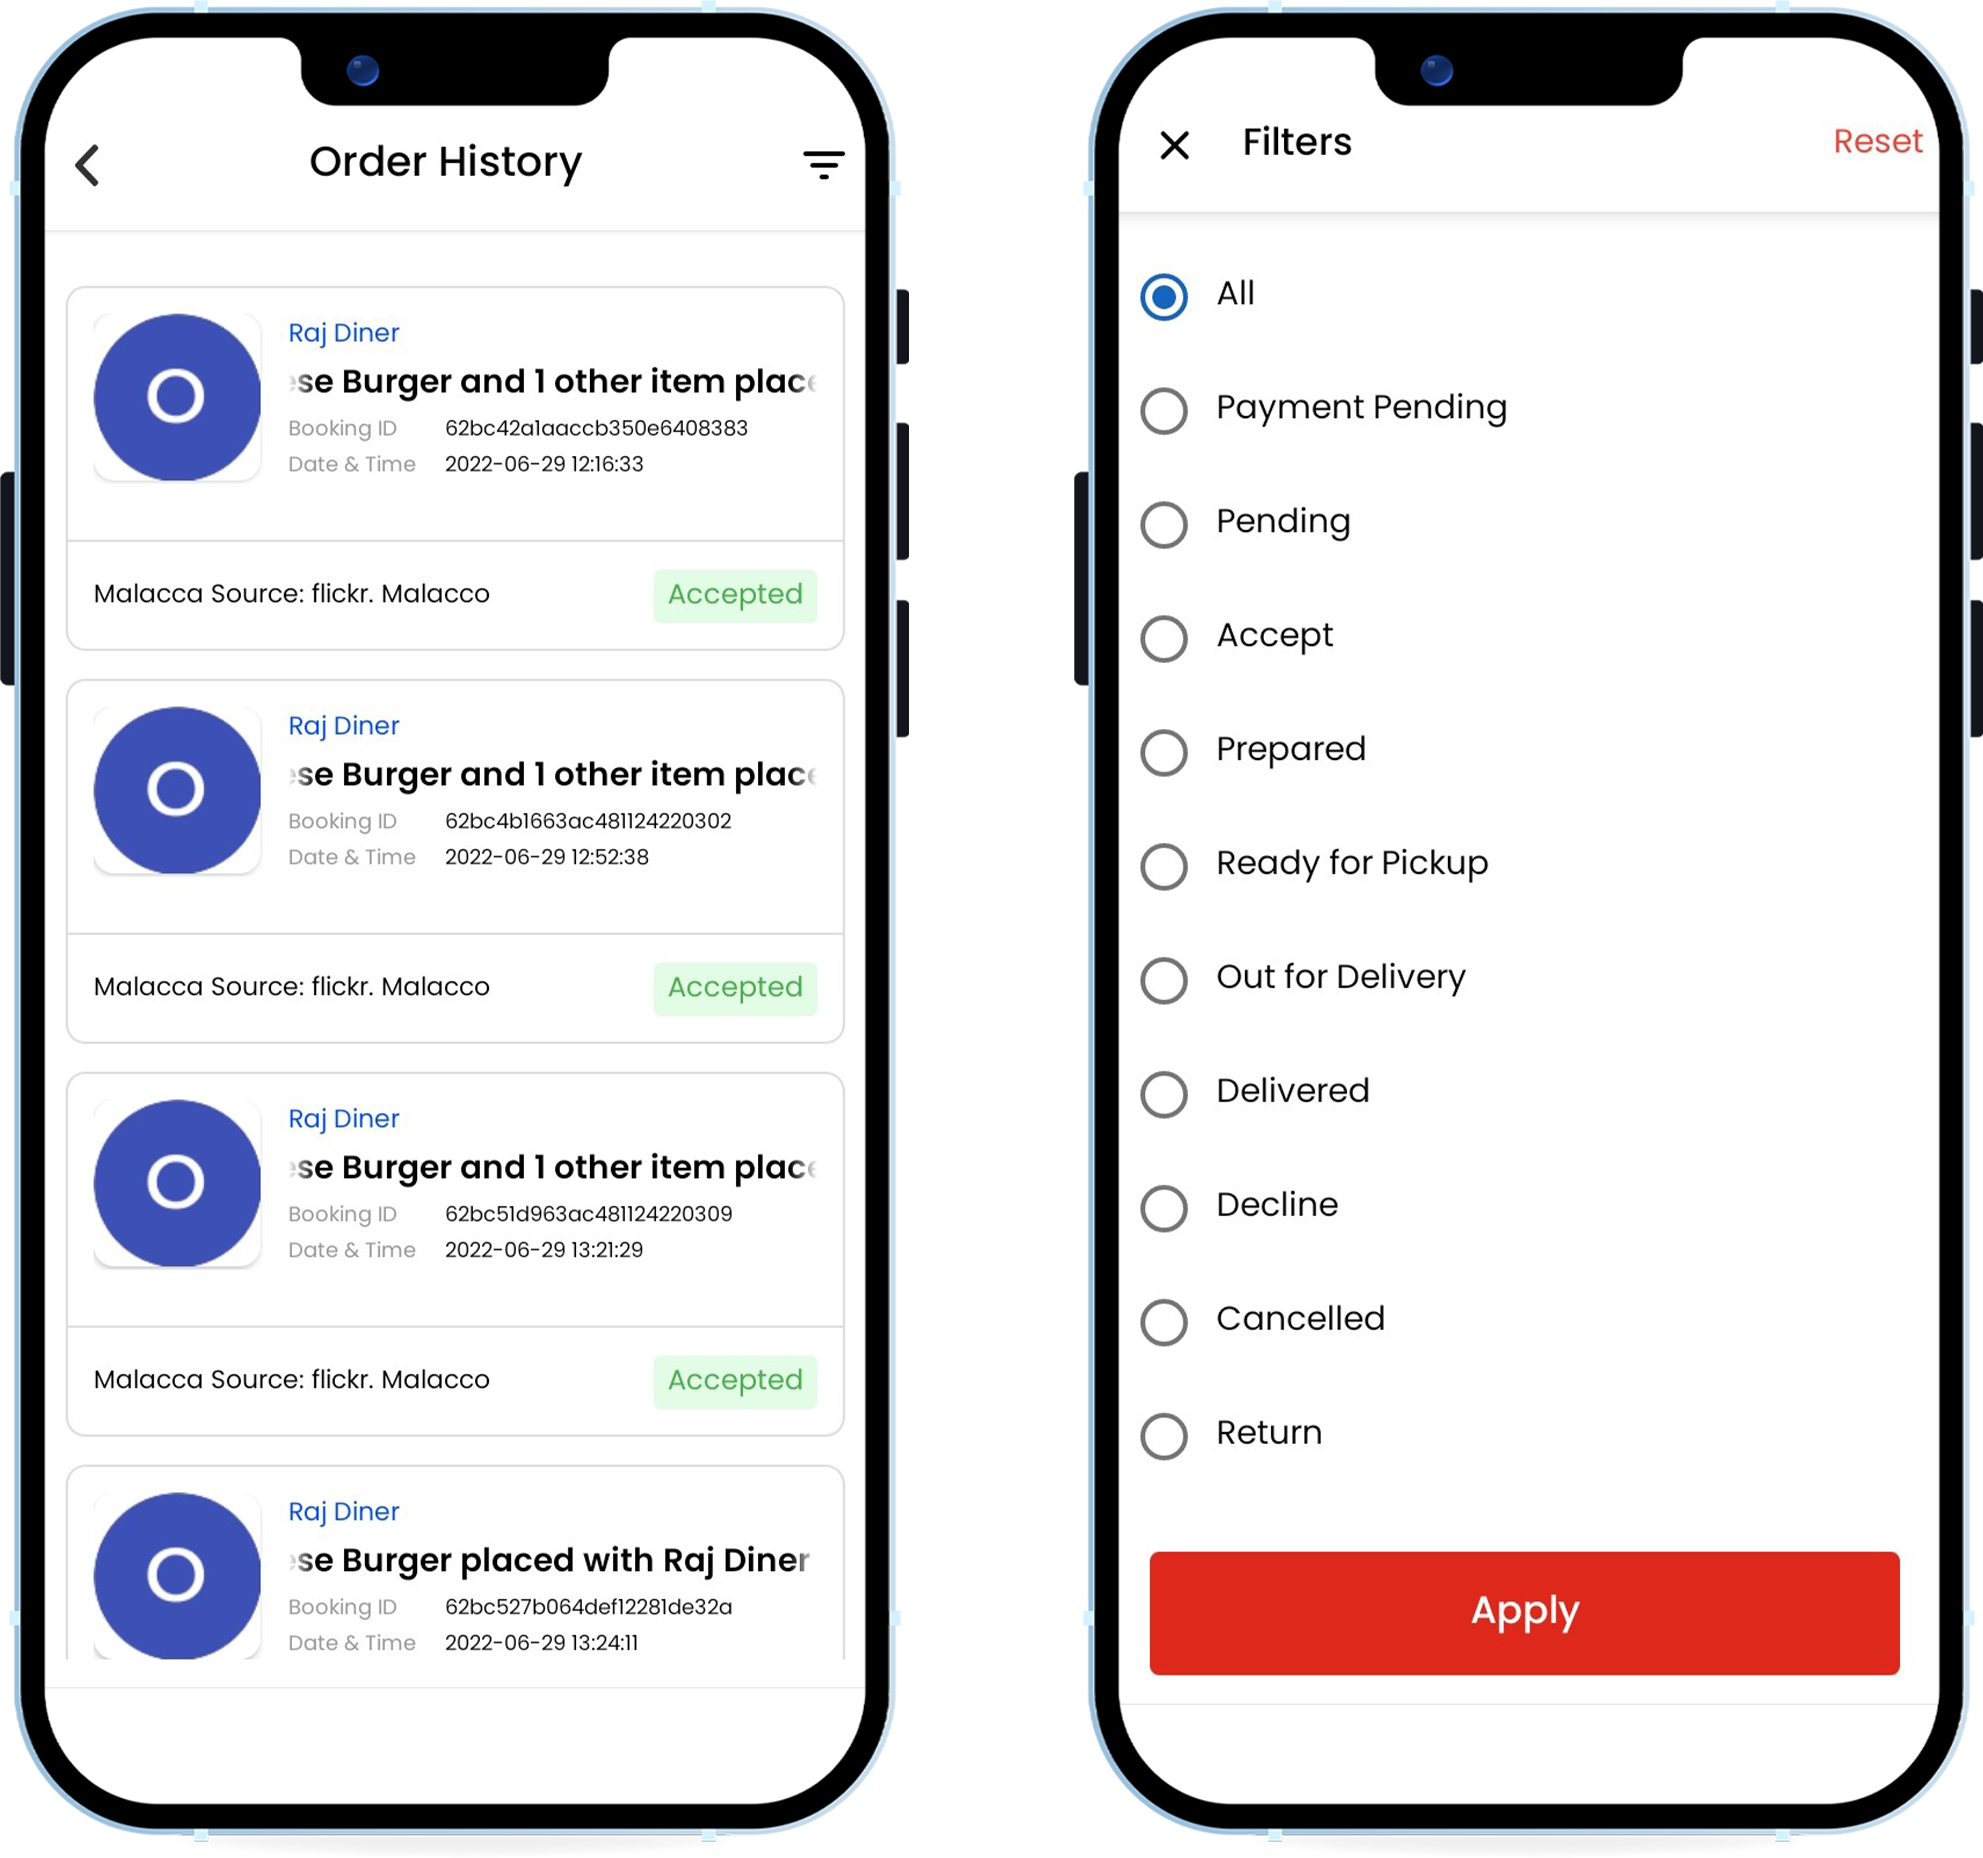
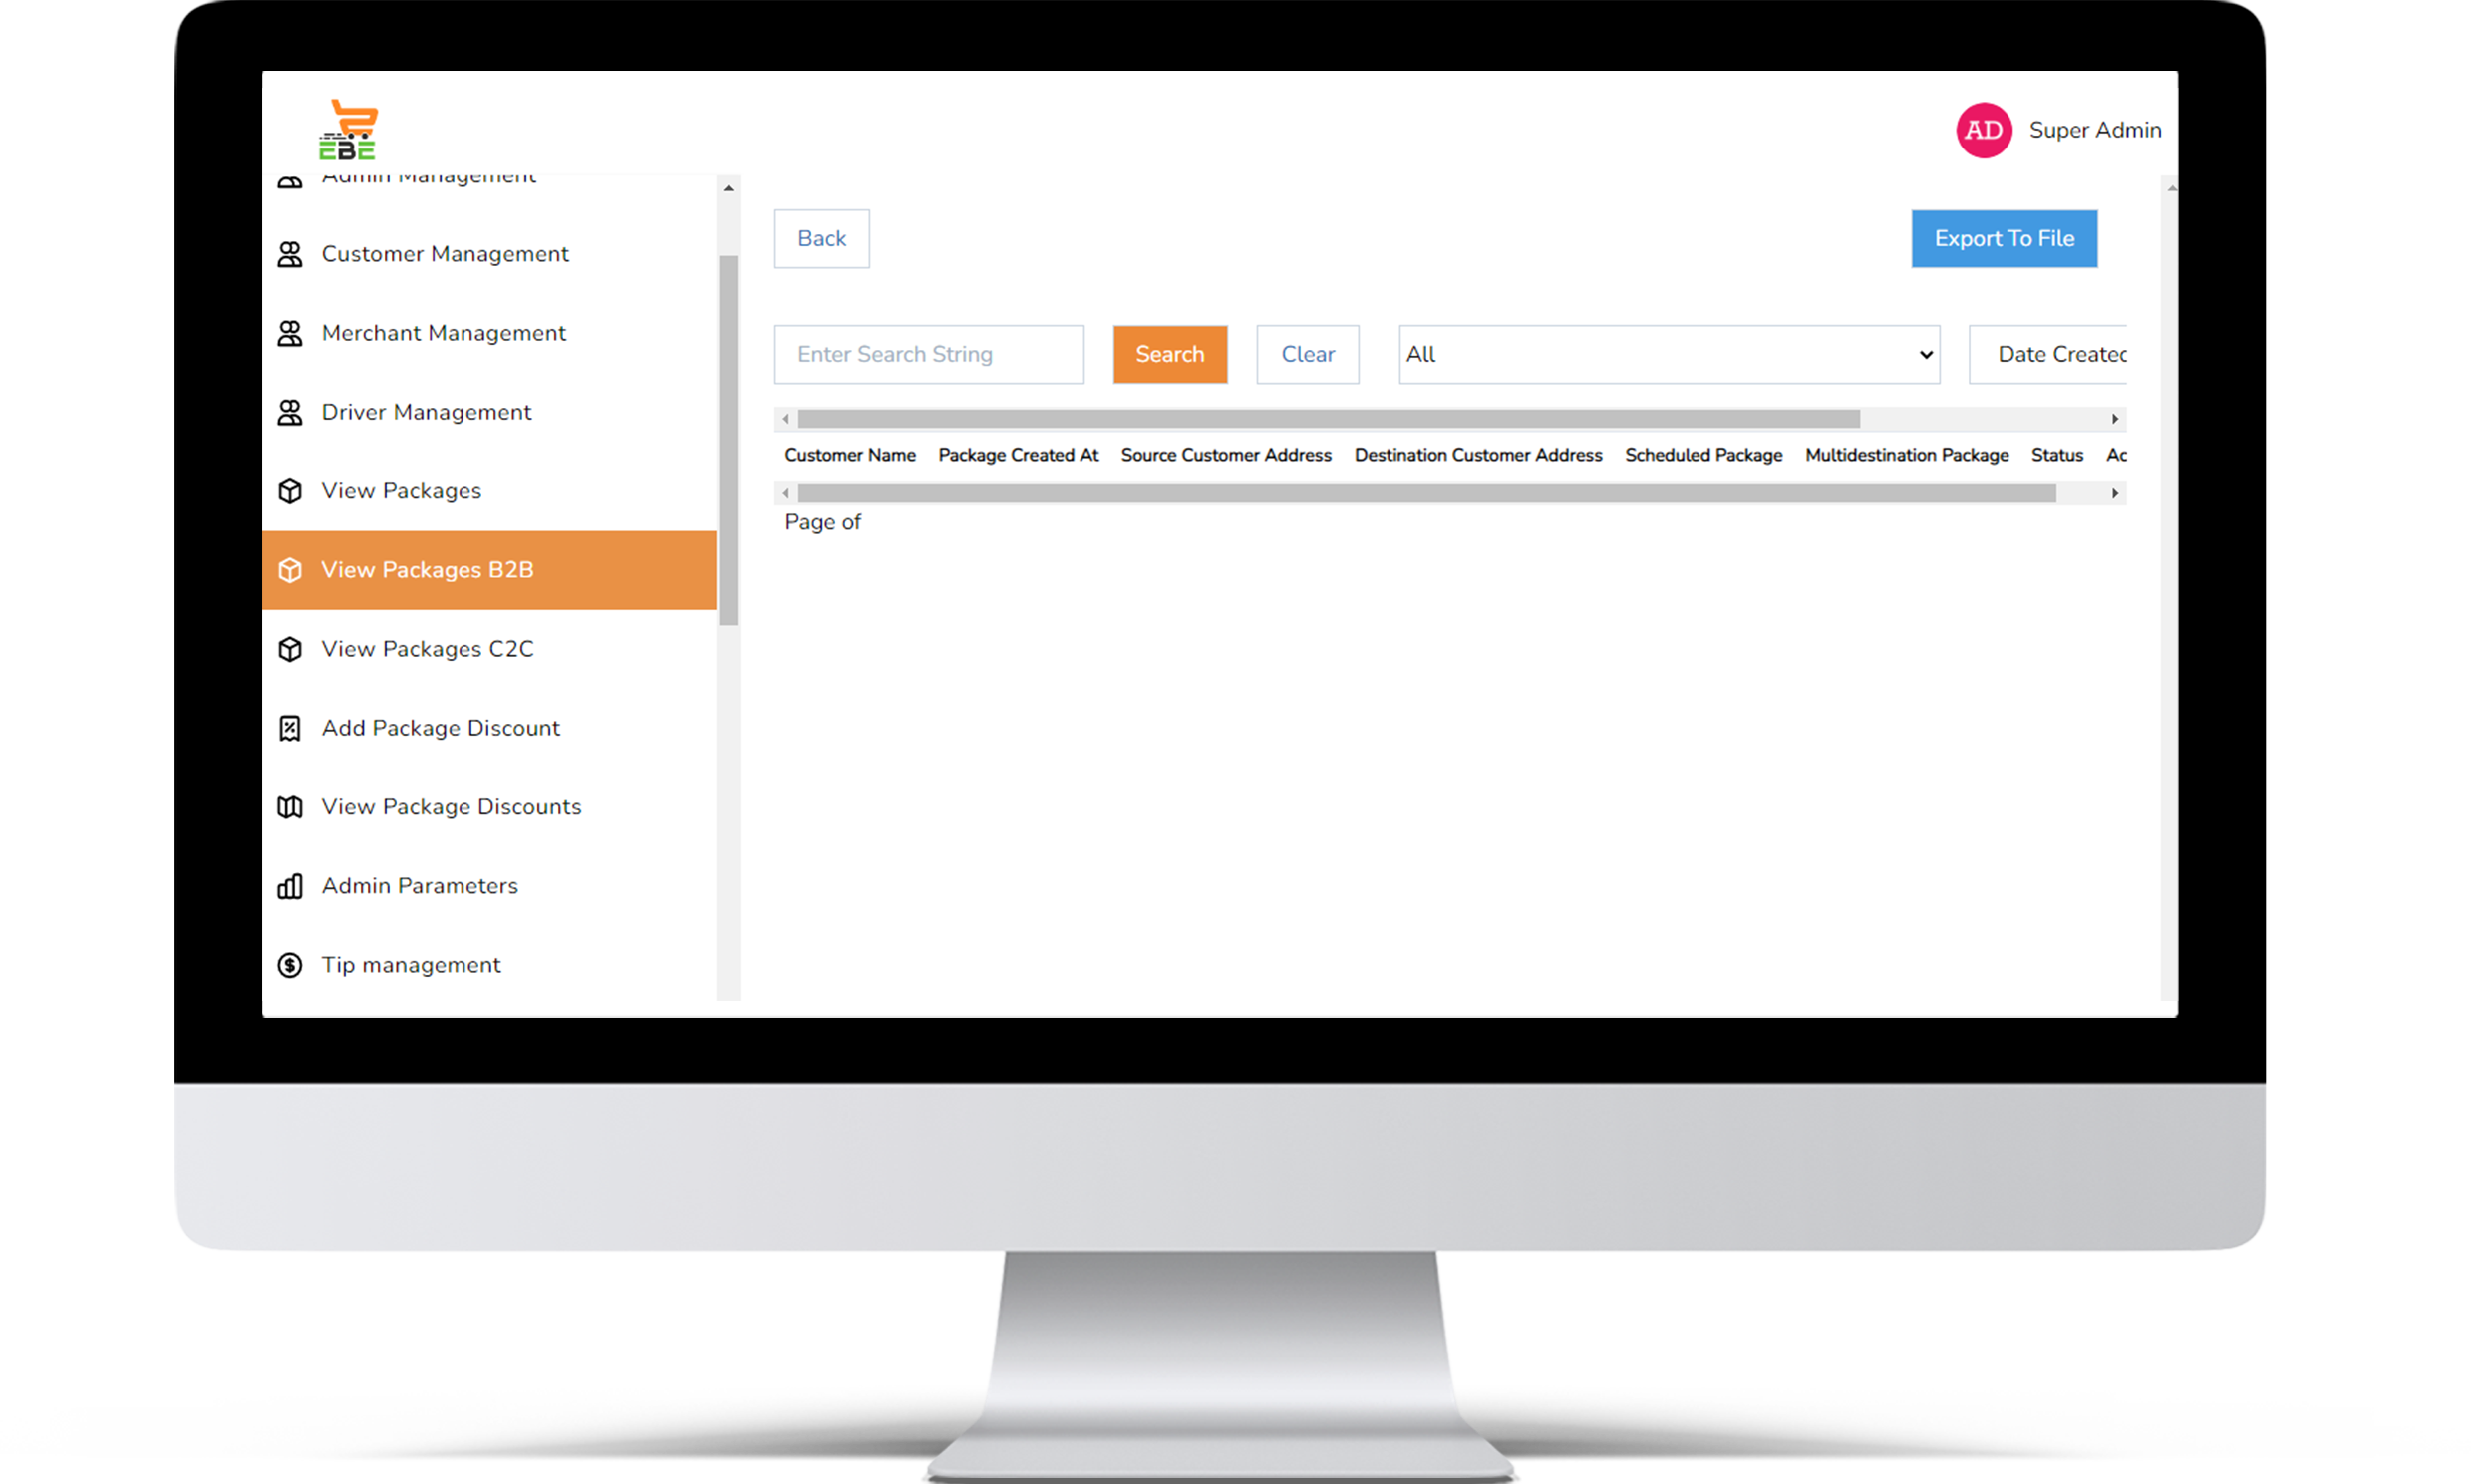
Filter Orders: Merchants can even select & apply filters & on the basis of that can see the orders. “All” is the default filter that would be selected & all the orders will display. If you want to select any particular order then select the filter according to that
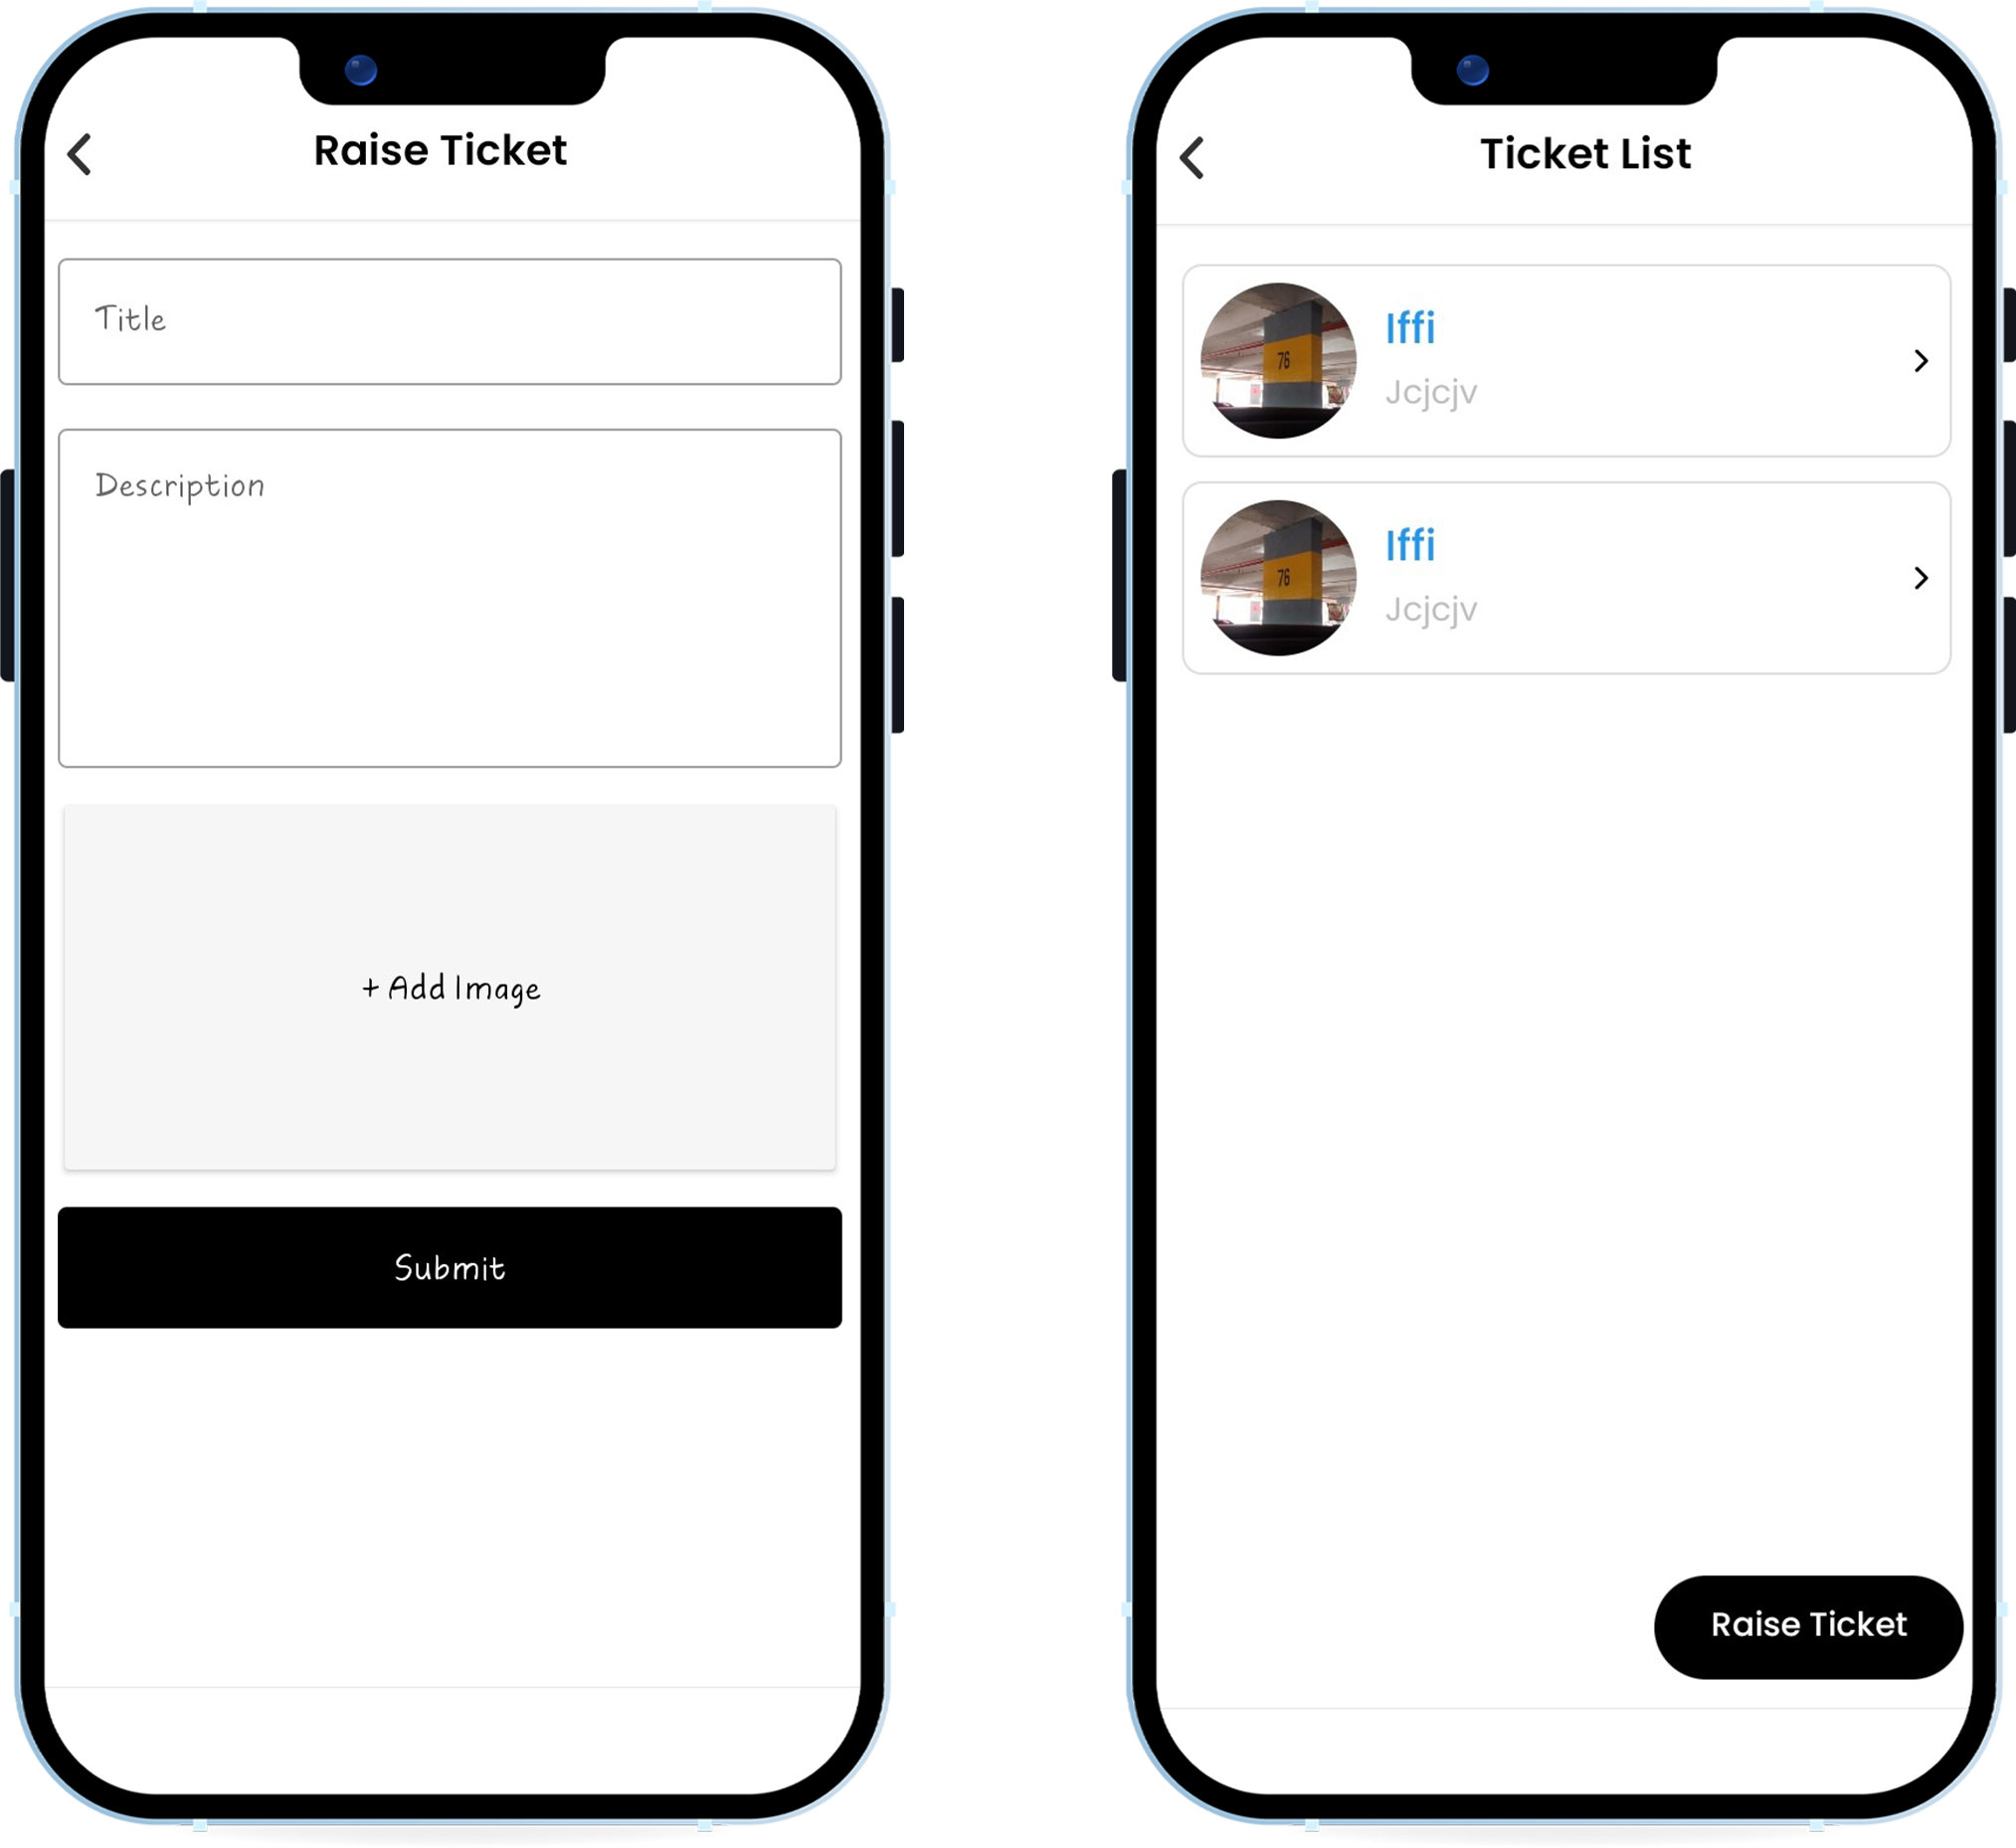
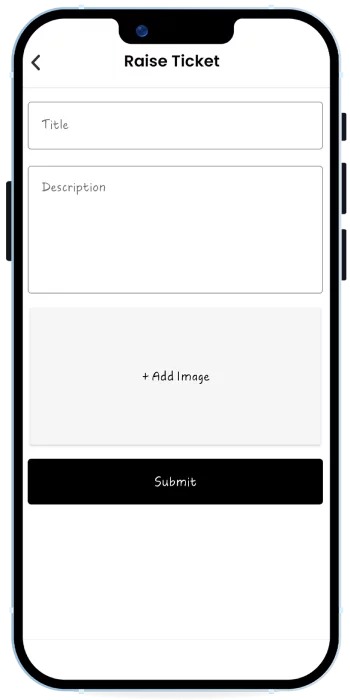
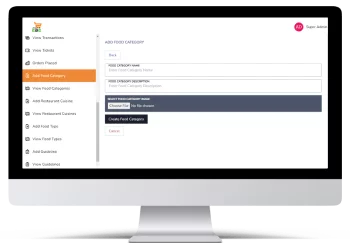
description & add imag-es.t
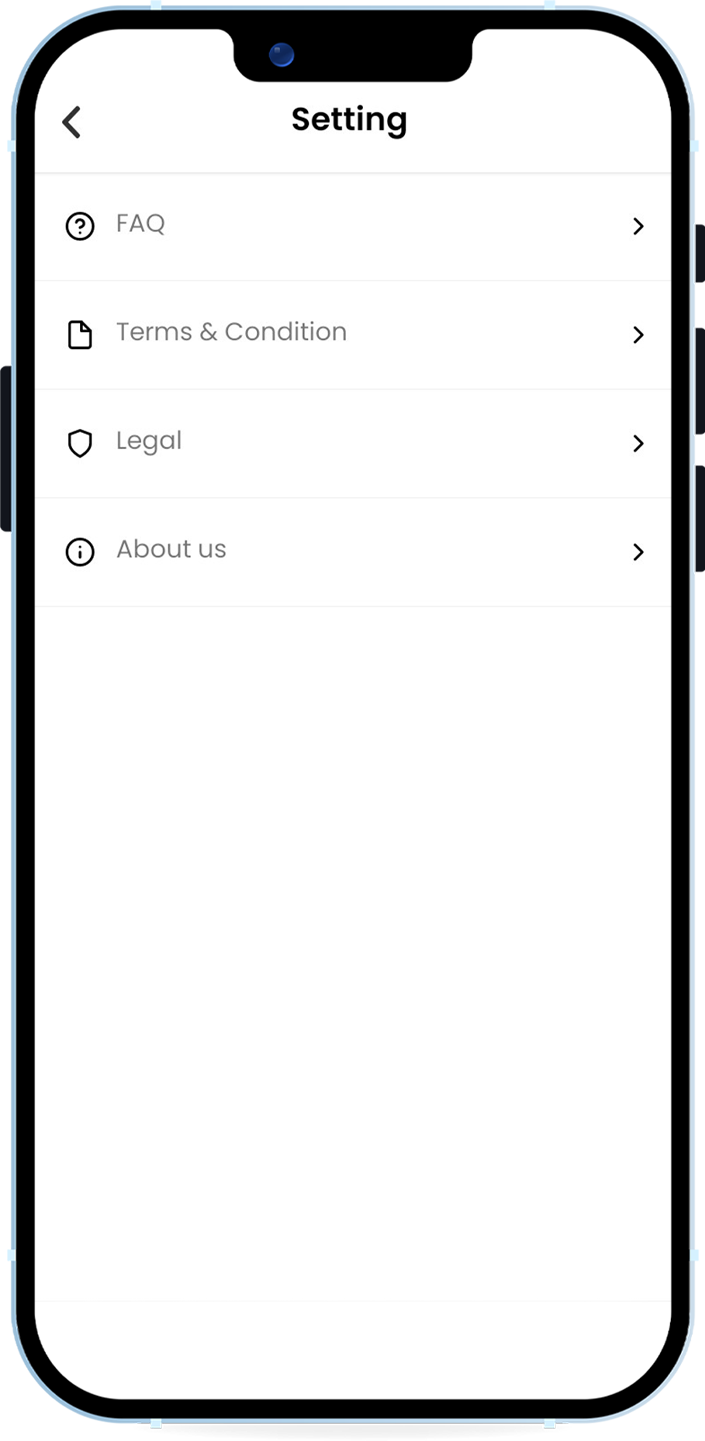
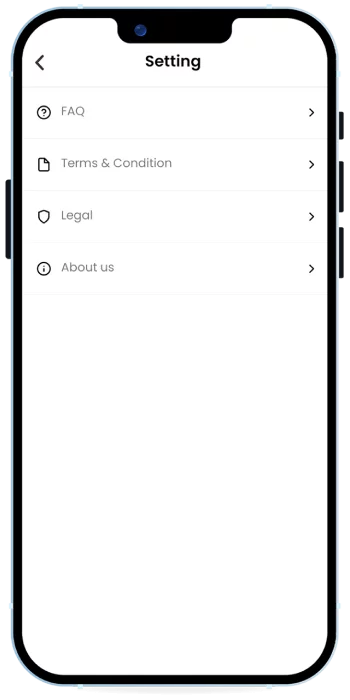
2. Terms & conditions – When we order food through the food delivery platforms, by simply clicking on “Place Order” option, we
enter into a contract with the Food Delivery Platforms. Through this article, we will learn about the various terms and conditions that a Food Delivery Platform should include in its Agreement.
3. About us – That is the briefest description for this app. The cus-tomer app helps the customer to access the online food ordering platforms, search for the right restaurant or the dish they want to order, place their orders and pay easily. There are many features you can implement in the app to make it easy and exciting to use.
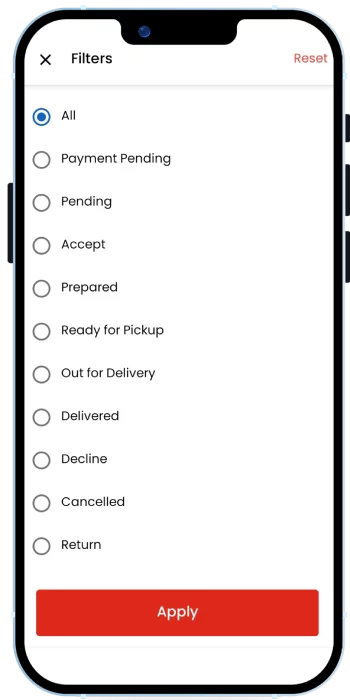
Filter Orders: Merchants can even select & apply filters & on the basis of that can see the orders. “All” is the default filter that would be selected & all the orders will display. If you want to select any particular order then select the filter according to that
description & add imag-es.t
2. Terms & conditions – When we order food through the food delivery platforms, by simply clicking on “Place Order” option, we
enter into a contract with the Food Delivery Platforms. Through this article, we will learn about the various terms and conditions that a Food Delivery Platform should include in its Agreement.
3. About us – That is the briefest description for this app. The cus-tomer app helps the customer to access the online food ordering platforms, search for the right restaurant or the dish they want to order, place their orders and pay easily. There are many features you can implement in the app to make it easy and exciting to use.
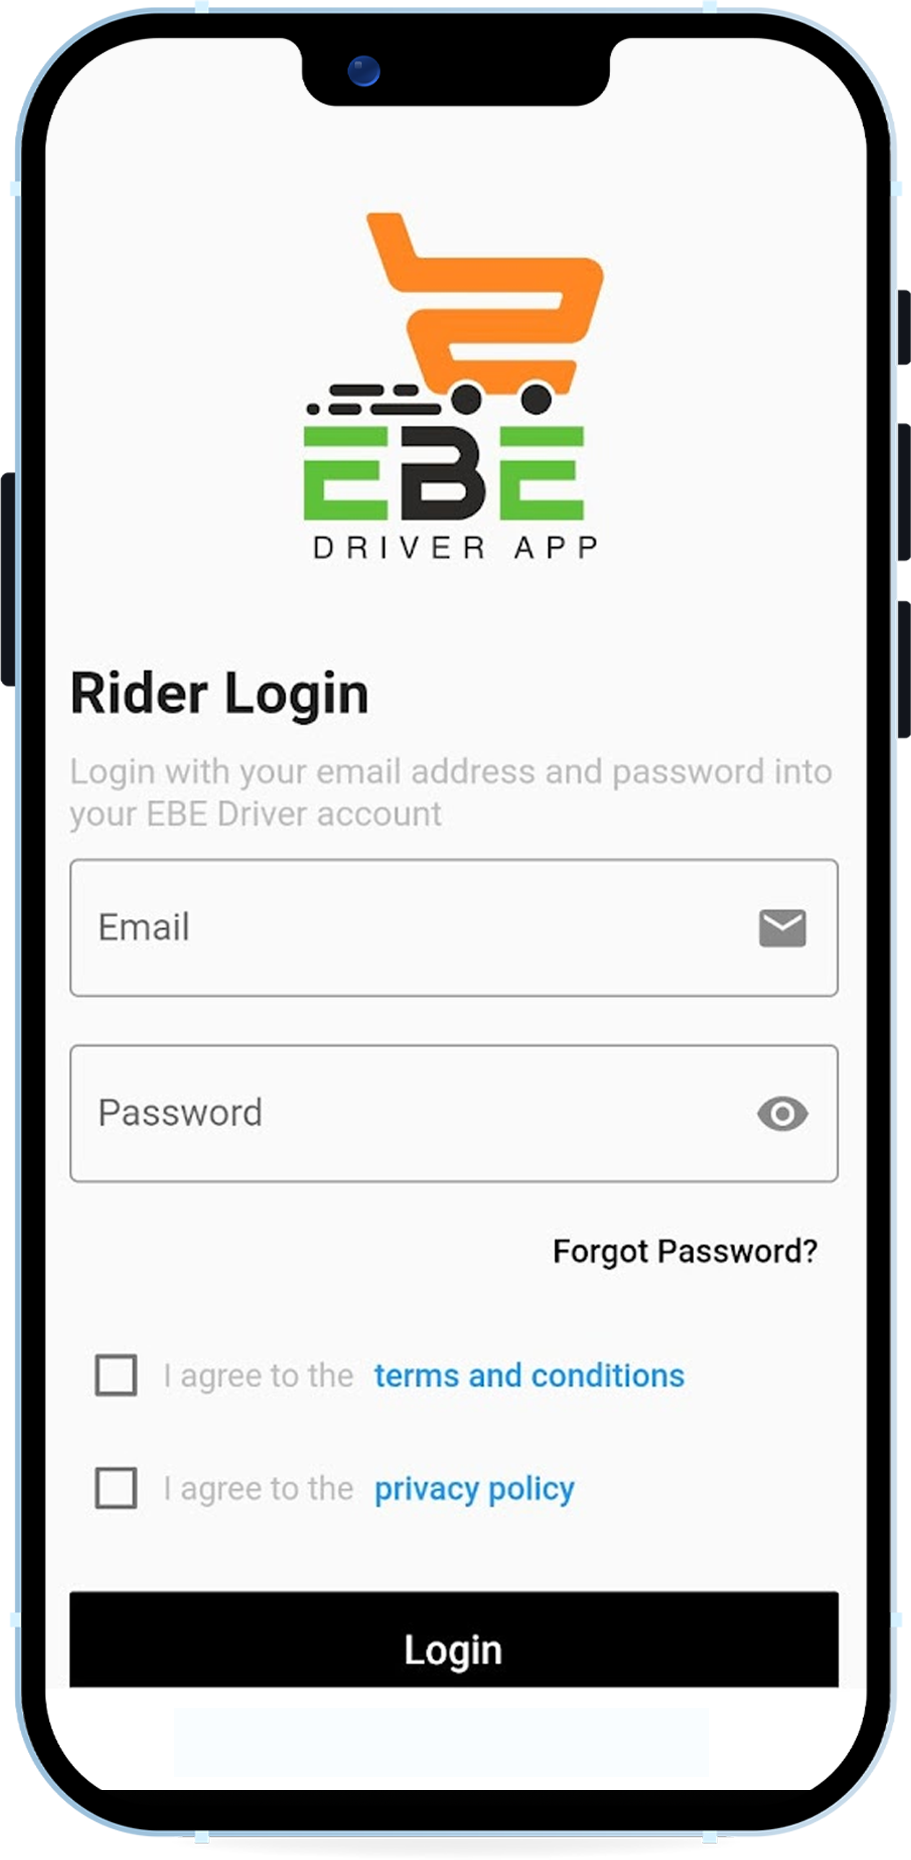
Driver Module

-Email ID
-Password
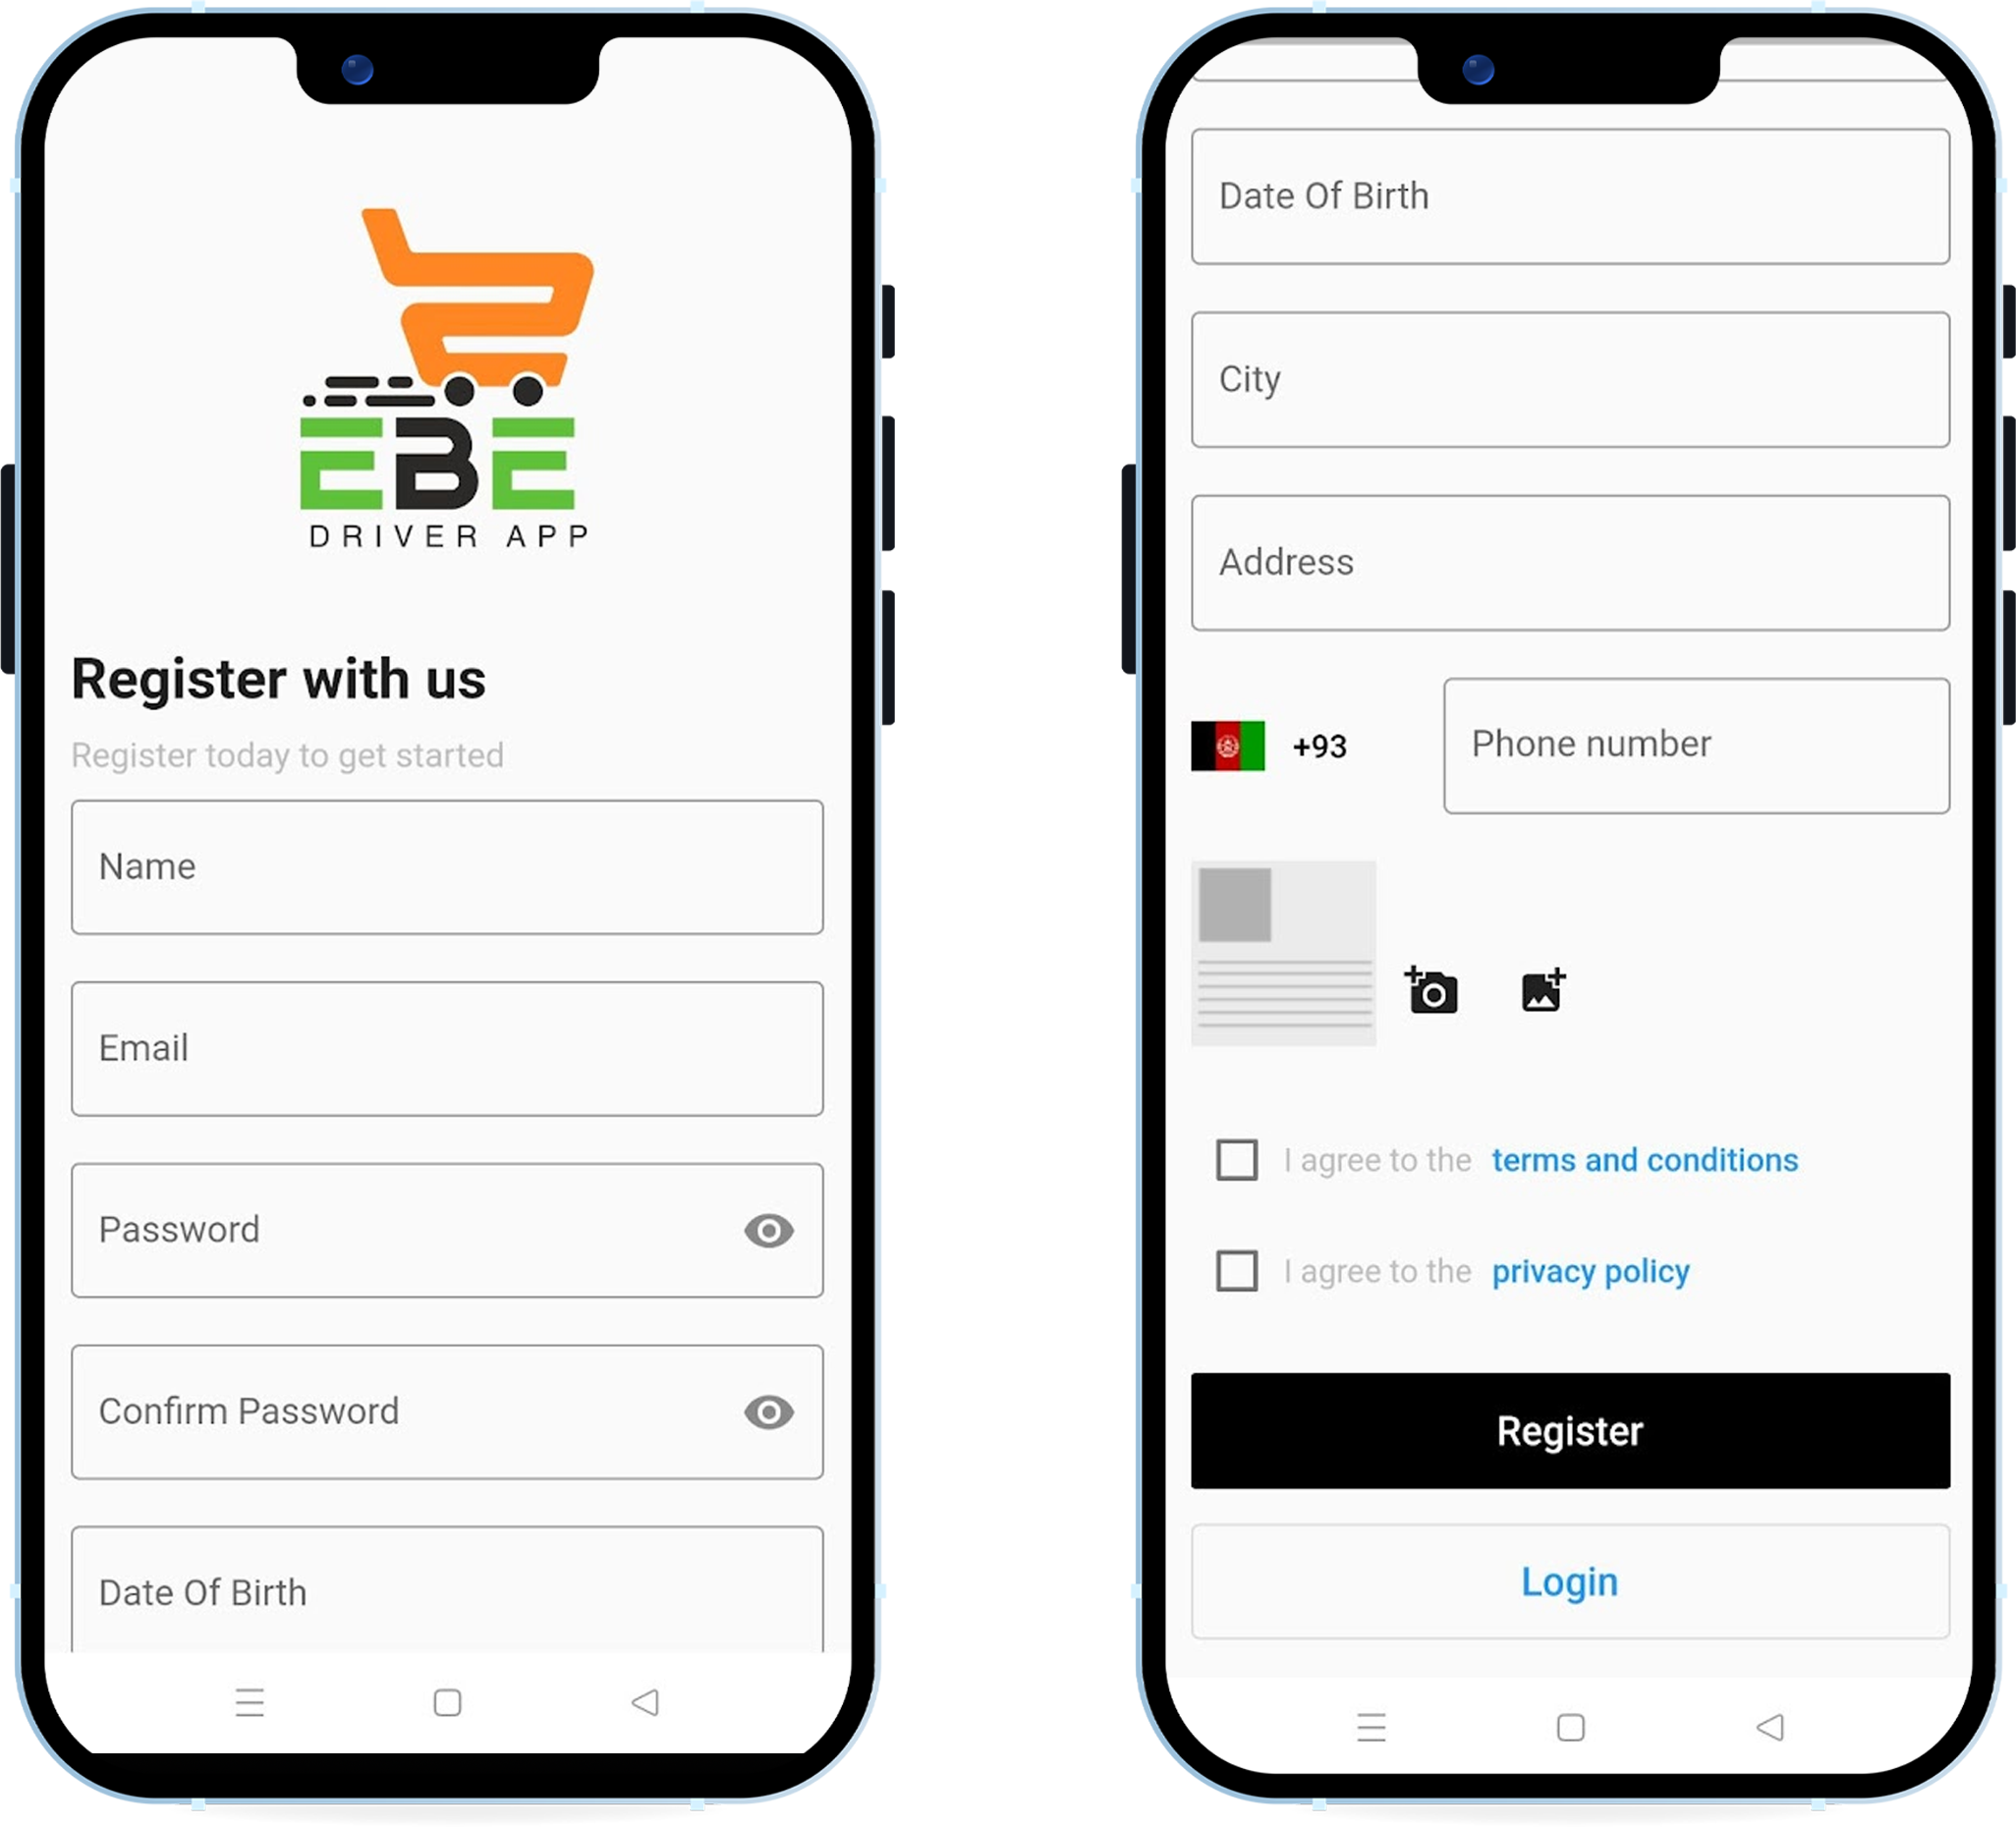
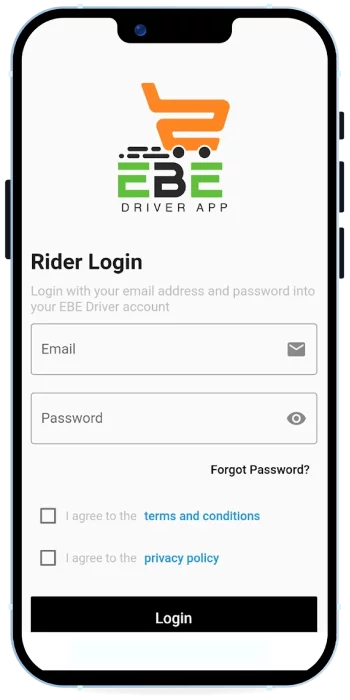
Then click on Login button. The driver’s entered credential – Email address/Username, Pass- word is valid and correct or not. User will not get access to the re-stricted page until he/she entered a valid email and password. If the driver is a new user for the app, he will click on Create account button & fill the form for further veri-fication process. Social login, also known as social sign-in, uses information from social networking sites to facilitate logins on third-party applications and platforms. The process is de-signed to simplify sign-in and regis-tration experiences, providing a convenient alternative to mandato-ry account creation.
1. Name
2. Email address
3. Contact number with country code
4. Date of birth
5. Password
6. Confirm password
Then click on Register button.
DRIVER MODULE

-Email ID
-Password
Then click on Login button. The driver’s entered credential – Email address/Username, Pass- word is valid and correct or not. User will not get access to the re-stricted page until he/she entered a valid email and password. If the driver is a new user for the app, he will click on Create account button & fill the form for further veri-fication process. Social login, also known as social sign-in, uses information from social networking sites to facilitate logins on third-party applications and platforms. The process is de-signed to simplify sign-in and regis-tration experiences, providing a convenient alternative to mandato-ry account creation.
1. Name
2. Email address
3. Contact number with country code
4. Date of birth
5. Password
6. Confirm password
Then click on Register button.
preferences. Here, when we will on the toggle switch then we will consider online & all types of orders which needs to be deliv-ered & data will display. When we will off the toggle button then we will consider offline & nothing will display on the screen.
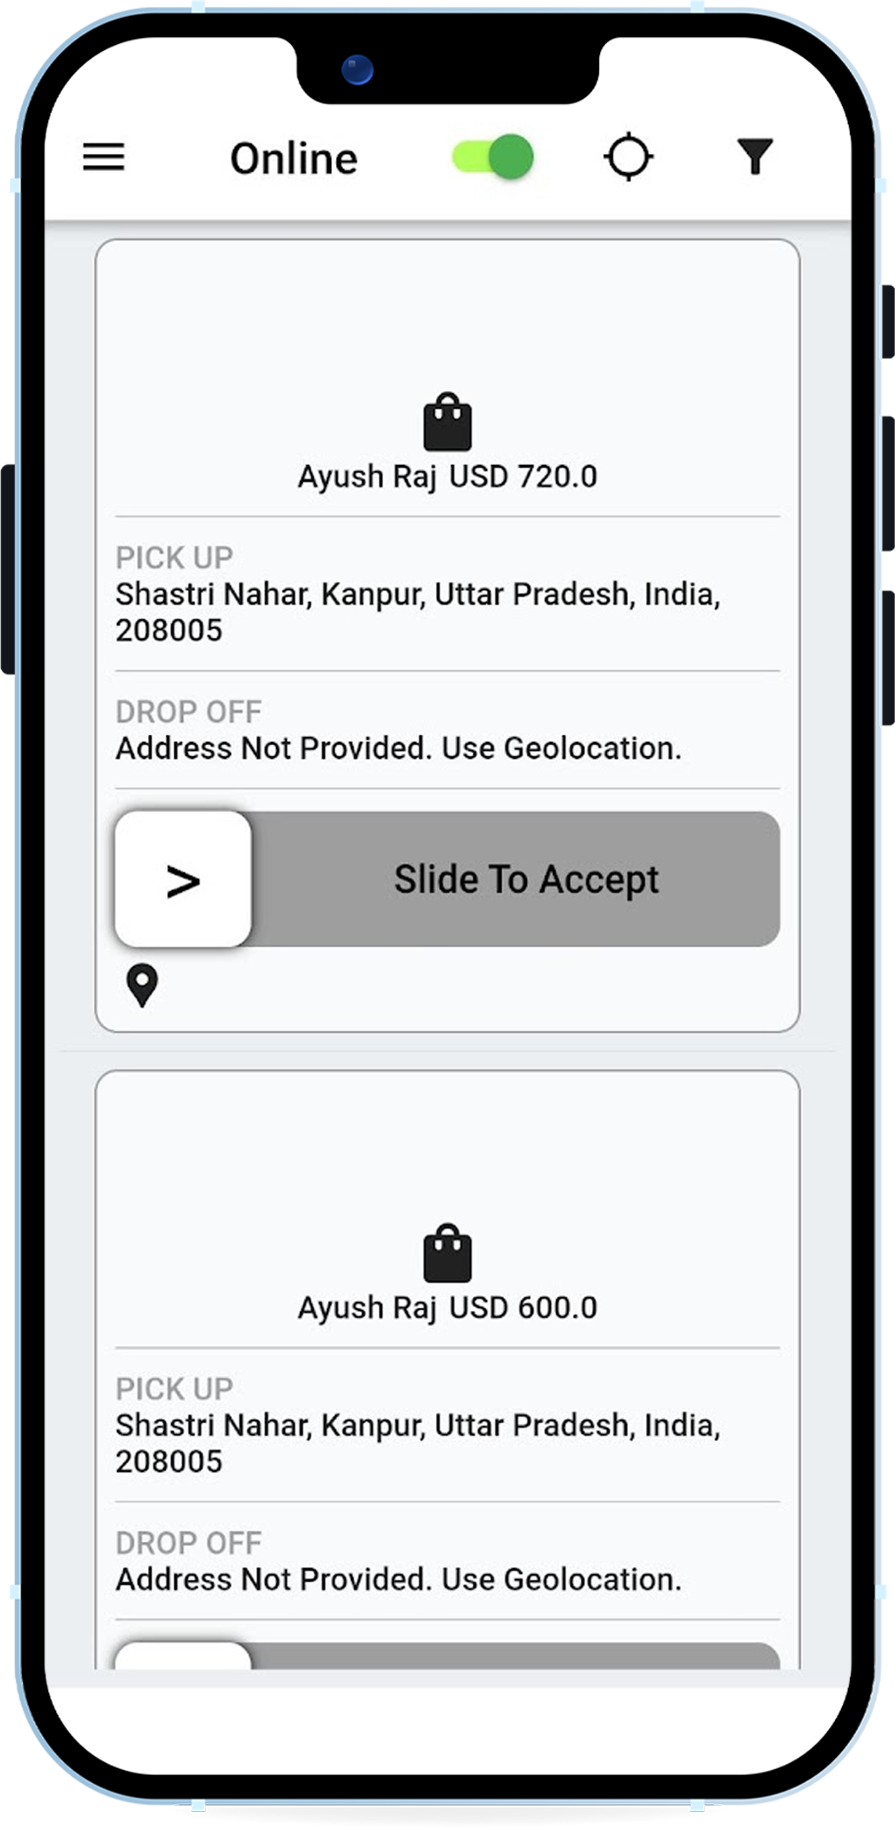


preferences. Here, when we will on the toggle switch then we will consider online & all types of orders which needs to be deliv-ered & data will display. When we will off the toggle button then we will consider offline & nothing will display on the screen.
preferences. Here, when we will on the toggle switch then we will consider online & all types of orders which needs to be deliv-ered & data will display. When we will off the toggle button then we will consider offline & nothing will display on the screen.
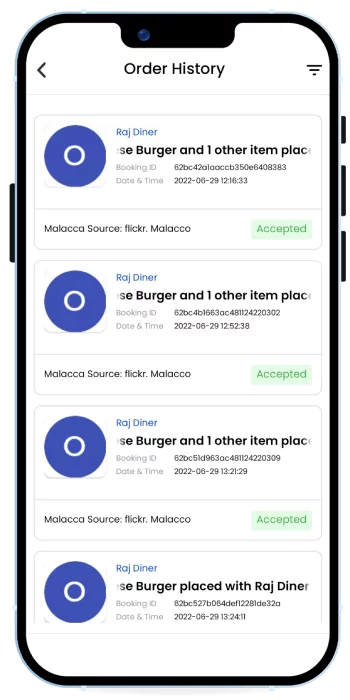
pleted, cancelled, return etc.
pleted, cancelled, return etc.
pleted, cancelled, return etc.
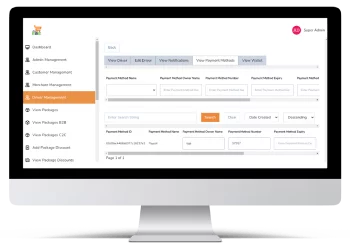
SUPER ADMIN PANEL MODULE
– Email ID
– Password
Then click on the Login button.
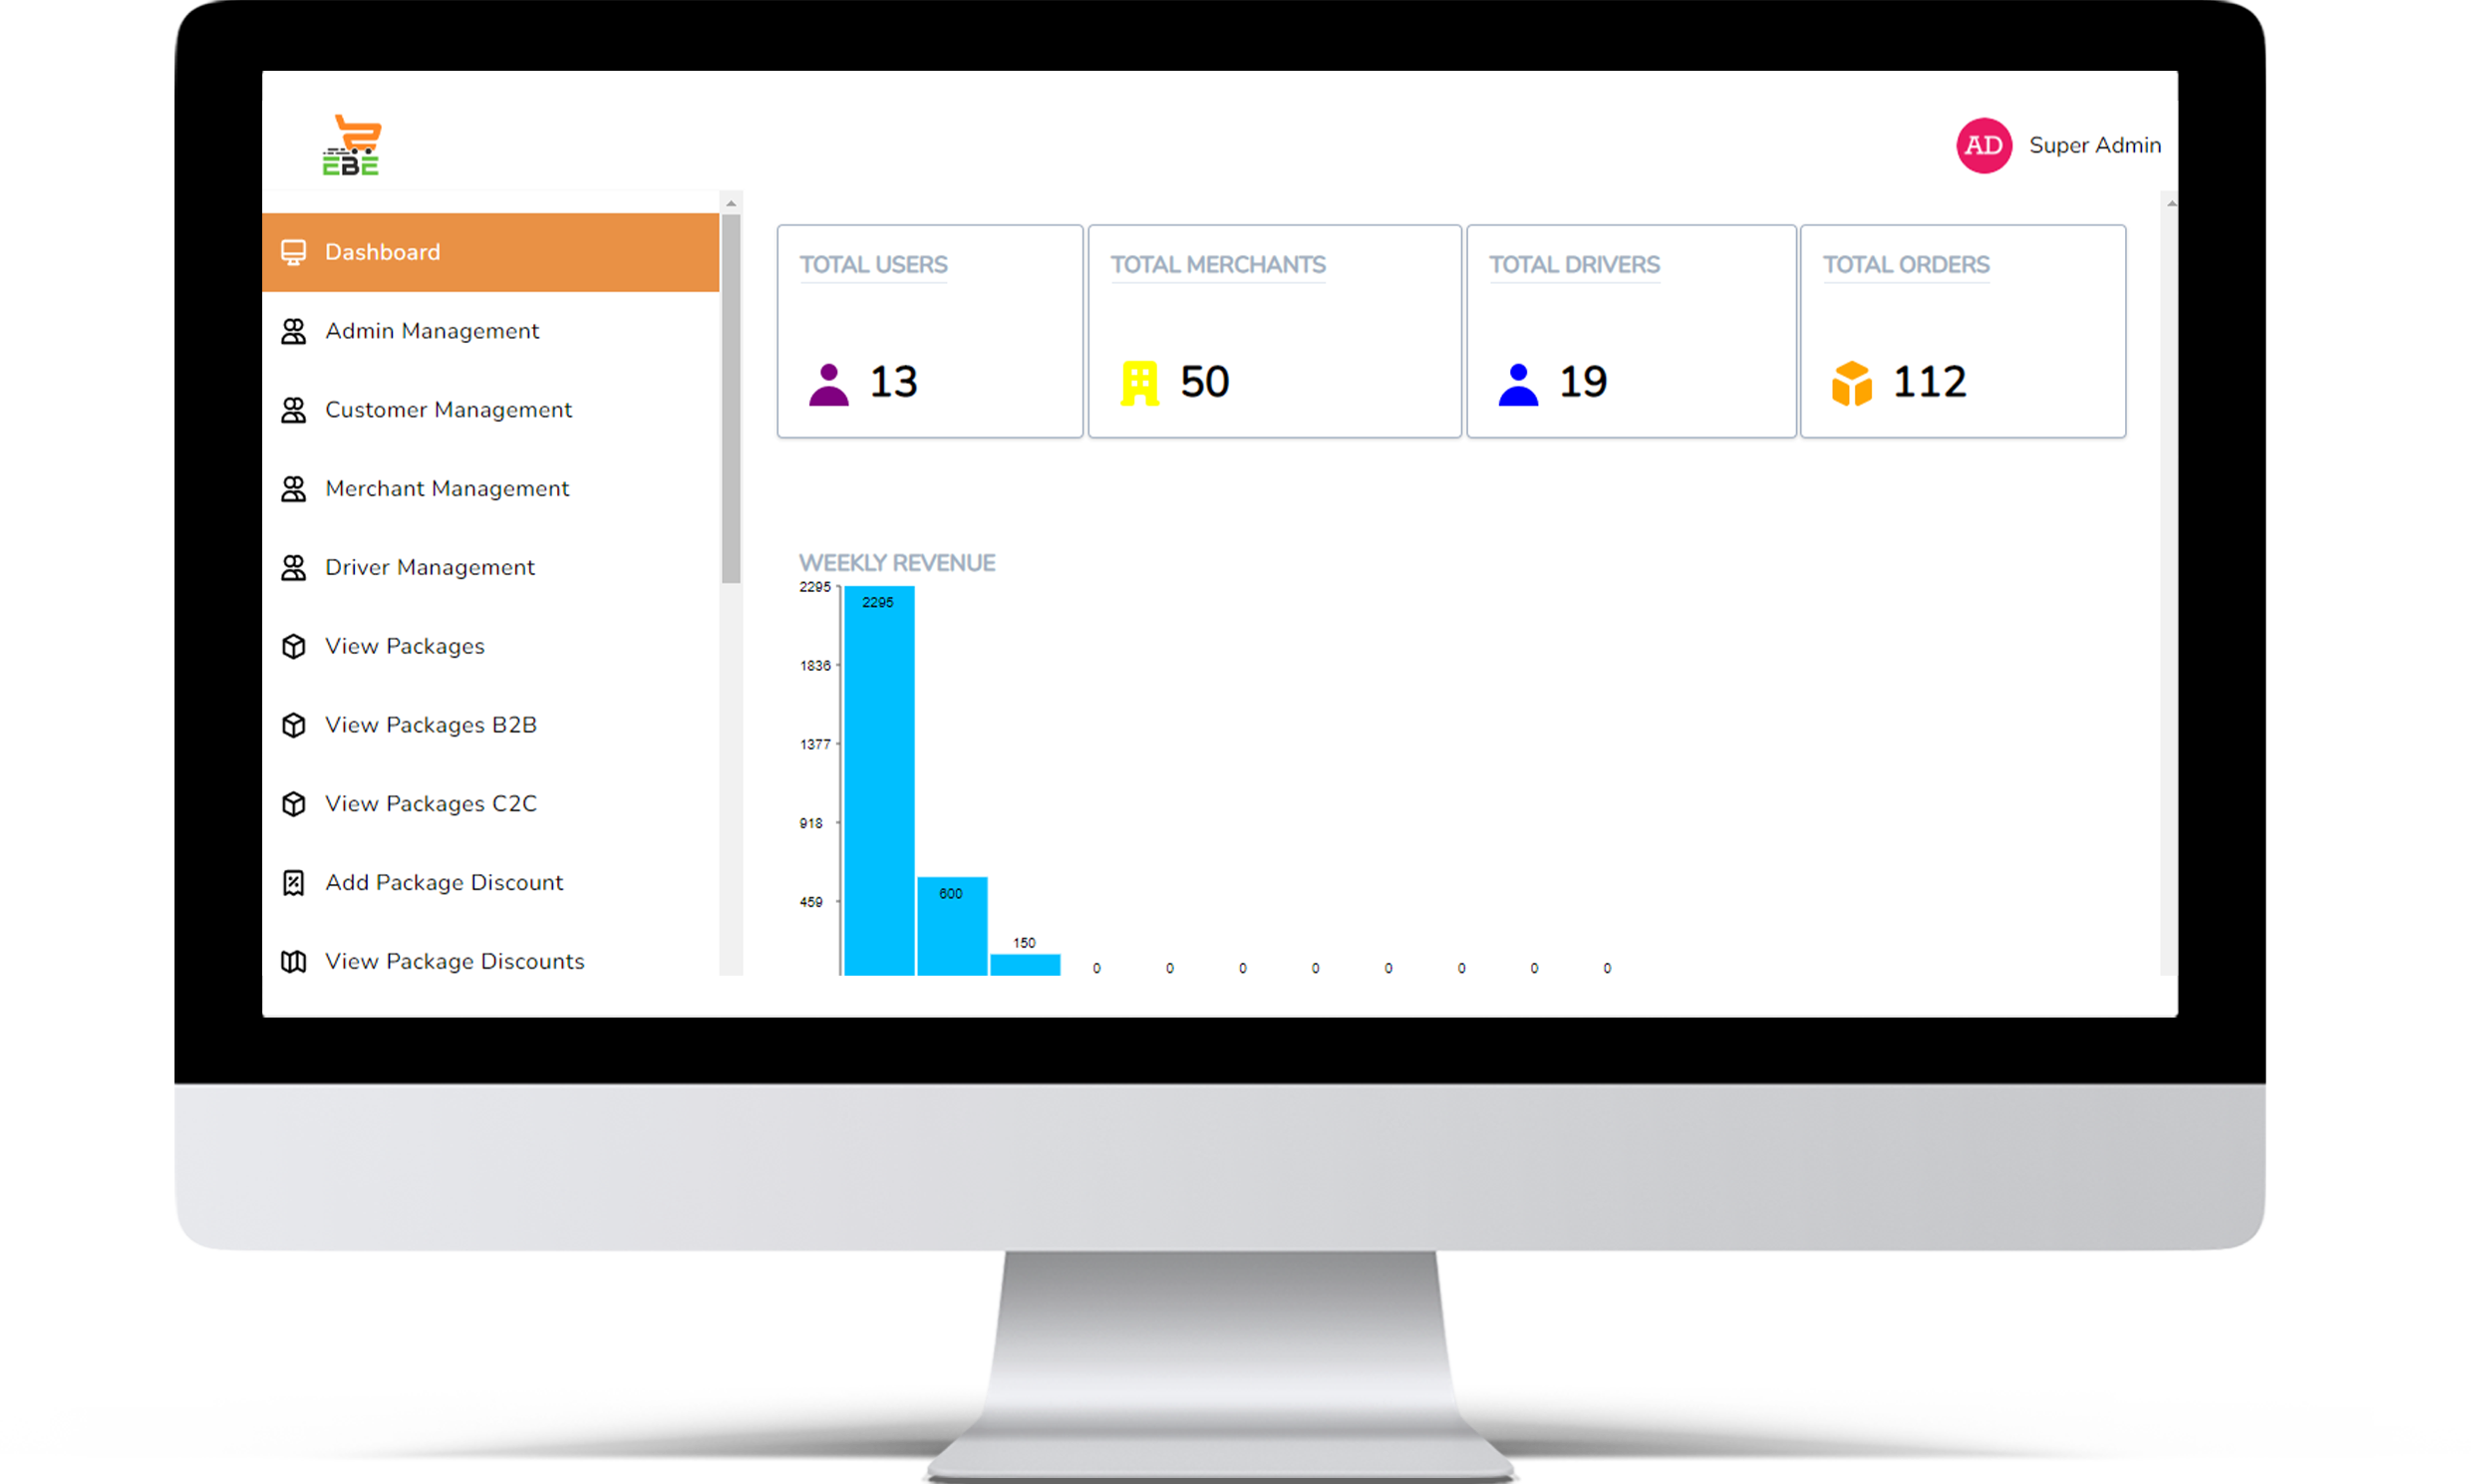
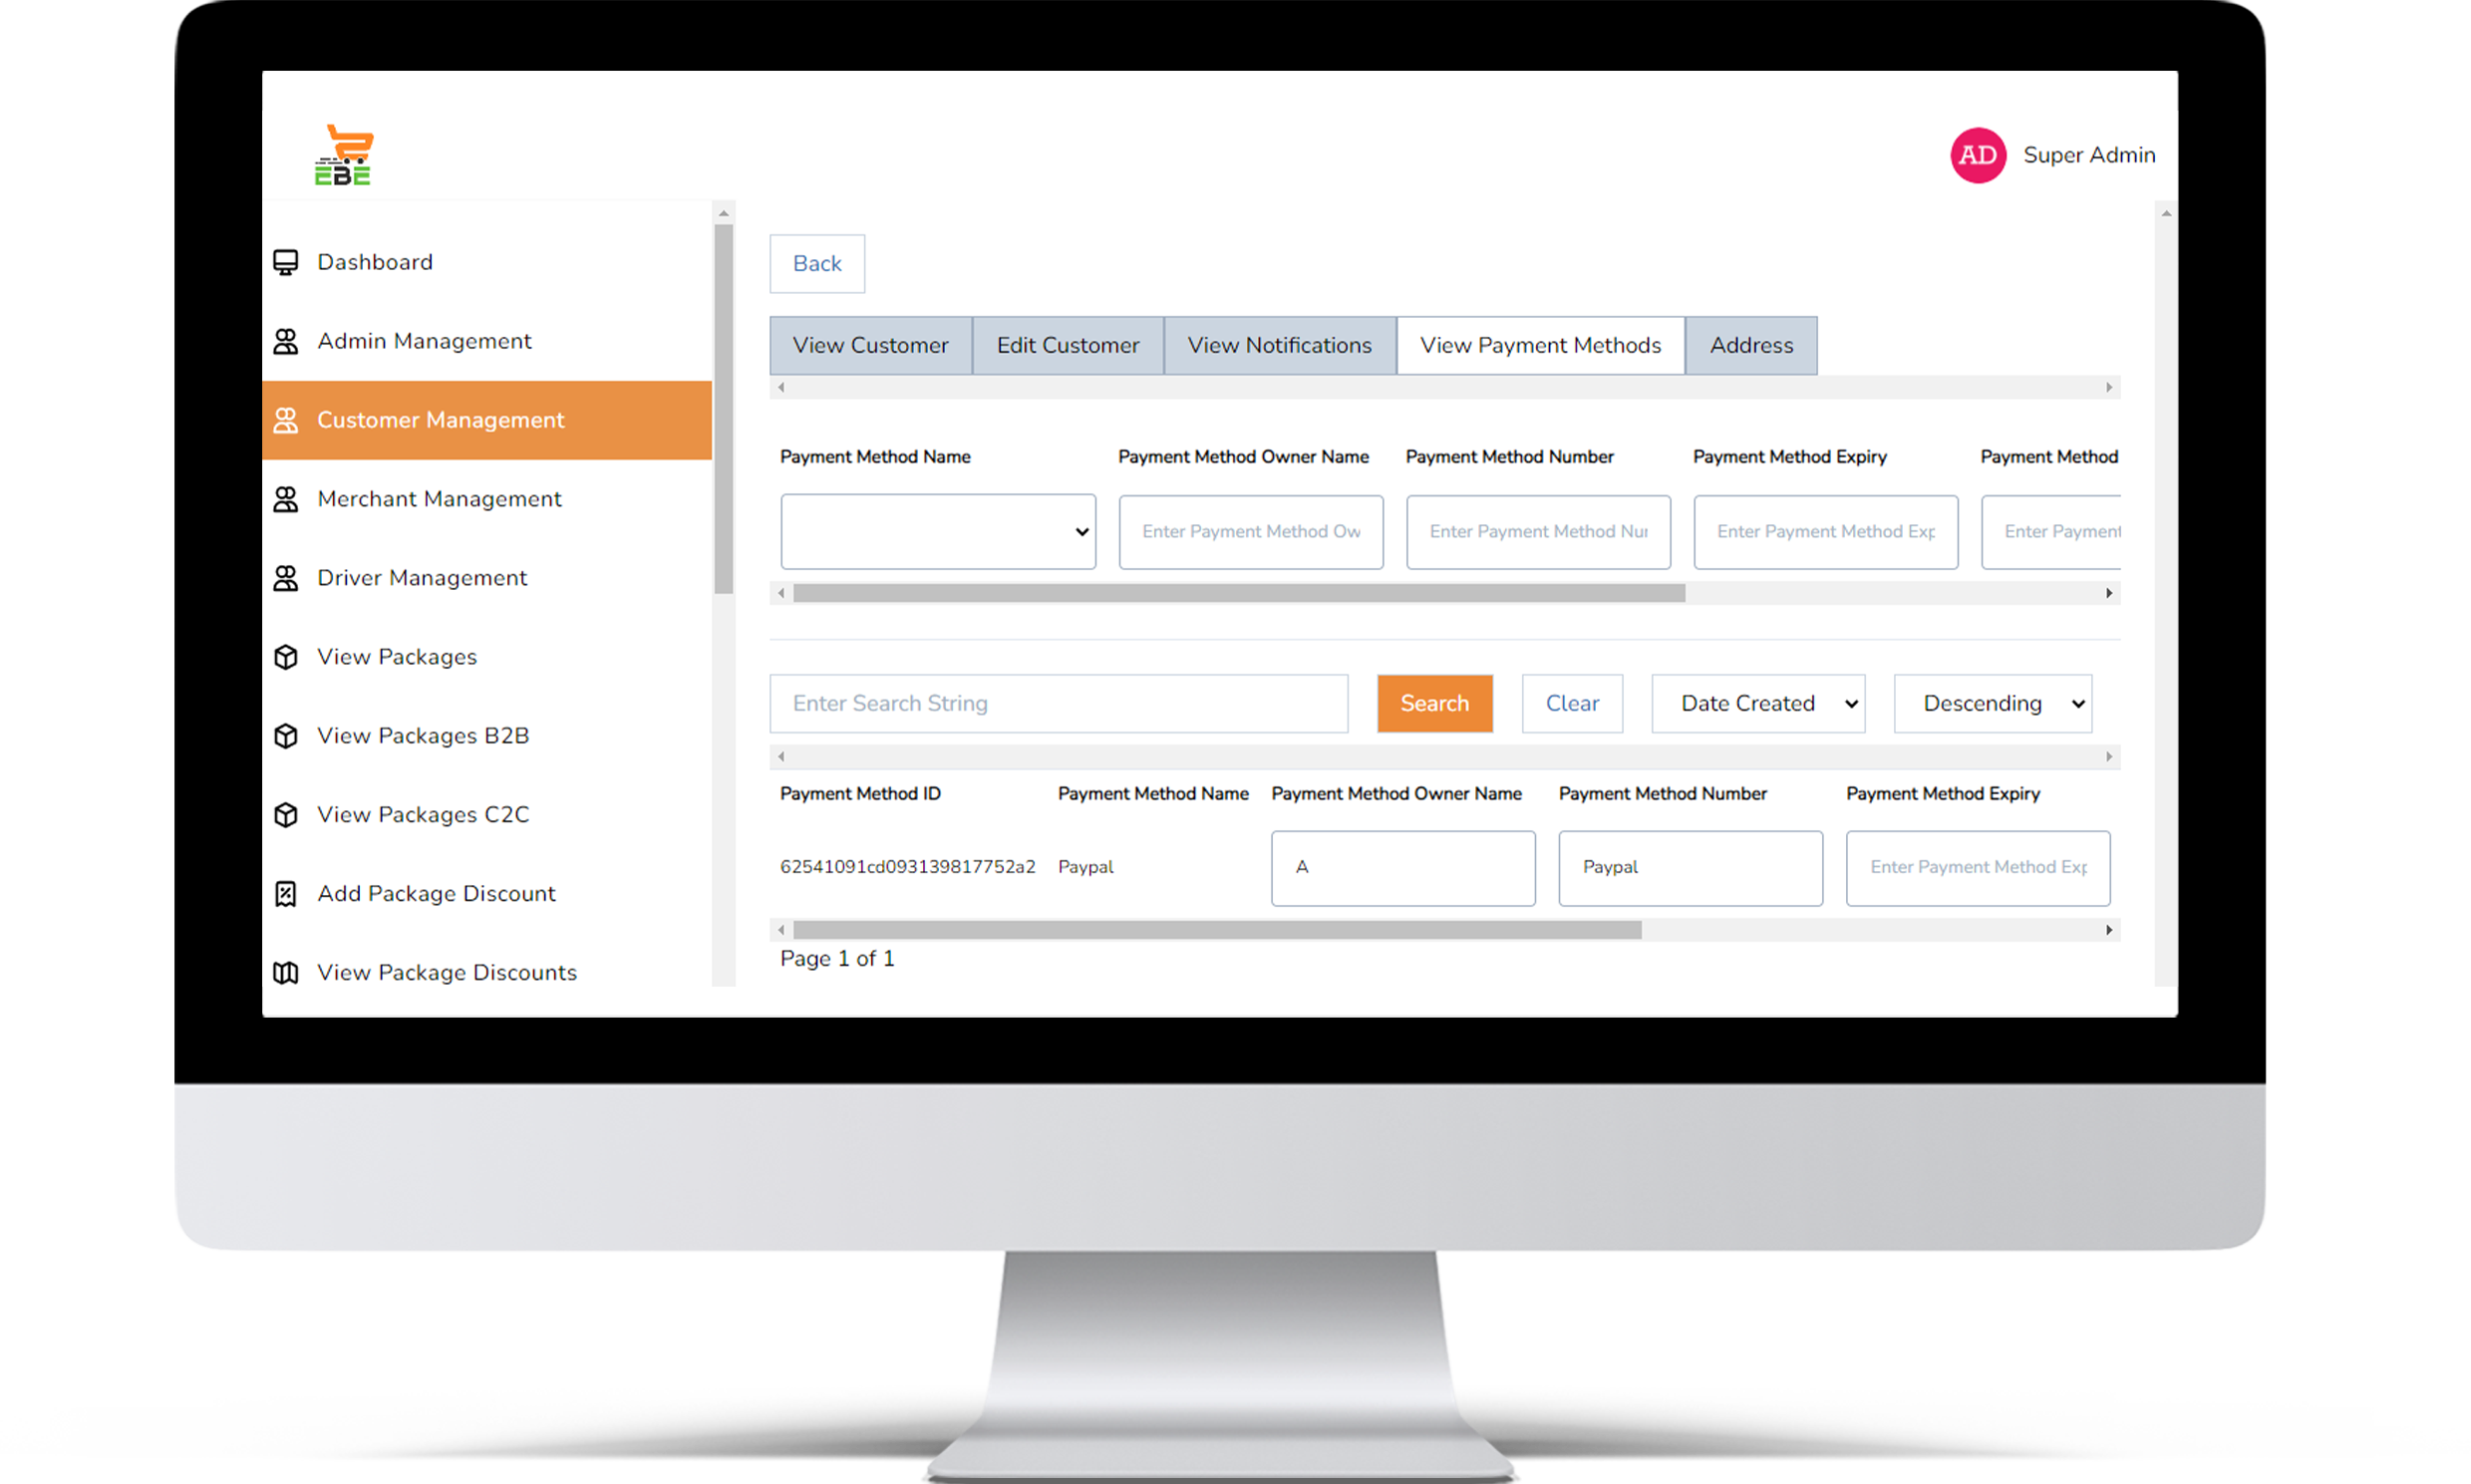
In the dashboard, the admin can view total users, total merchants,total drivers & total orders
SUPER ADMIN PANEL MODULE
– Email ID
– Password
Then click on the Login button.
In the dashboard, the admin can view total users, total merchants,total drivers & total orders
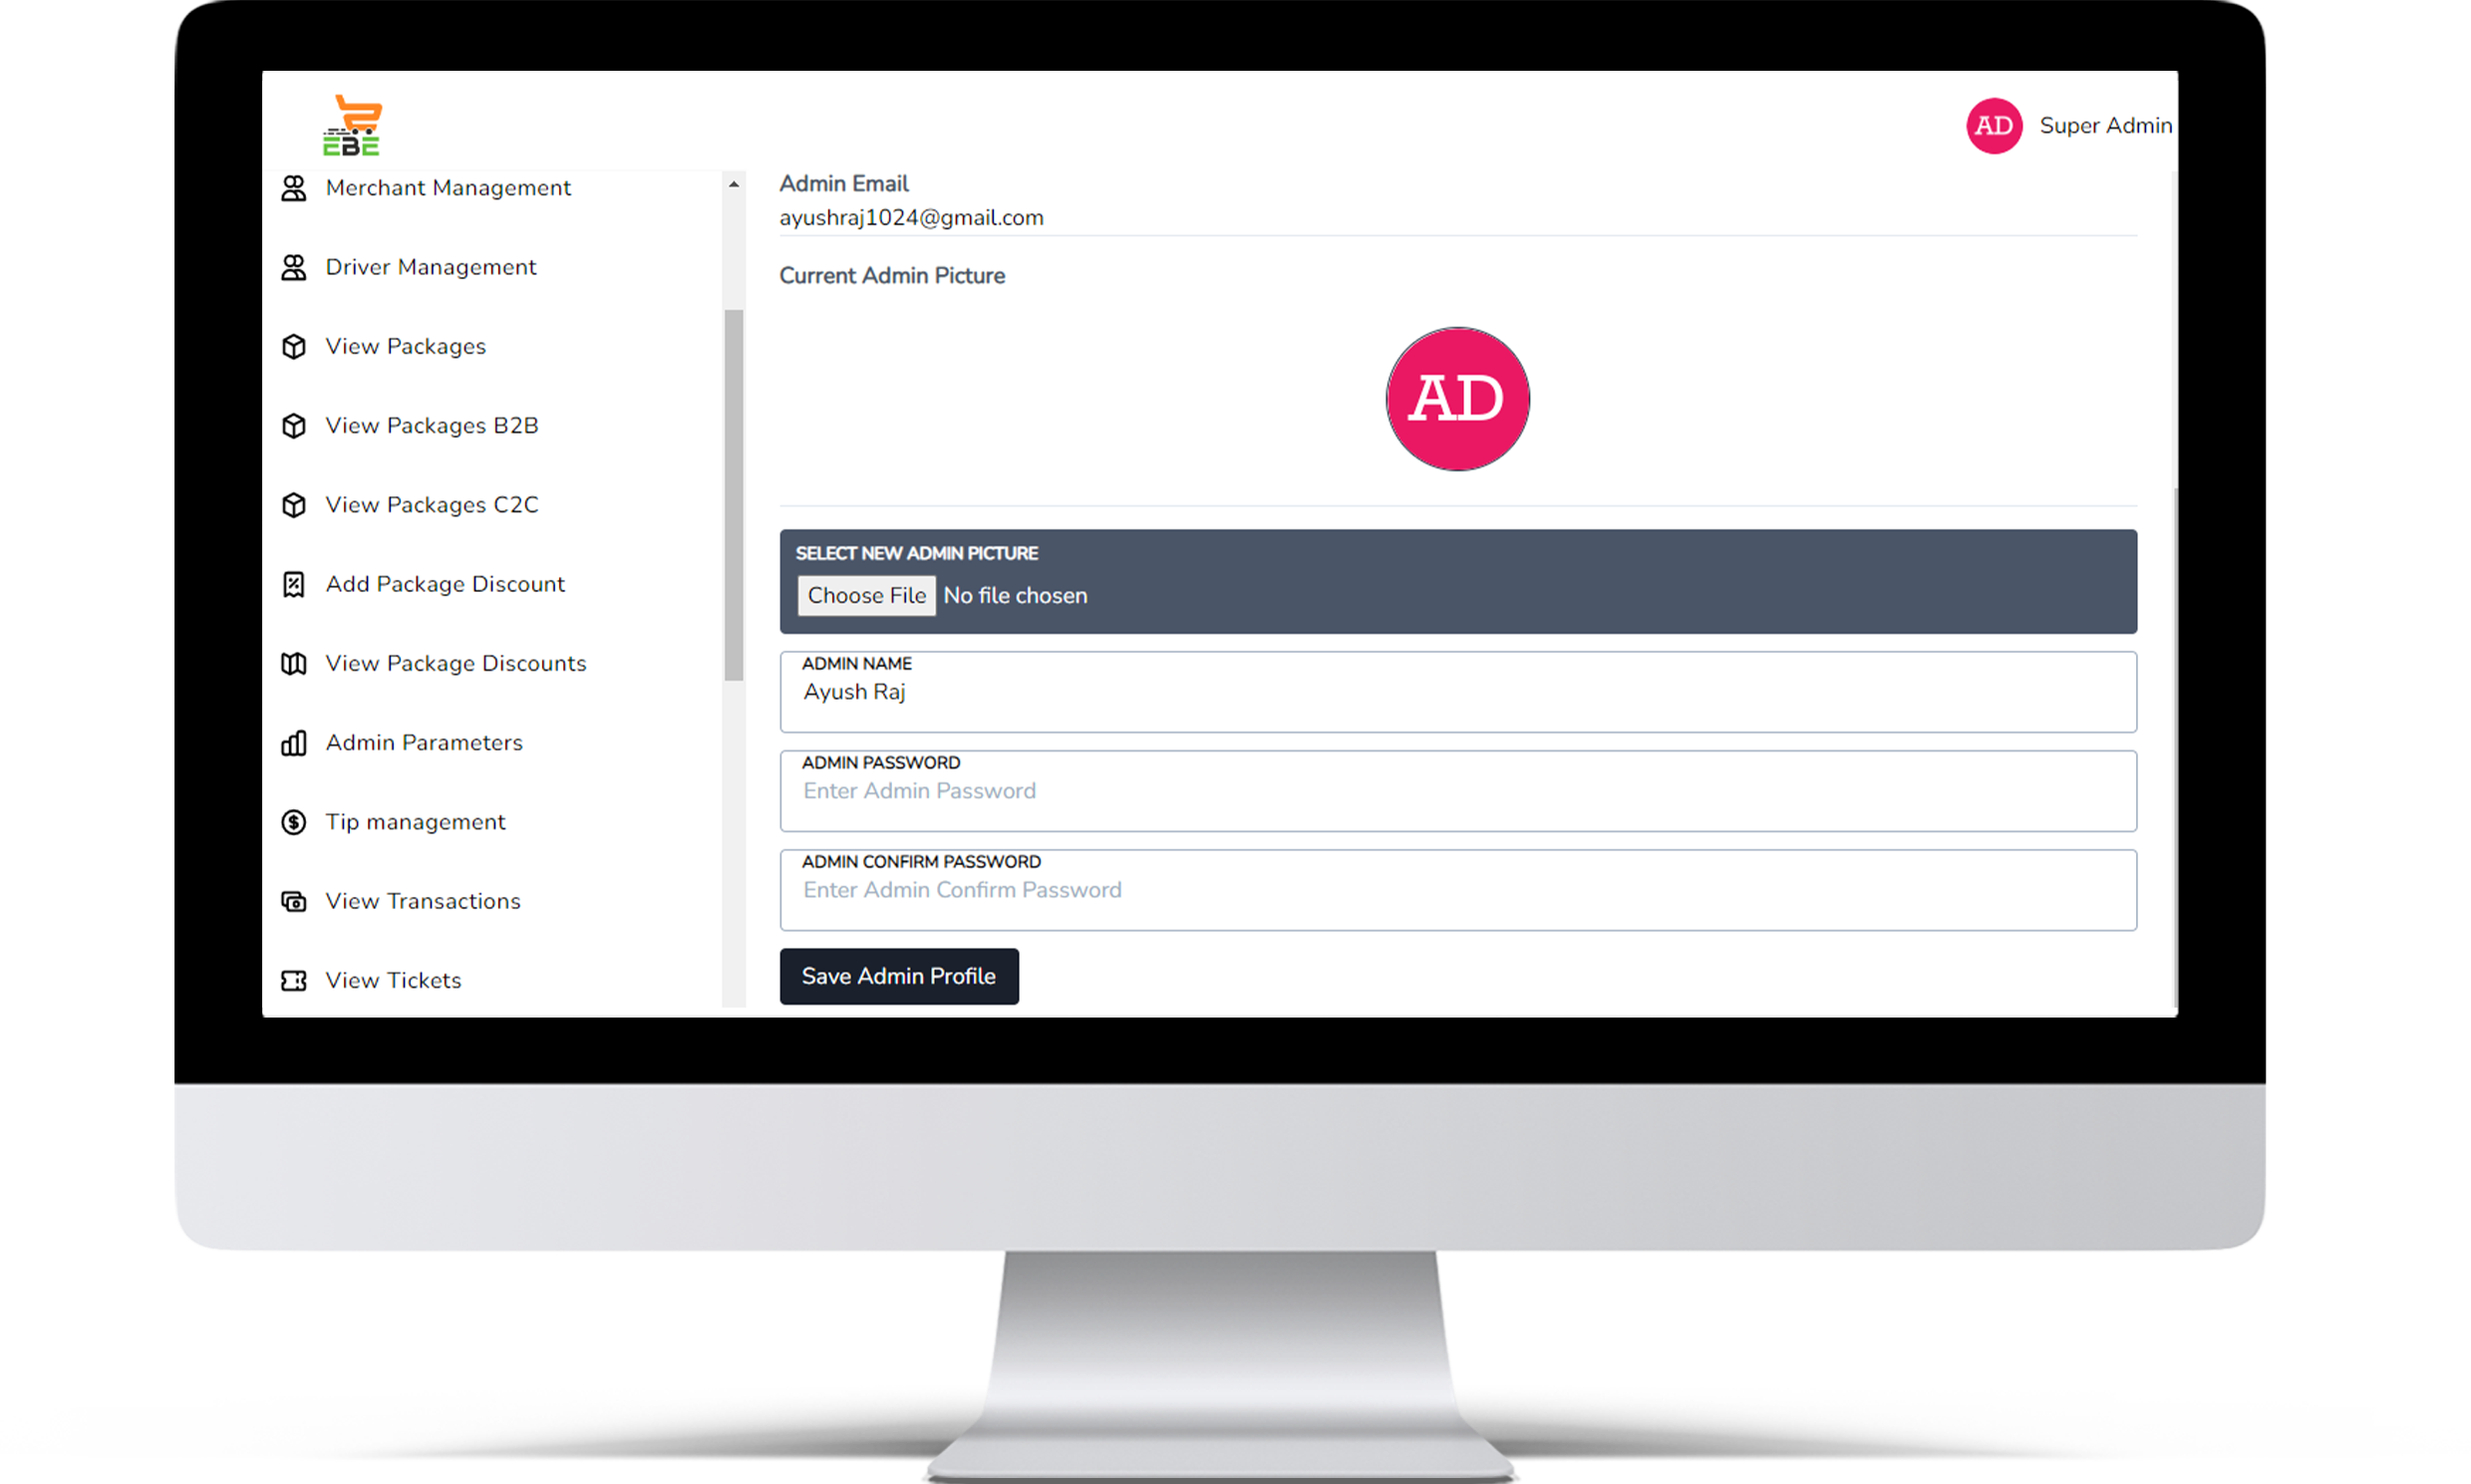
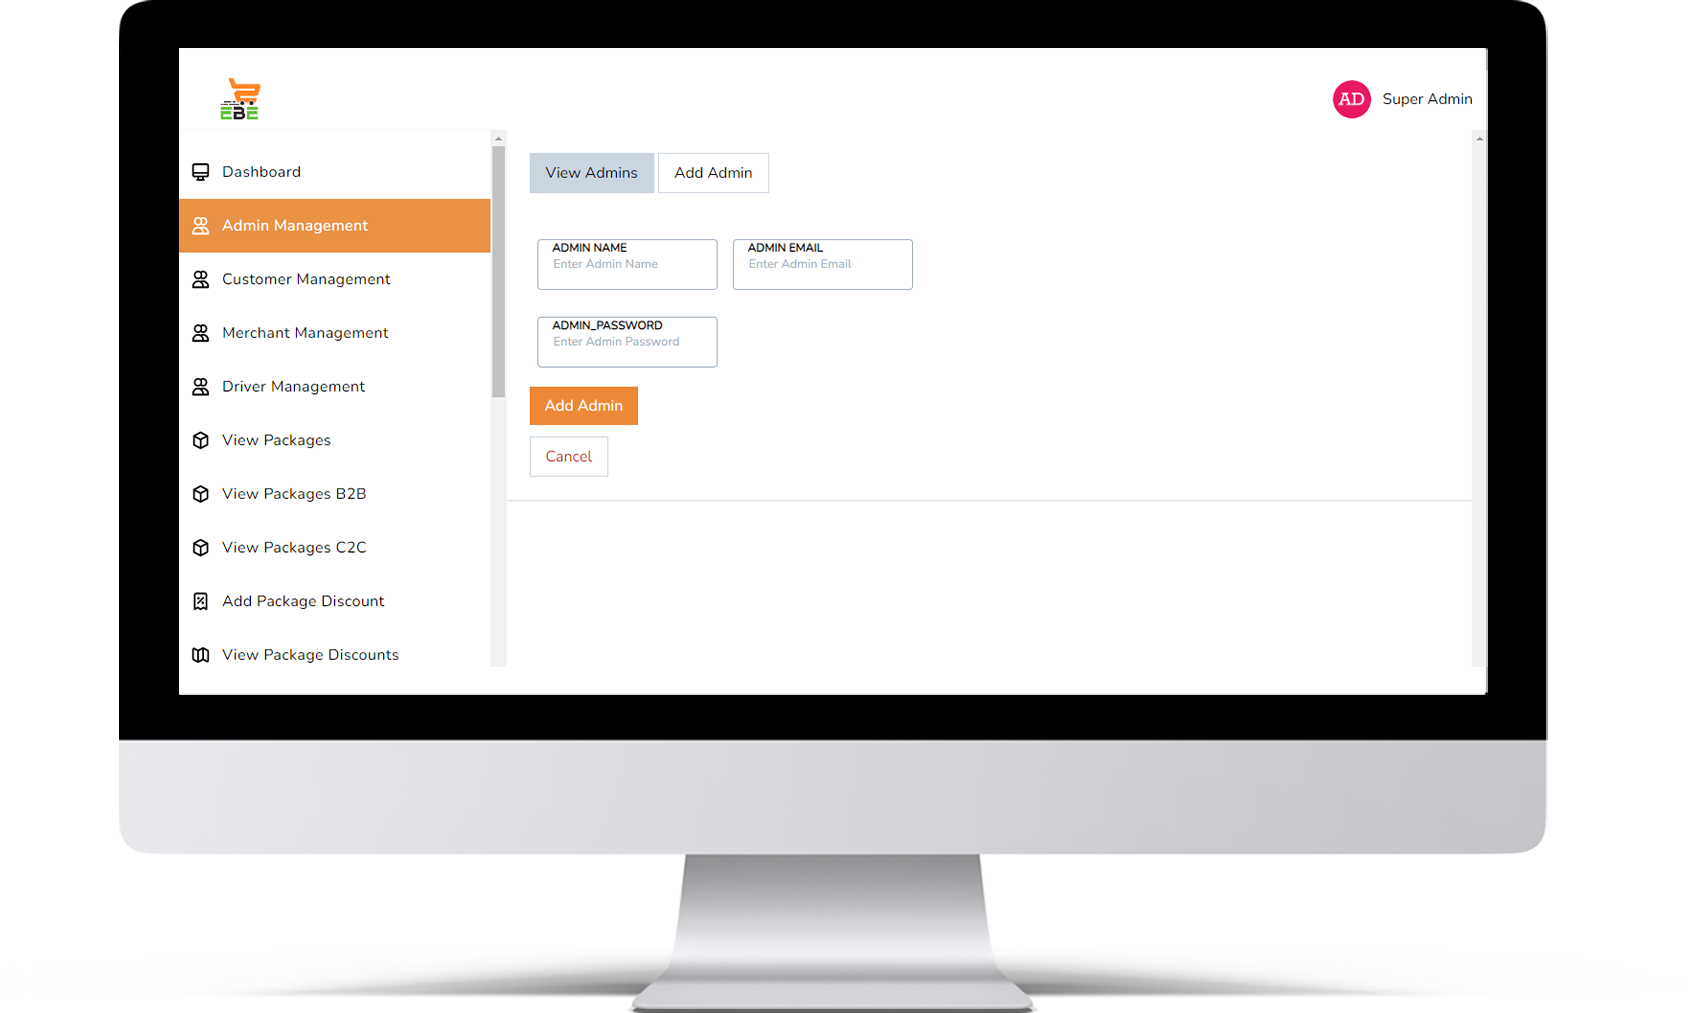
Admin name
Admin email
Admin password
Then click on Add admin button.
dresses, etc.

Admin name
Admin email
Admin password
Then click on Add admin button.
dresses, etc.
Admin name
Admin email
Admin password
Then click on Add admin button.
dresses, etc.

Admin name
Admin email
Admin password
Then click on Add admin button.
dresses, etc.
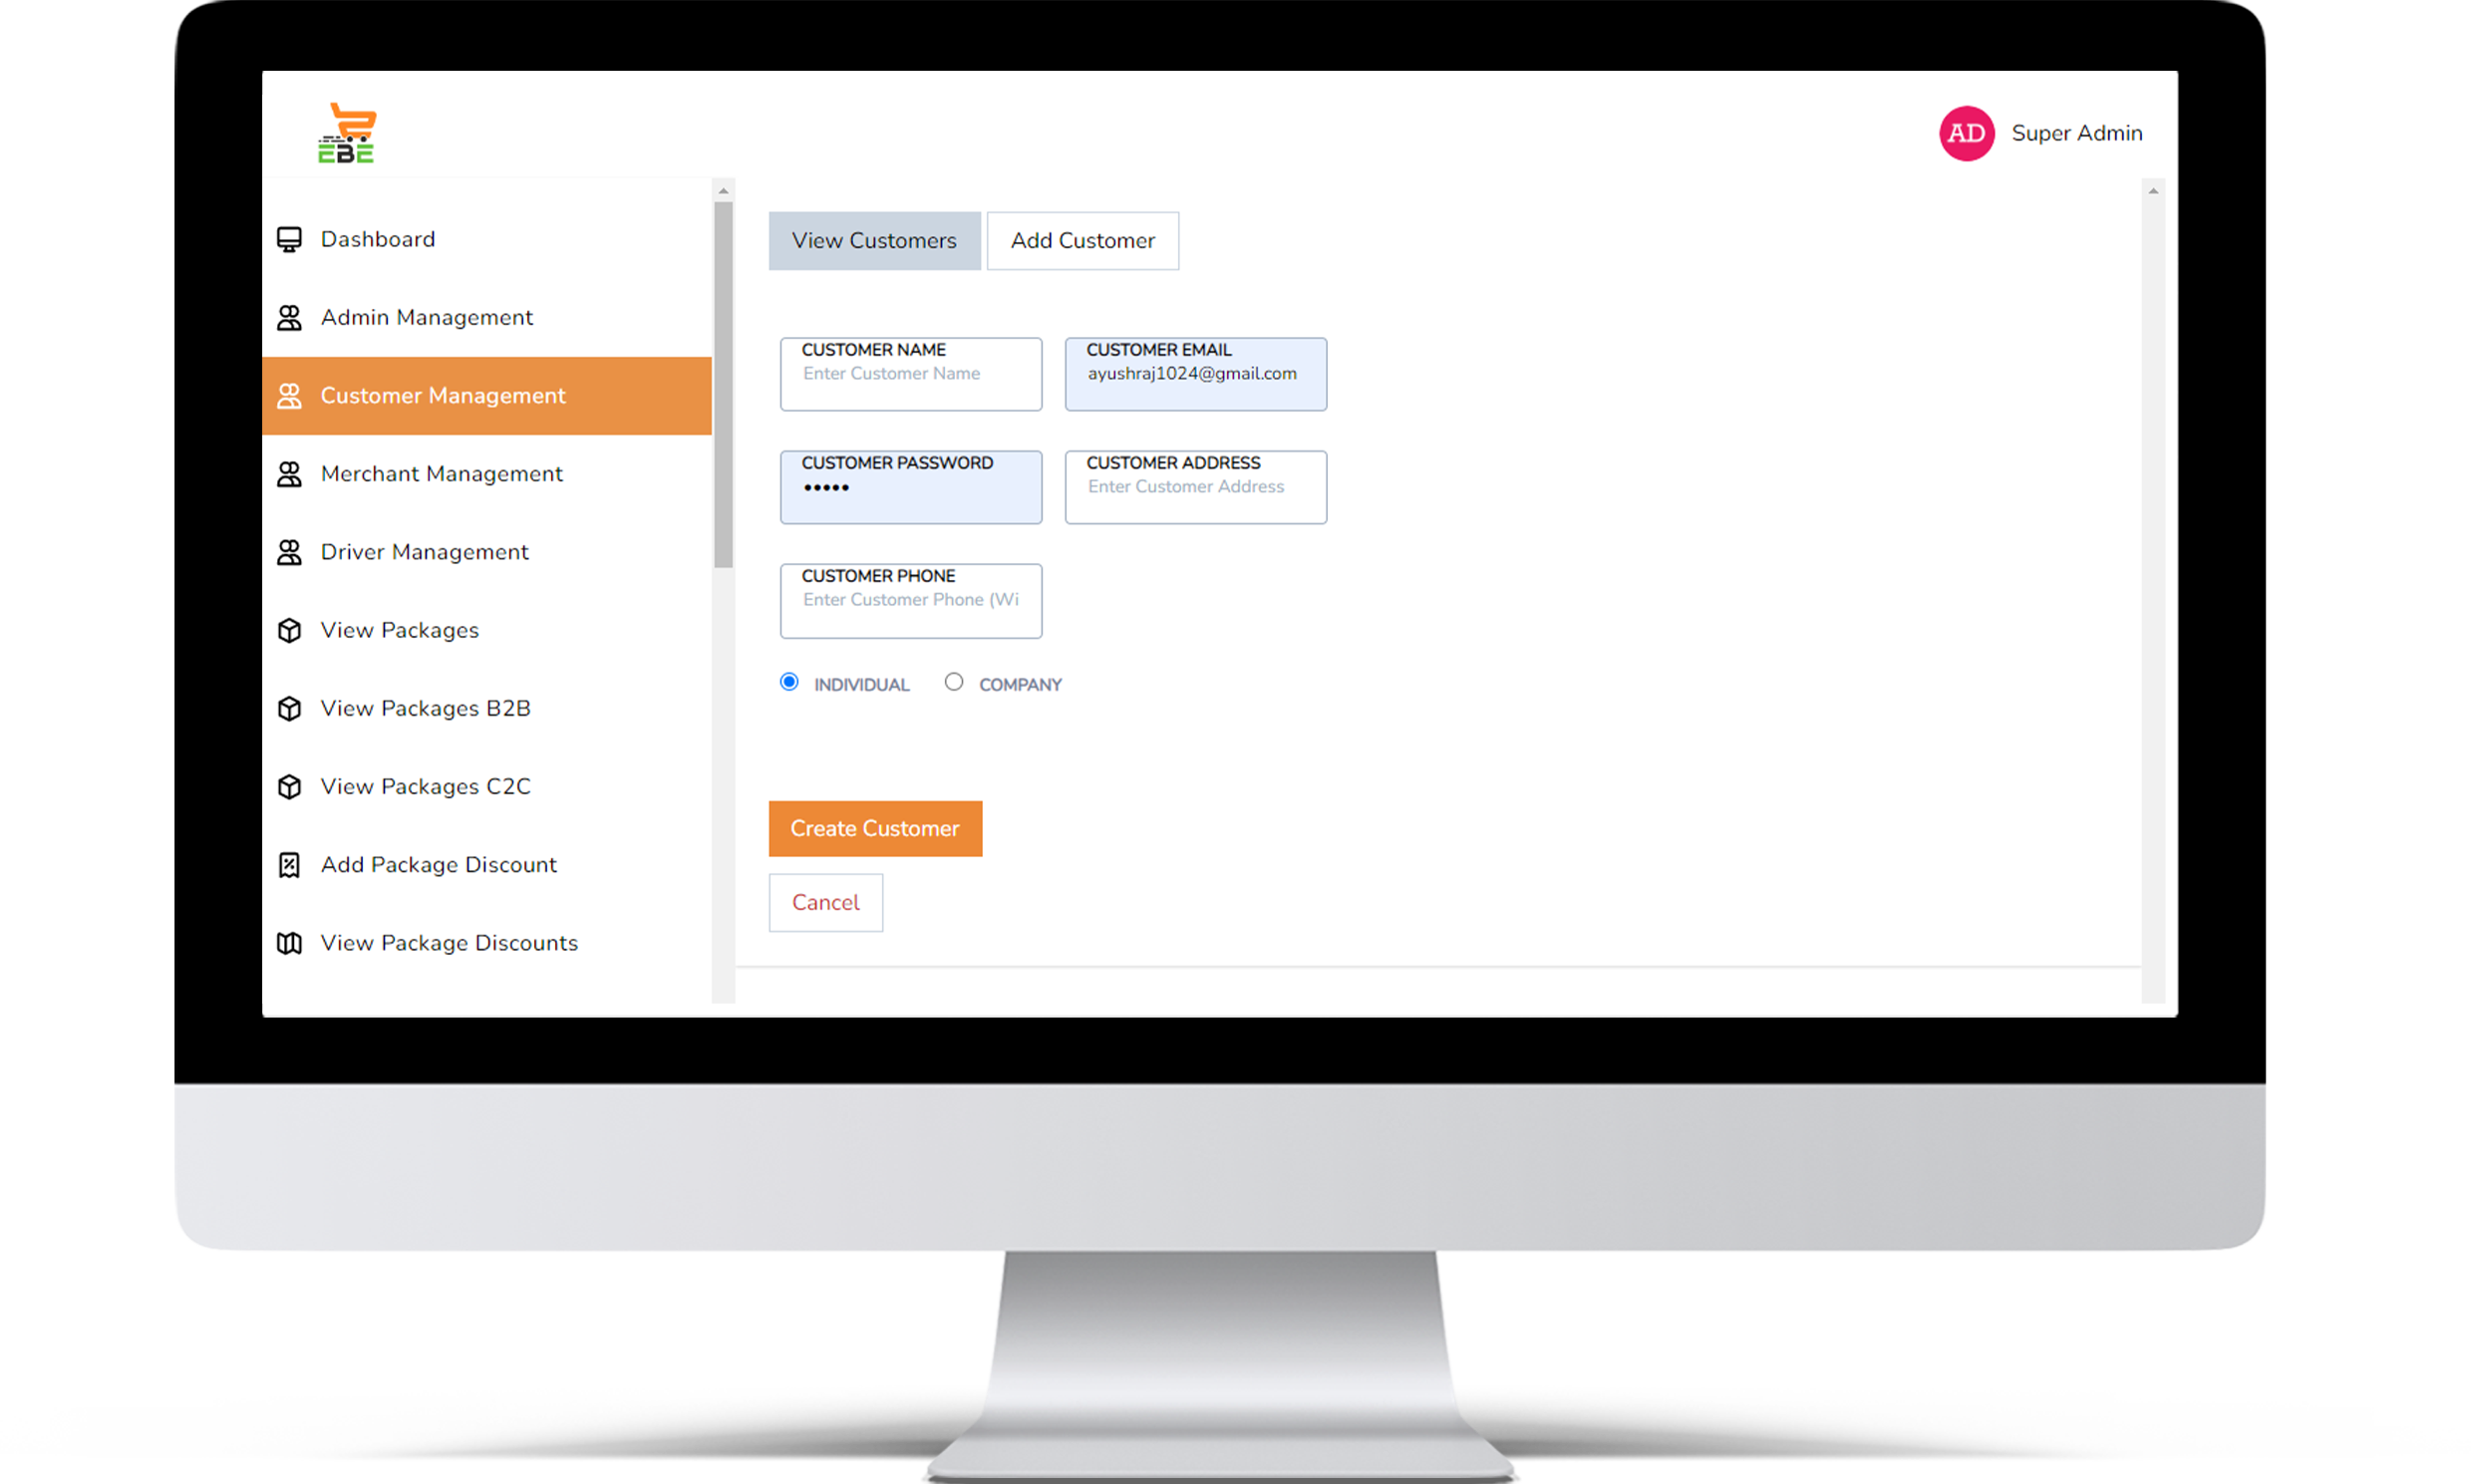
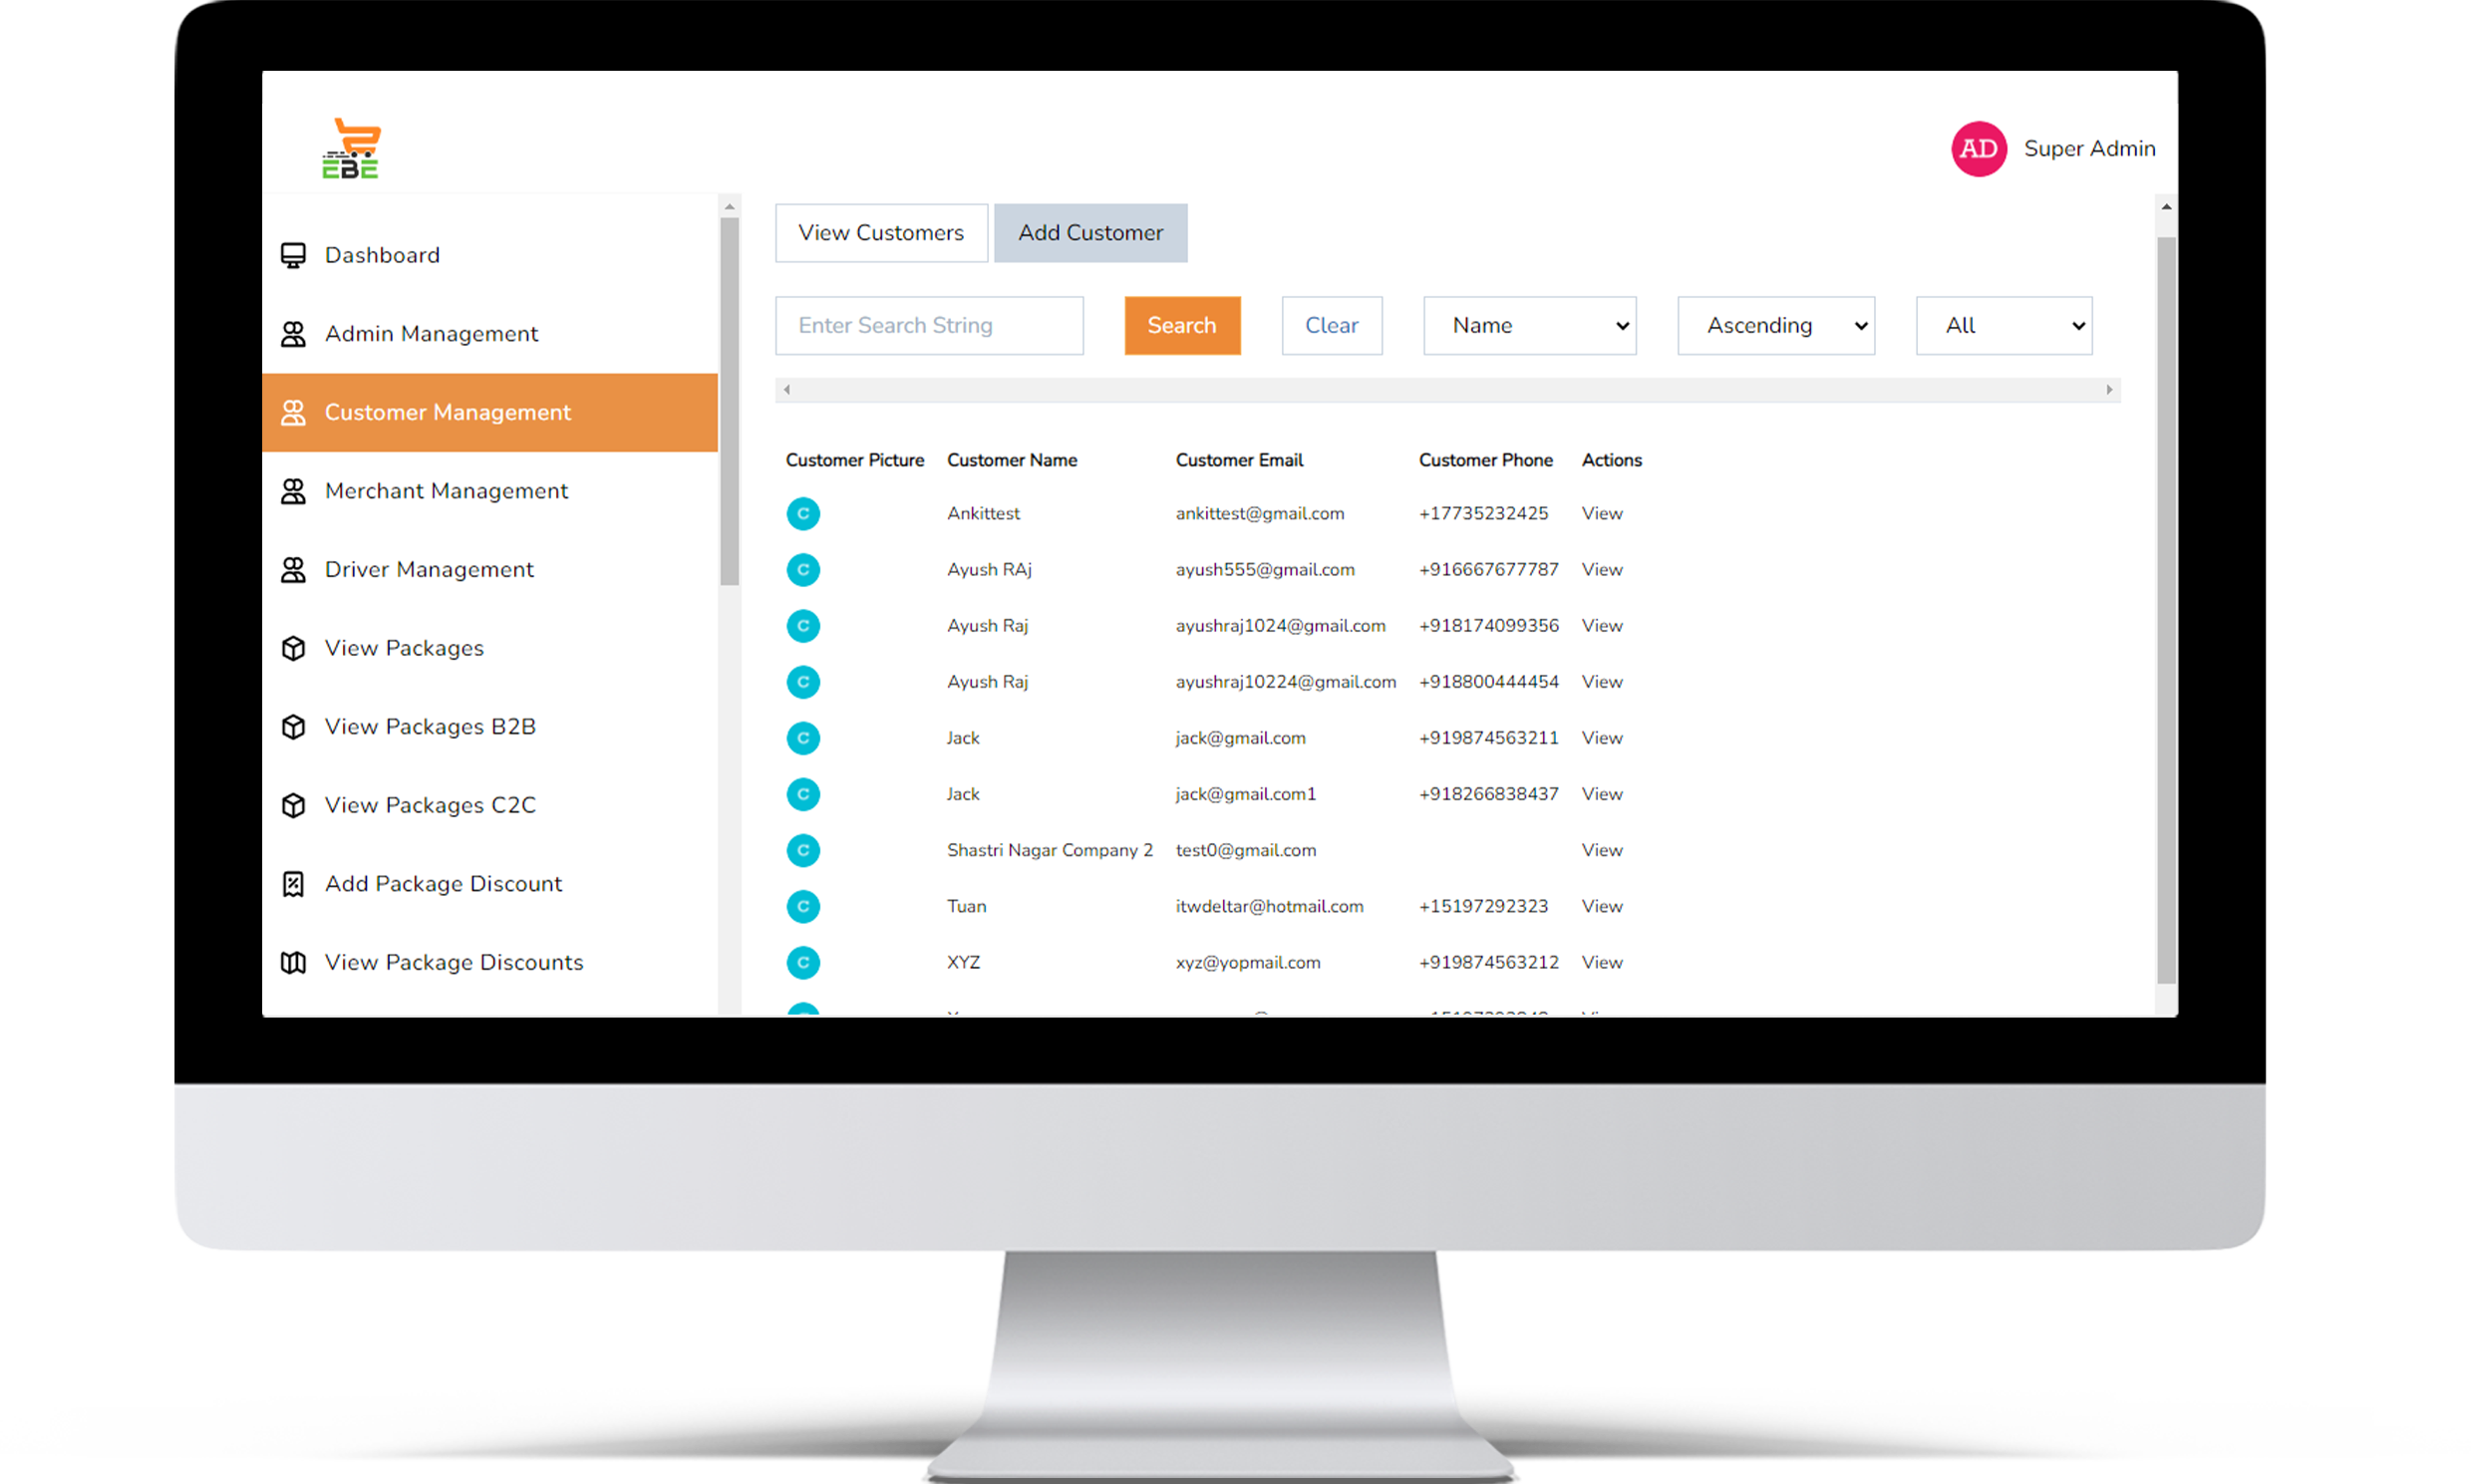
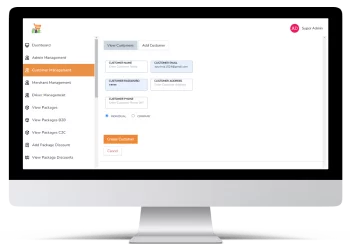
Customer name
Customer email
Customer password
Customer address
Customer phone number
Then click on Create customer button

Customer name
Customer email
Customer password
Customer address
Customer phone number
Then click on Create customer button
details, restaurant information, their service day & time etc. Then click on Create merchant button.


details, restaurant information, their service day & time etc. Then click on Create merchant button.
details, restaurant information, their service day & time etc. Then click on Create merchant button.


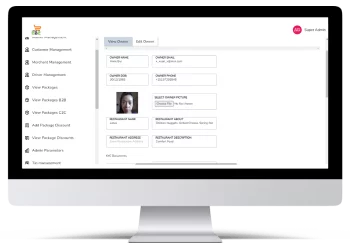
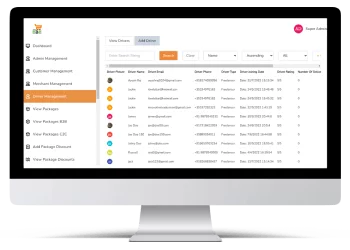
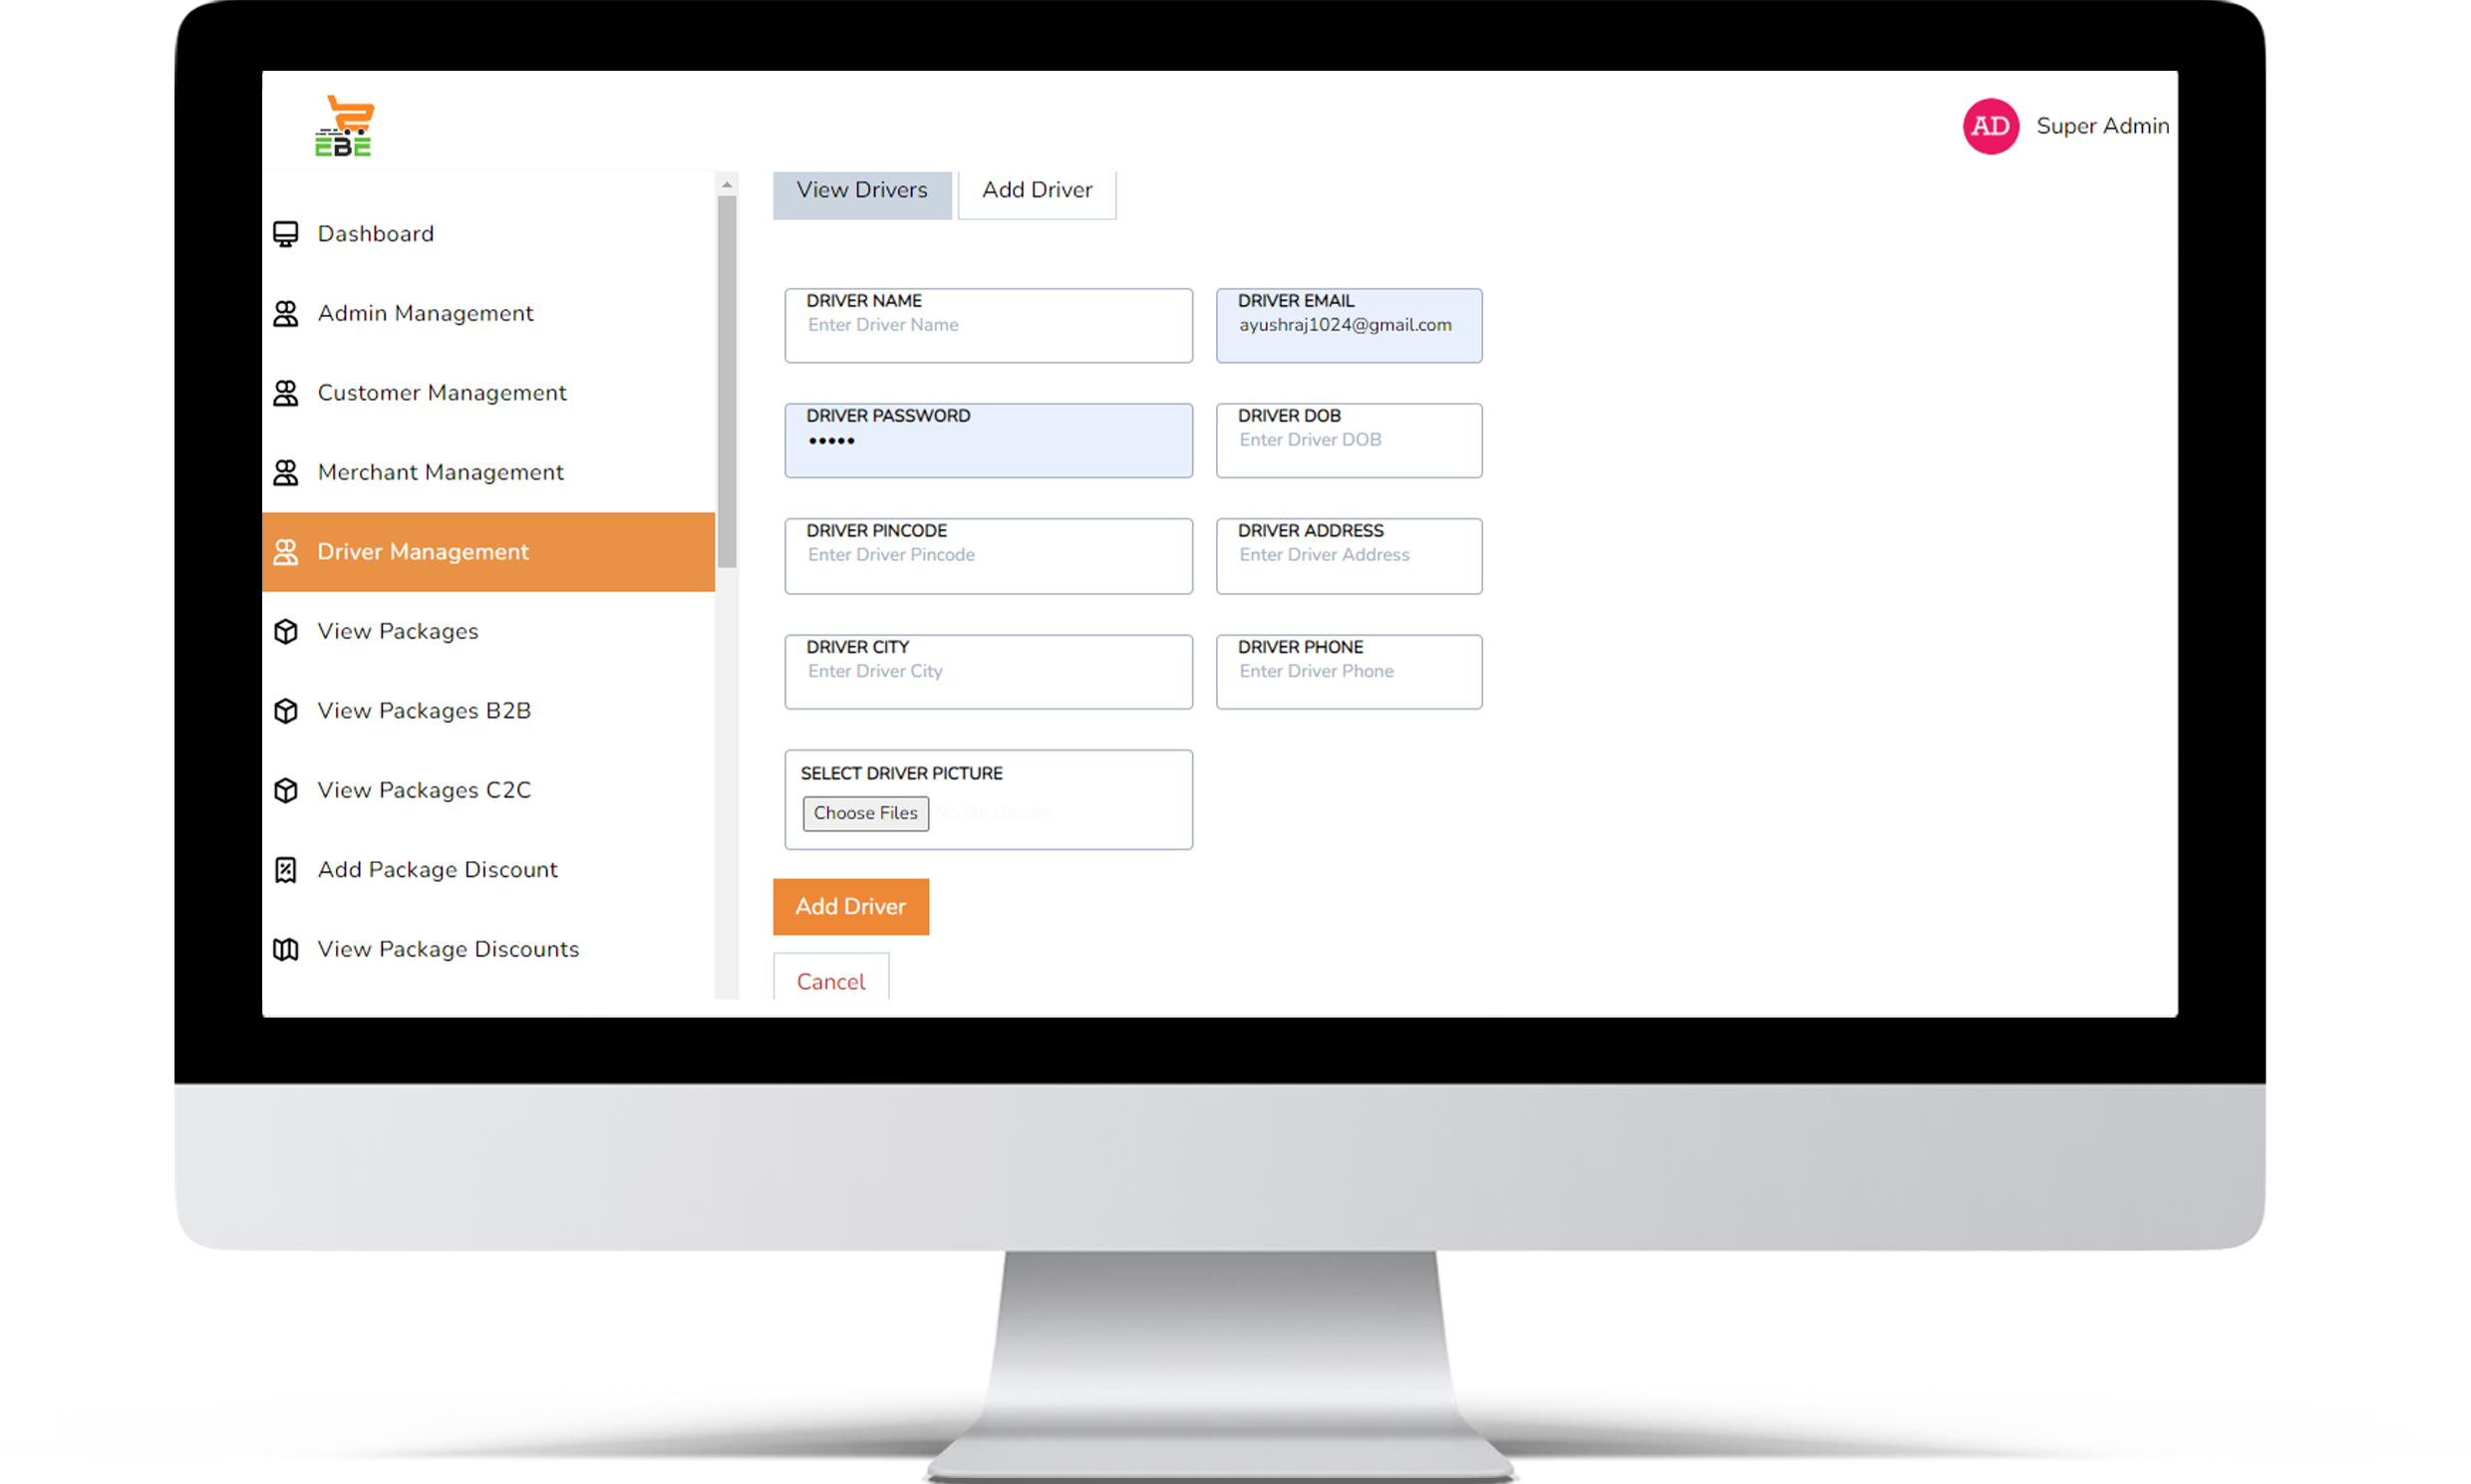
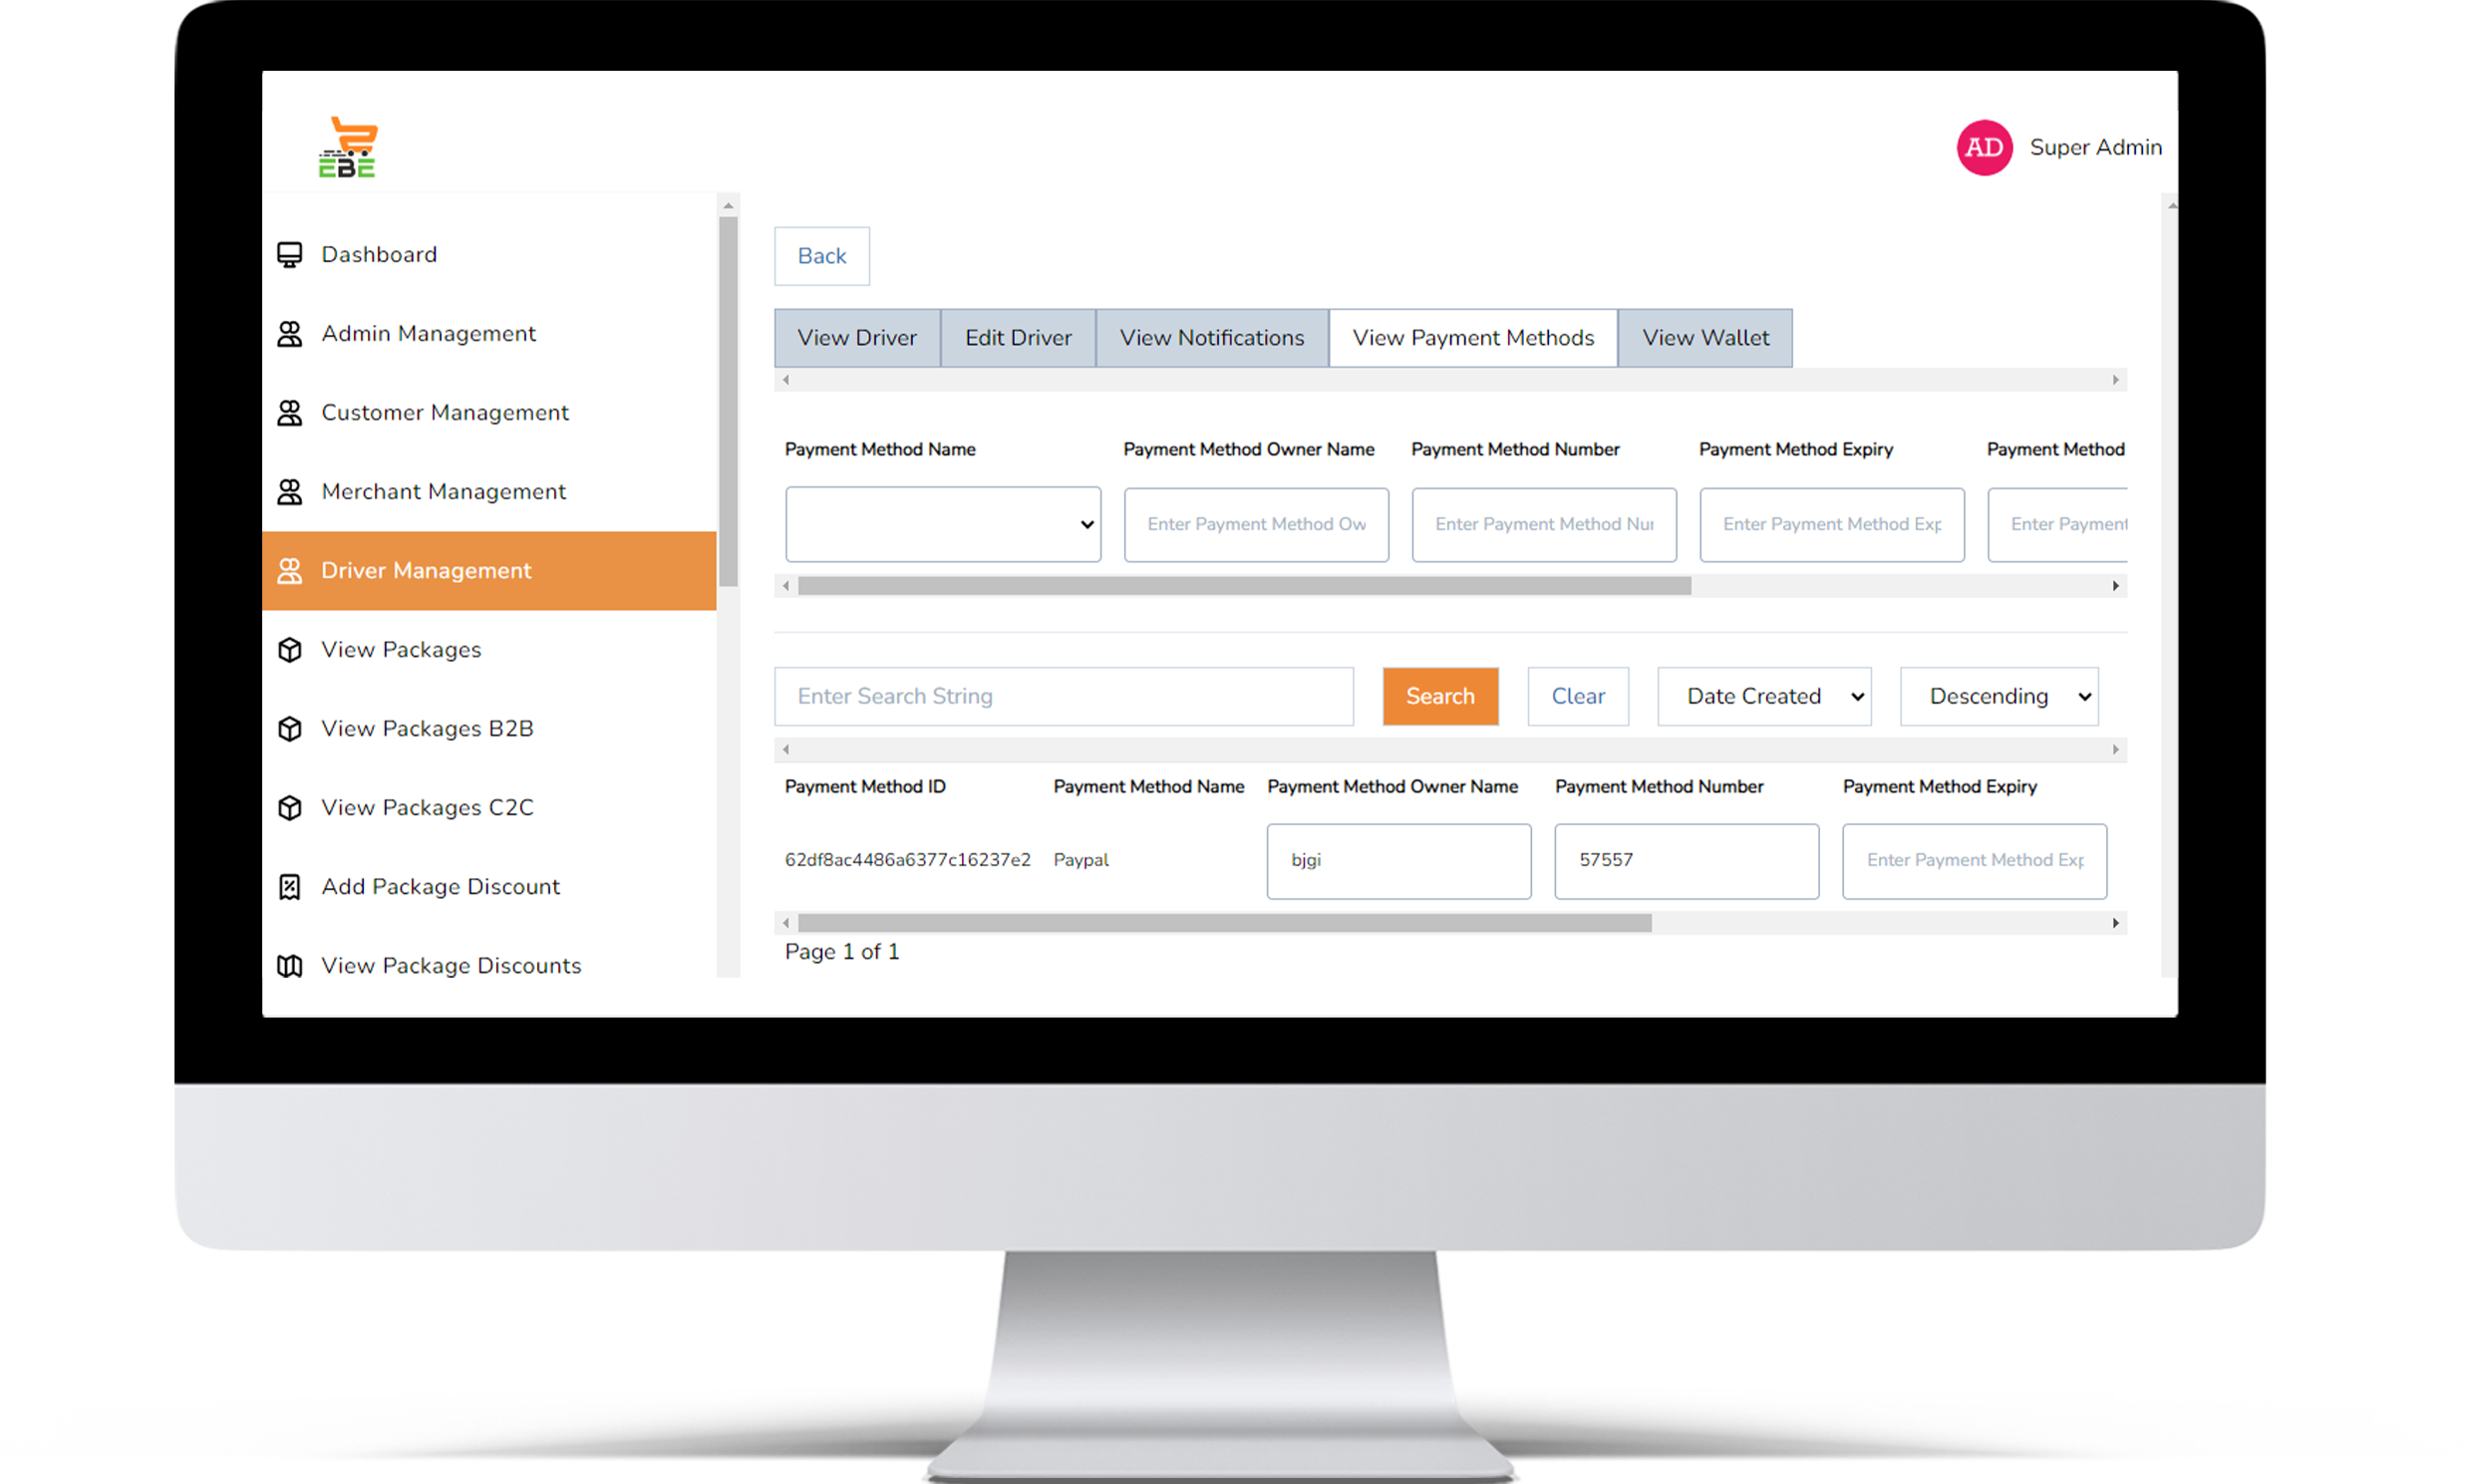
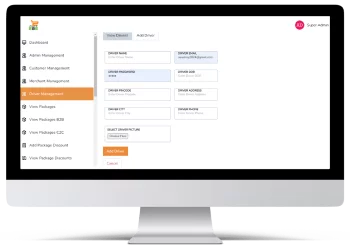
1. Driver name 2. Driver email 3. Driver password 4. Driver DOB 5. Driver pin code
6. Driver address 7. Driver city 8. Driver phone number 9. Upload driver profile picture
Then click on add driver button.
1. Driver name 2. Driver email 3. Driver password 4. Driver DOB 5. Driver pin code
6. Driver address 7. Driver city 8. Driver phone number 9. Upload driver profile picture
Then click on add driver button.
1. Driver name 2. Driver email 3. Driver password 4. Driver DOB 5. Driver pin code
6. Driver address 7. Driver city 8. Driver phone number 9. Upload driver profile picture
Then click on add driver button.
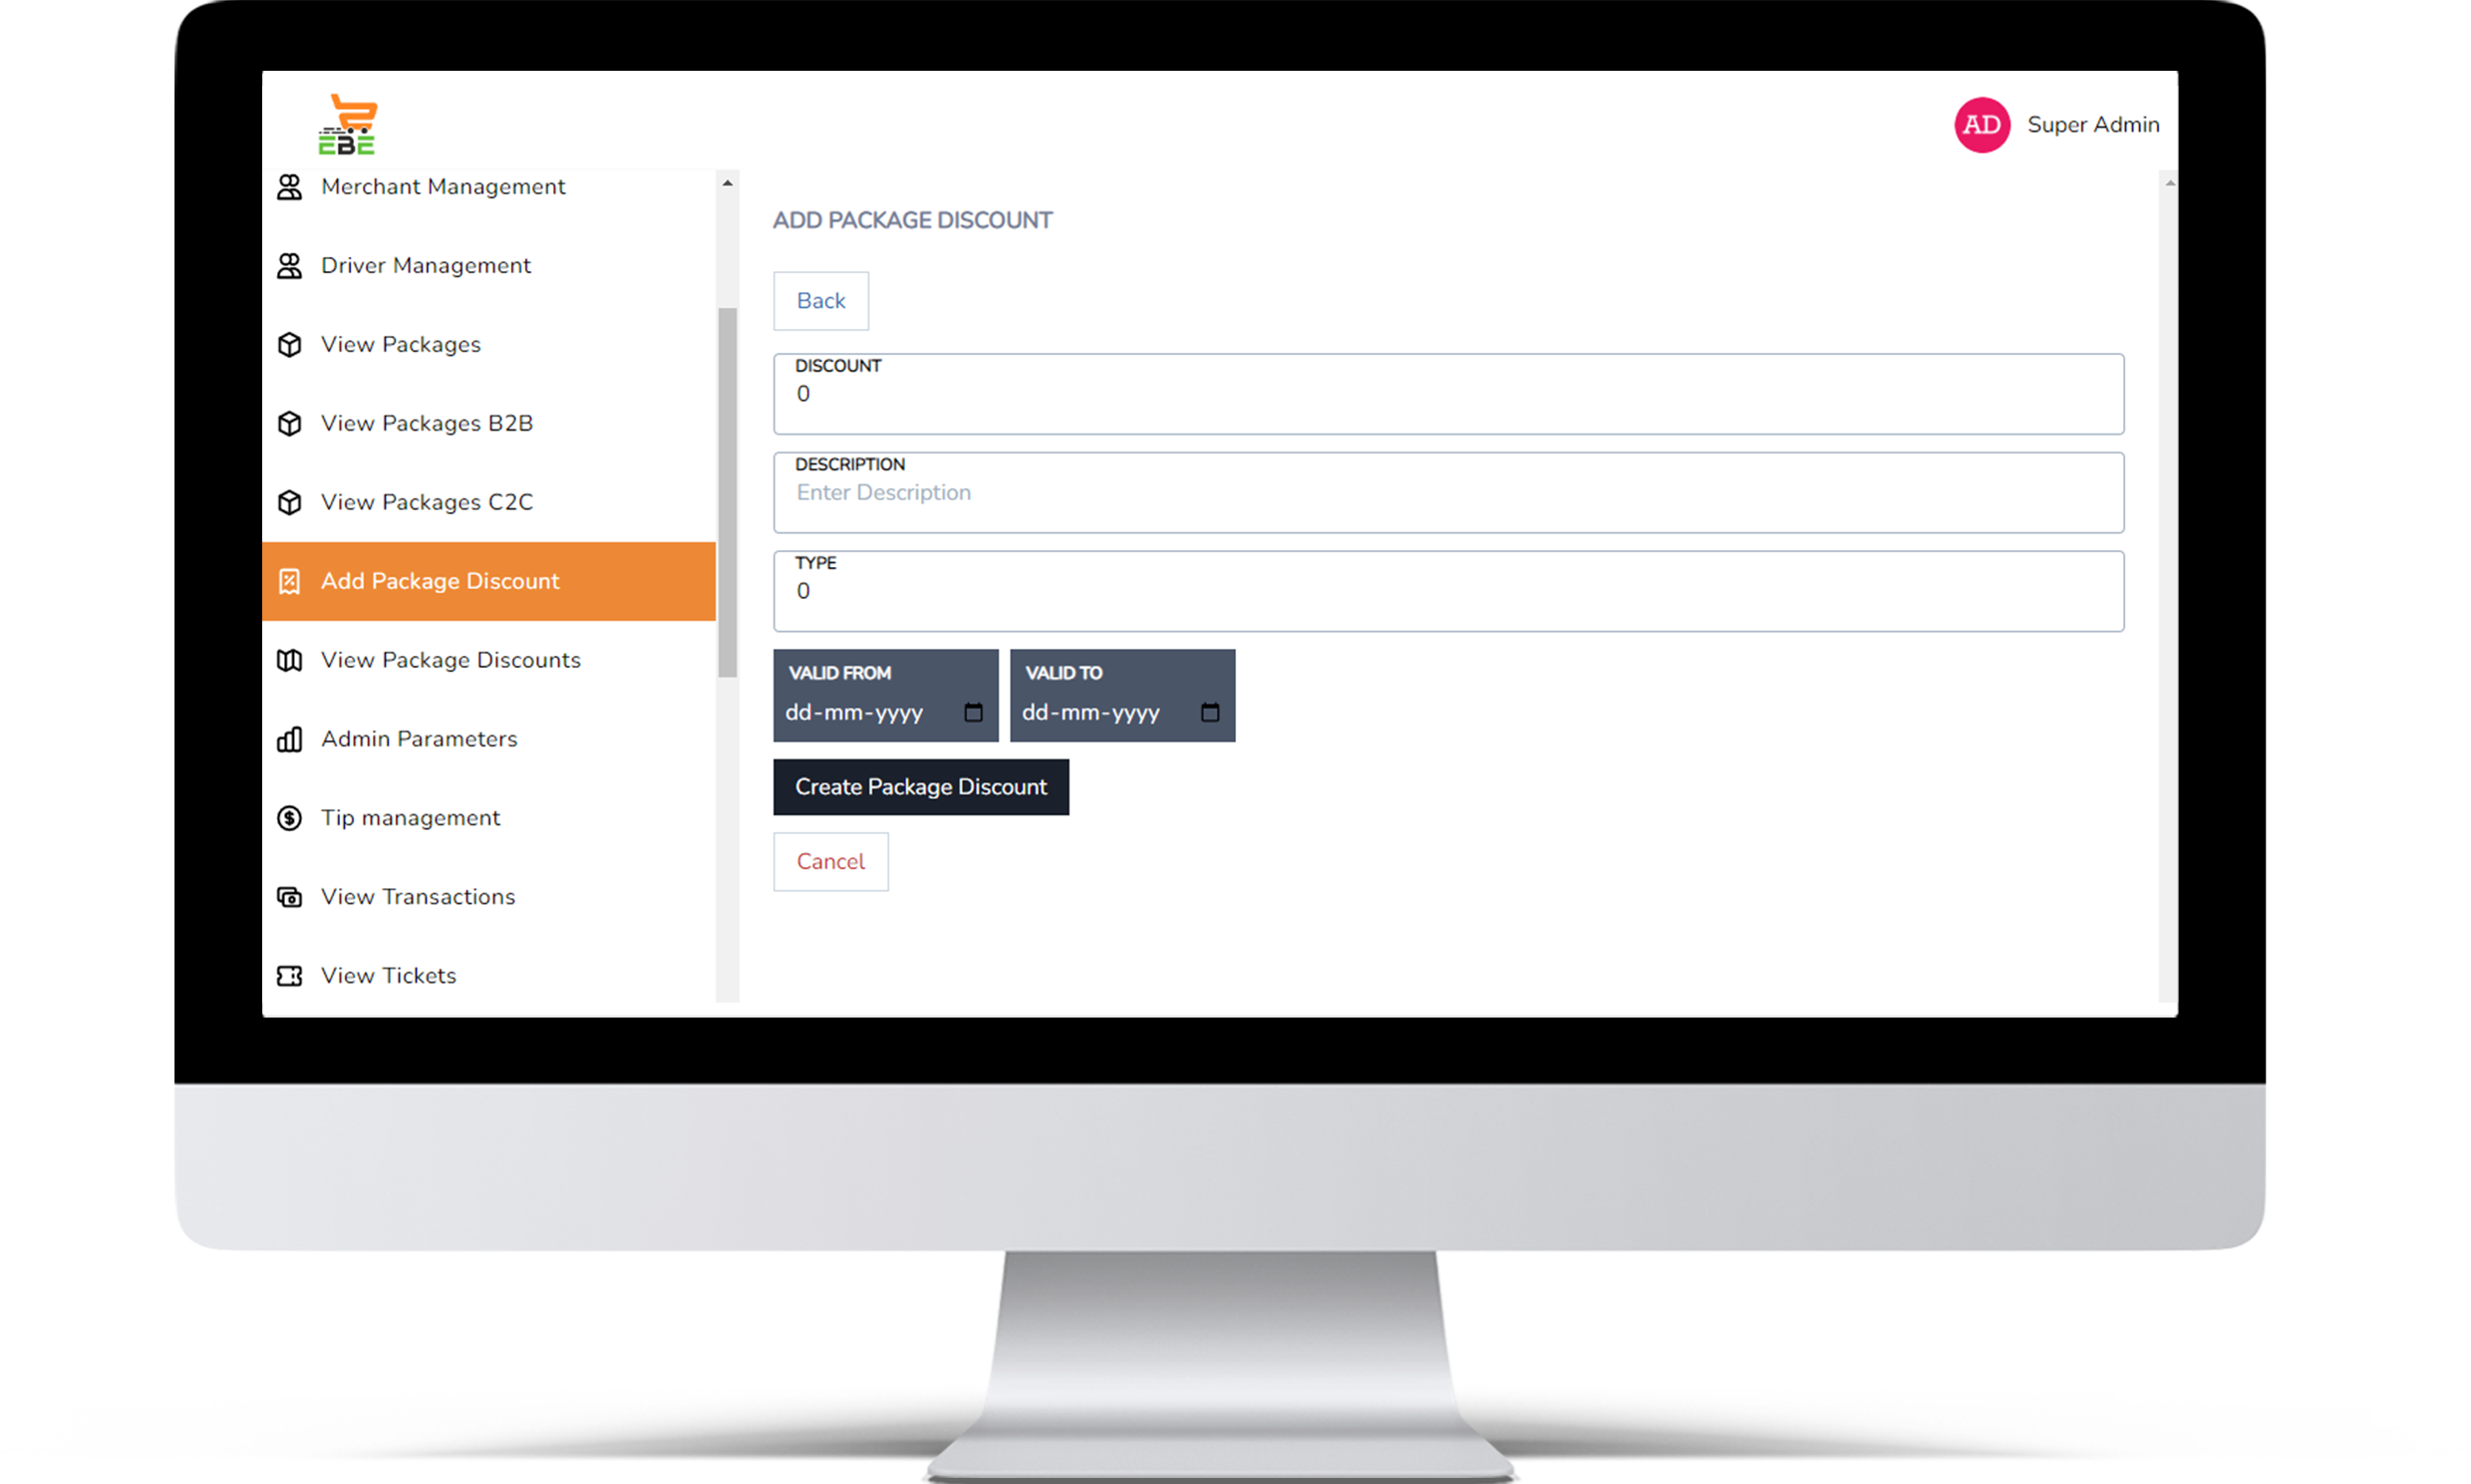

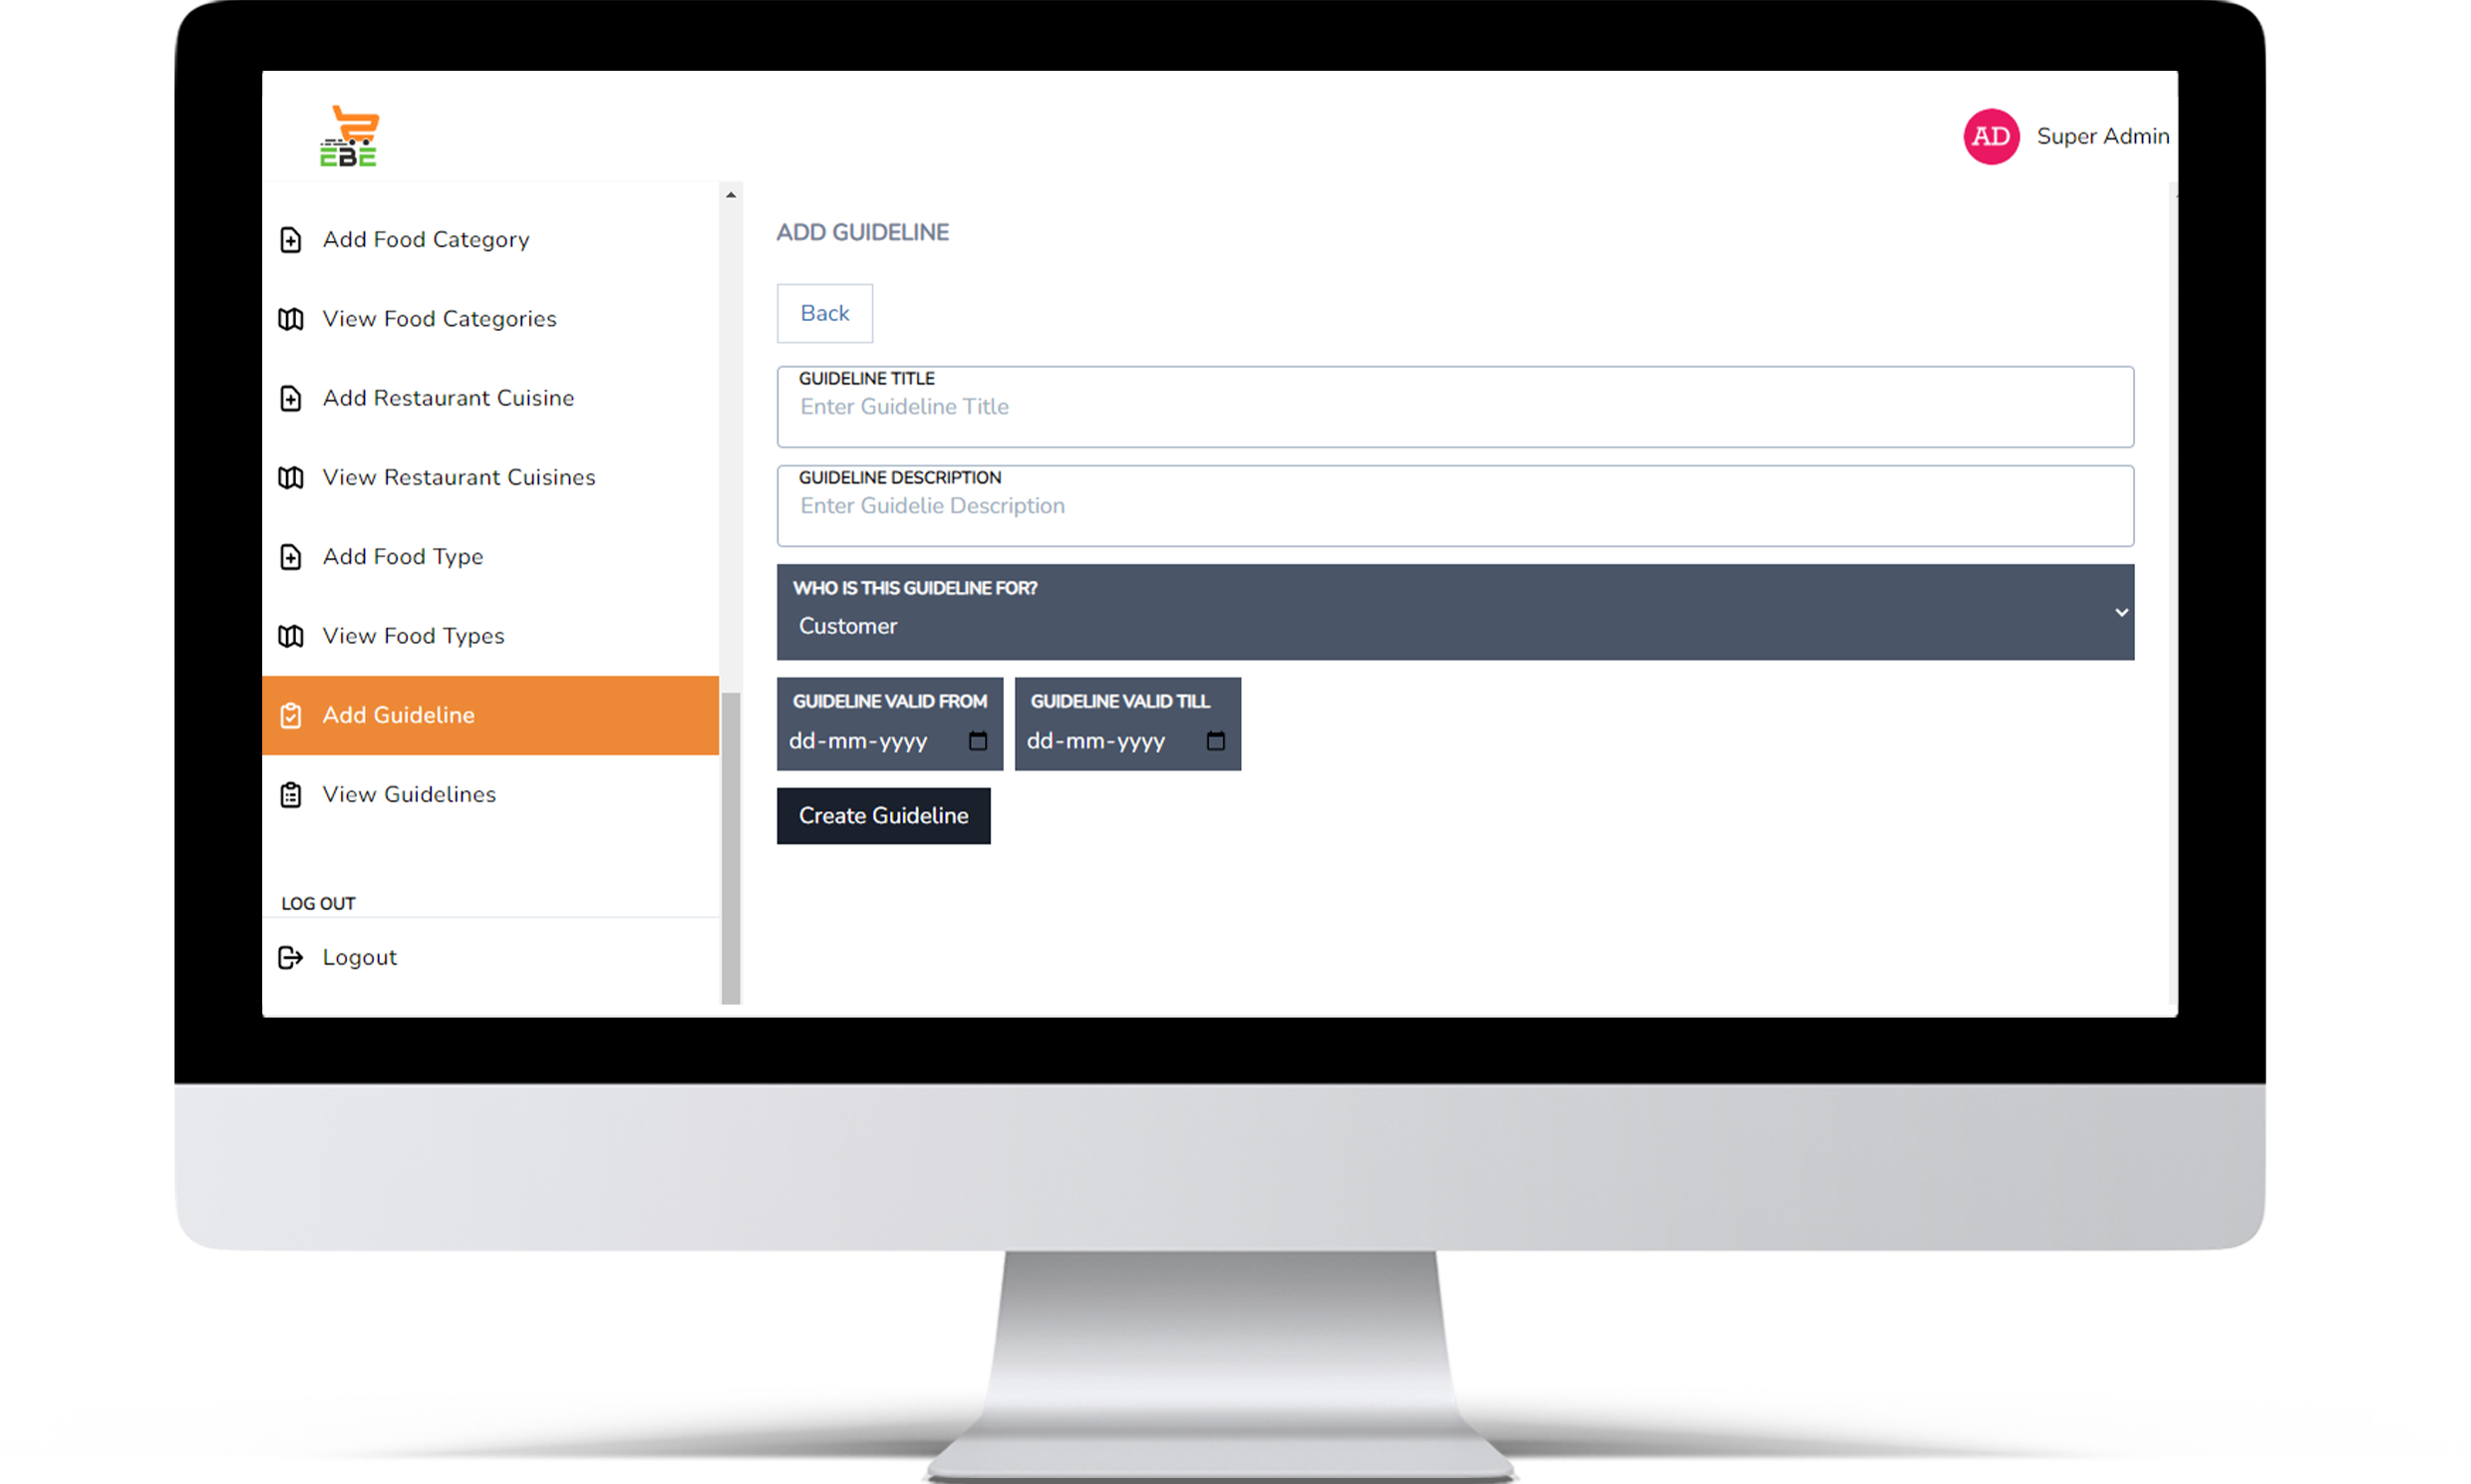
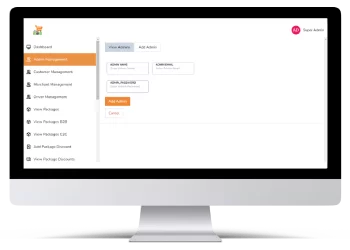
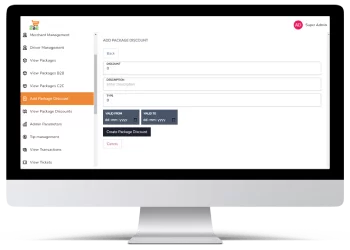
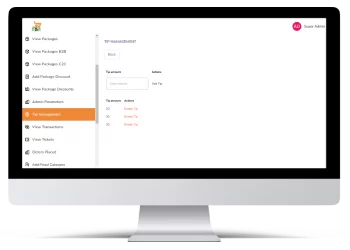
In this menu, the admin can create discounts on the package. He will enter the following details:
- Discount – set amount on the package for discount purposes
- Description – short description regarding the discount pack age
- Type – type of discount
- Valid from – valid to (calendar) – enter the date from which you
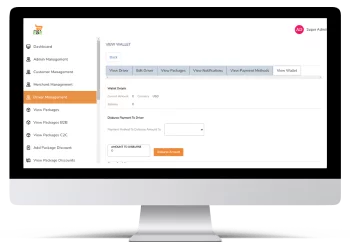
Click on the drop-down menu of the New State & update the status of the transaction to failed, initiated, or successful.
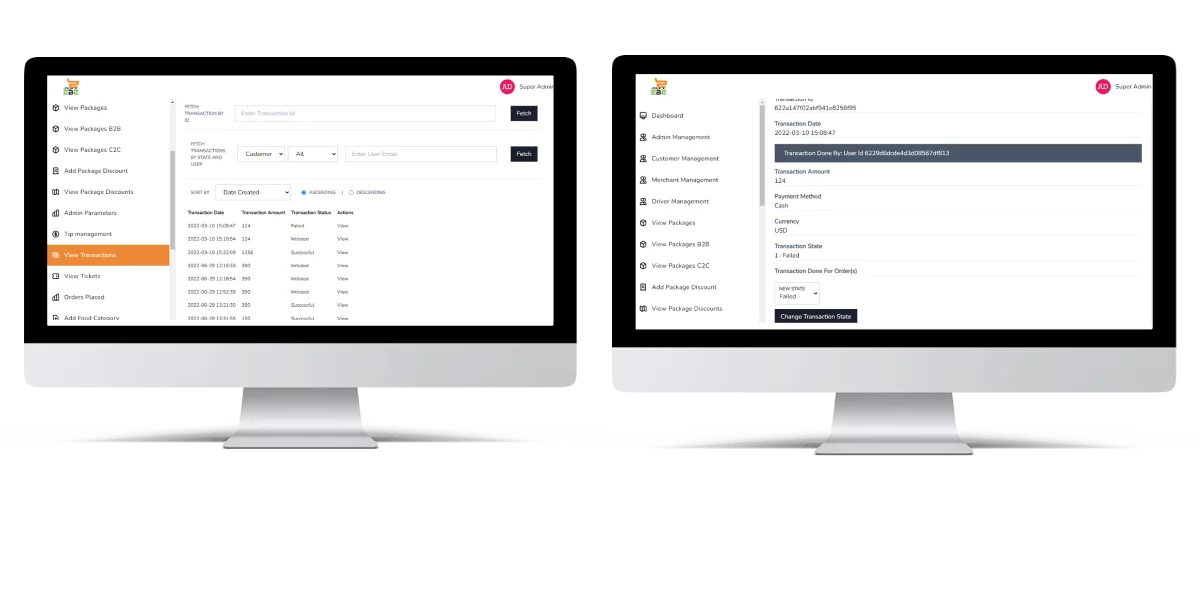


Click on the drop-down menu of the New State & update the status of the transaction to failed, initiated, or successful.
Click on the drop-down menu of the New State & update the status of the transaction to failed, initiated, or successful.
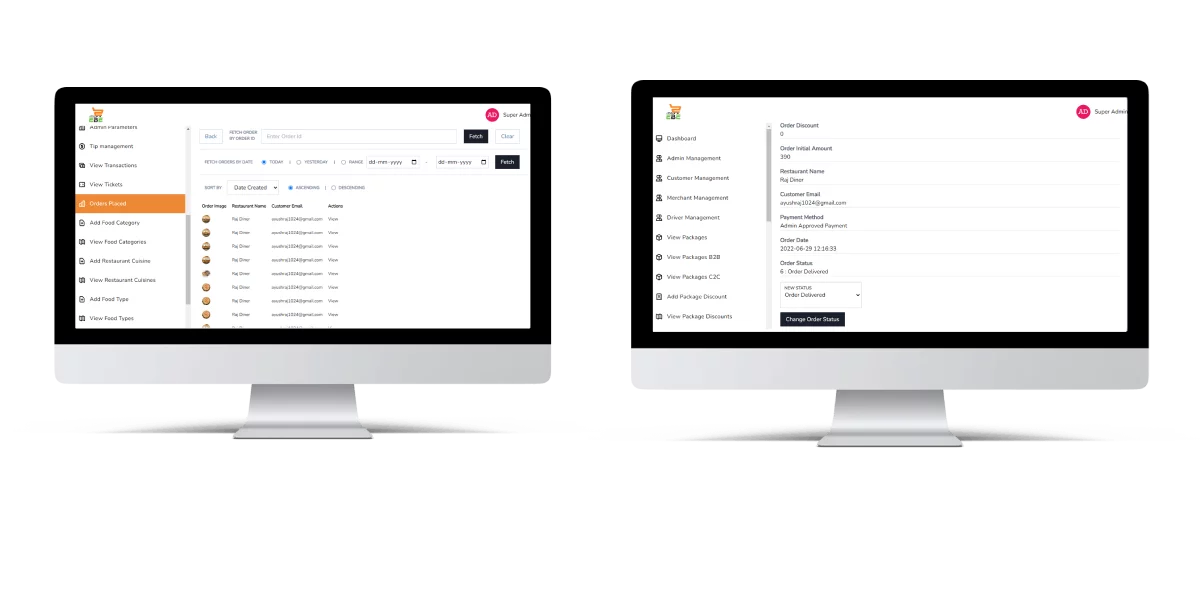

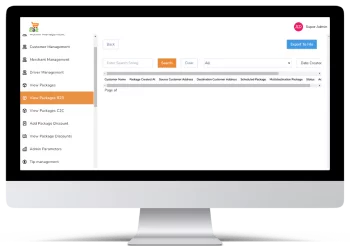
You can view the orders placed by the customers along with the customer details. In case you want to change the status of orders then click on the VIEW button & the below screen will appear. Click on the drop-down menu of the New Status & update the status of orders to delivered, declined, canceled, returned, refund-ed, etc

You can view the orders placed by the customers along with the customer details. In case you want to change the status of orders then click on the VIEW button & the below screen will appear. Click on the drop-down menu of the New Status & update the status of orders to delivered, declined, canceled, returned, refund-ed, etc